iOS inbox
Integration guide to implement an inbox in your iOS app
The inbox channel allows you to persist notifications you send to a user in an inbox in the app. It also allows you to send messages to users who have not opted into push notifications as these messages come into the inbox like a feed when the app is opened. You are also not constrained by the push notification format and can use a richer style in your inbox messages.

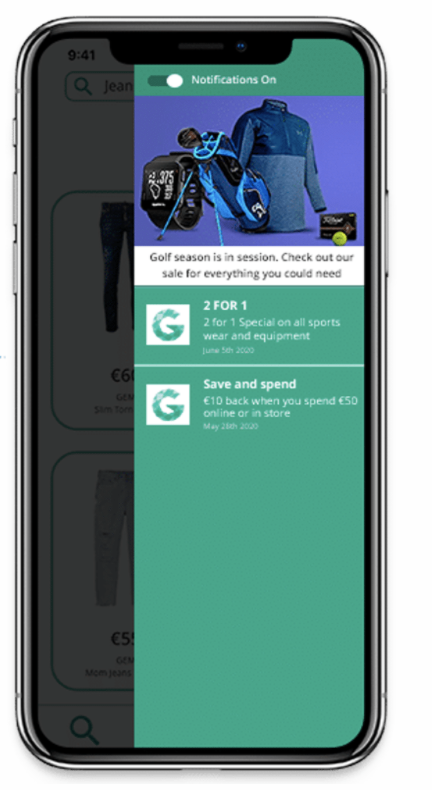
Example of the inbox integrated in an iOS app.
Integration guides for Objective-C and Swift based apps below.
Make sure you have set up the inbox on the platform before you start, this is a prerequisite. Review our inbox quick start guide for more details.
Basic configuration
Enabling the Inbox
In the standard integration described in the iOS integration guide the inbox is switched off. It can be turned on using the setInboxEnabled method. In your iOS App where you have initialised Xtremepush in the app delegate add:
[XPush setInboxEnabled:YES];XPush.setInboxEnabled(true)Before
[XPush applicationDidFinishLaunchingWithOptions:launchOptions];XPush.applicationDidFinishLaunchingWithOptions(launchOptions);As shown below:
- (BOOL)application:(UIApplication *)application didFinishLaunchingWithOptions:(NSDictionary *)launchOptions {
// ...
[XPush setInboxEnabled:YES];
// ...
[XPush applicationDidFinishLaunchingWithOptions:launchOptions]; return YES; }
func application(application: UIApplication, didFinishLaunchingWithOptions launchOptions: [NSObject: AnyObject]?) -> Bool {
// Override point for customization after application launch.
//Start - Initialise XPush
//...
XPush.setInboxEnabled(true)
XPush.registerForRemoteNotificationTypes(NotificationSettings.getNotificationSettings())
XPush.applicationDidFinishLaunchingWithOptions(launchOptions)
//End - Initialise XPushYou will also need to add a UI element (a button) to launch the inbox. When tapped this button will open the inbox. You may for example use a notification icon like a bell on your menu bar.

Wherever you are handling your interactions with this button you can open the inbox with the following method:
[XPush openInbox];XPush.openInbox();Add badging
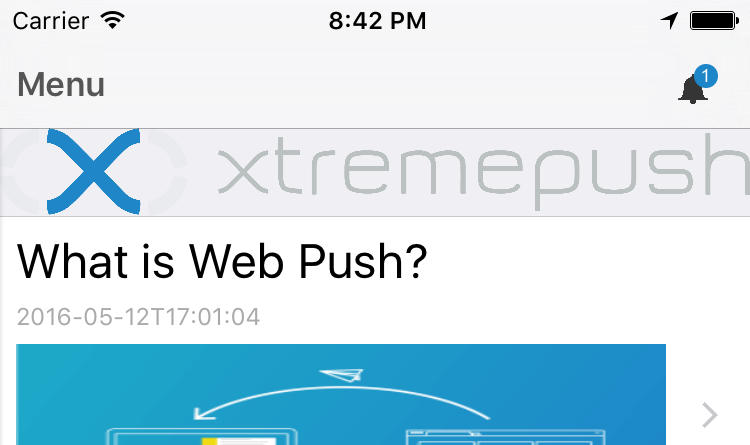
If you want your icon to display a badge when a user has new messages in the inbox since the last time it was opened see below, there is an Xtremepush button type that can be used for this XPInboxButton.

Objective-C
To implement badging simply make the button you use for notification an XPInboxButton,for example:
Create your button element:
XPInboxButton *button = [[XPInboxButton alloc] init];Configure the button. XPInboxButton inherits from UIButton, so you can deal with it just like with UIButton.
So can set the size and the image:
[button setFrame:CGRectMake(0, 0, 24, 24)];
[button setImage:someImage forState:UIControlStateNormal];
XPInboxButton has a few helpers to quickly change badge color:
// set badge background color default is red
- (void)setBadgeColor:(UIColor *)color;

// set color of the text used for number on badge default is white
- (void)setBadgeTextColor:(UIColor *)color;
You can make the badge blue for example:
[button setBadgeColor: [UIColor redColor]];You can also access badge element itself which is just a UILabel object:
[button.badge setAnyUILabelAttribute:...]When ready add the button to a view. For example as a navigation bar item:
UIBarButtonItem *barButton = [[UIBarButtonItem alloc] initWithBarButtonSystemItem:UIBarButtonSystemItemCompose target:nil action:nil];
>barButton.customView = button;
self.navigationItem.leftBarButtonItem = barButton;
Or in any other way, such as:
[someView addSubview: button];Swift
To implement badging simply make the button you use for notification an XPInboxButton,for example:
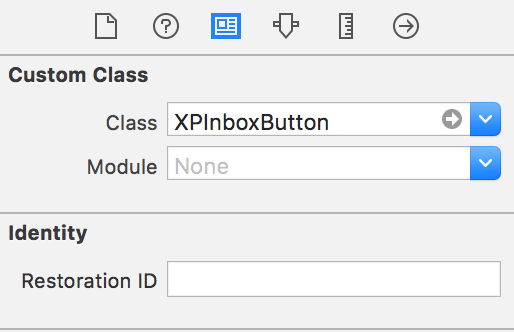
Create your button element, for example if you use a storyboard you may set the custom class to be XPInboxButton:

And when added to your code it will look like:
@IBOutlet weak var InboxButton: XPInboxButton!Configure the button to your required look, XPInboxButton inherits from UIButton, so you can deal with it just like with a UIButton to set the size, image etc.
XPInboxButton also has a few helpers to quickly change badge color:
// set badge background color default is red
// setting custom blue here:
InboxButton.setBadgeColor(UIColor.init(red: 0.114, green: 0.525, blue: 0.784, alpha: 1))

// set color of the text used for number on badge default is white
// setting dark grey here
InboxButton.setBadgeTextColor(UIColor.darkGrayColor())
You can also access badge element itself which is just a UILabel object and you can for example move the badge so it fits better with your image
//For example move badge to be inset by 5px from top right of image
InboxButton.imageEdgeInsets = UIEdgeInsetsMake(5, 0, 0, 5)
Updated 3 months ago