Optimove campaigns
Create and send campaigns in Xtremepush using an Optimove integration
To create an Optimove campaign via Xtremepush you need first to create a campaign on the Xtremepush dashboard and then use this campaign as a template on the Optimove dashboard.
Make sure your Optimove integration is configured.
Create an Optimove campaign in Xtremepush
Navigate to Campaigns > Create Campaign and click on Optimove > Create campaign.
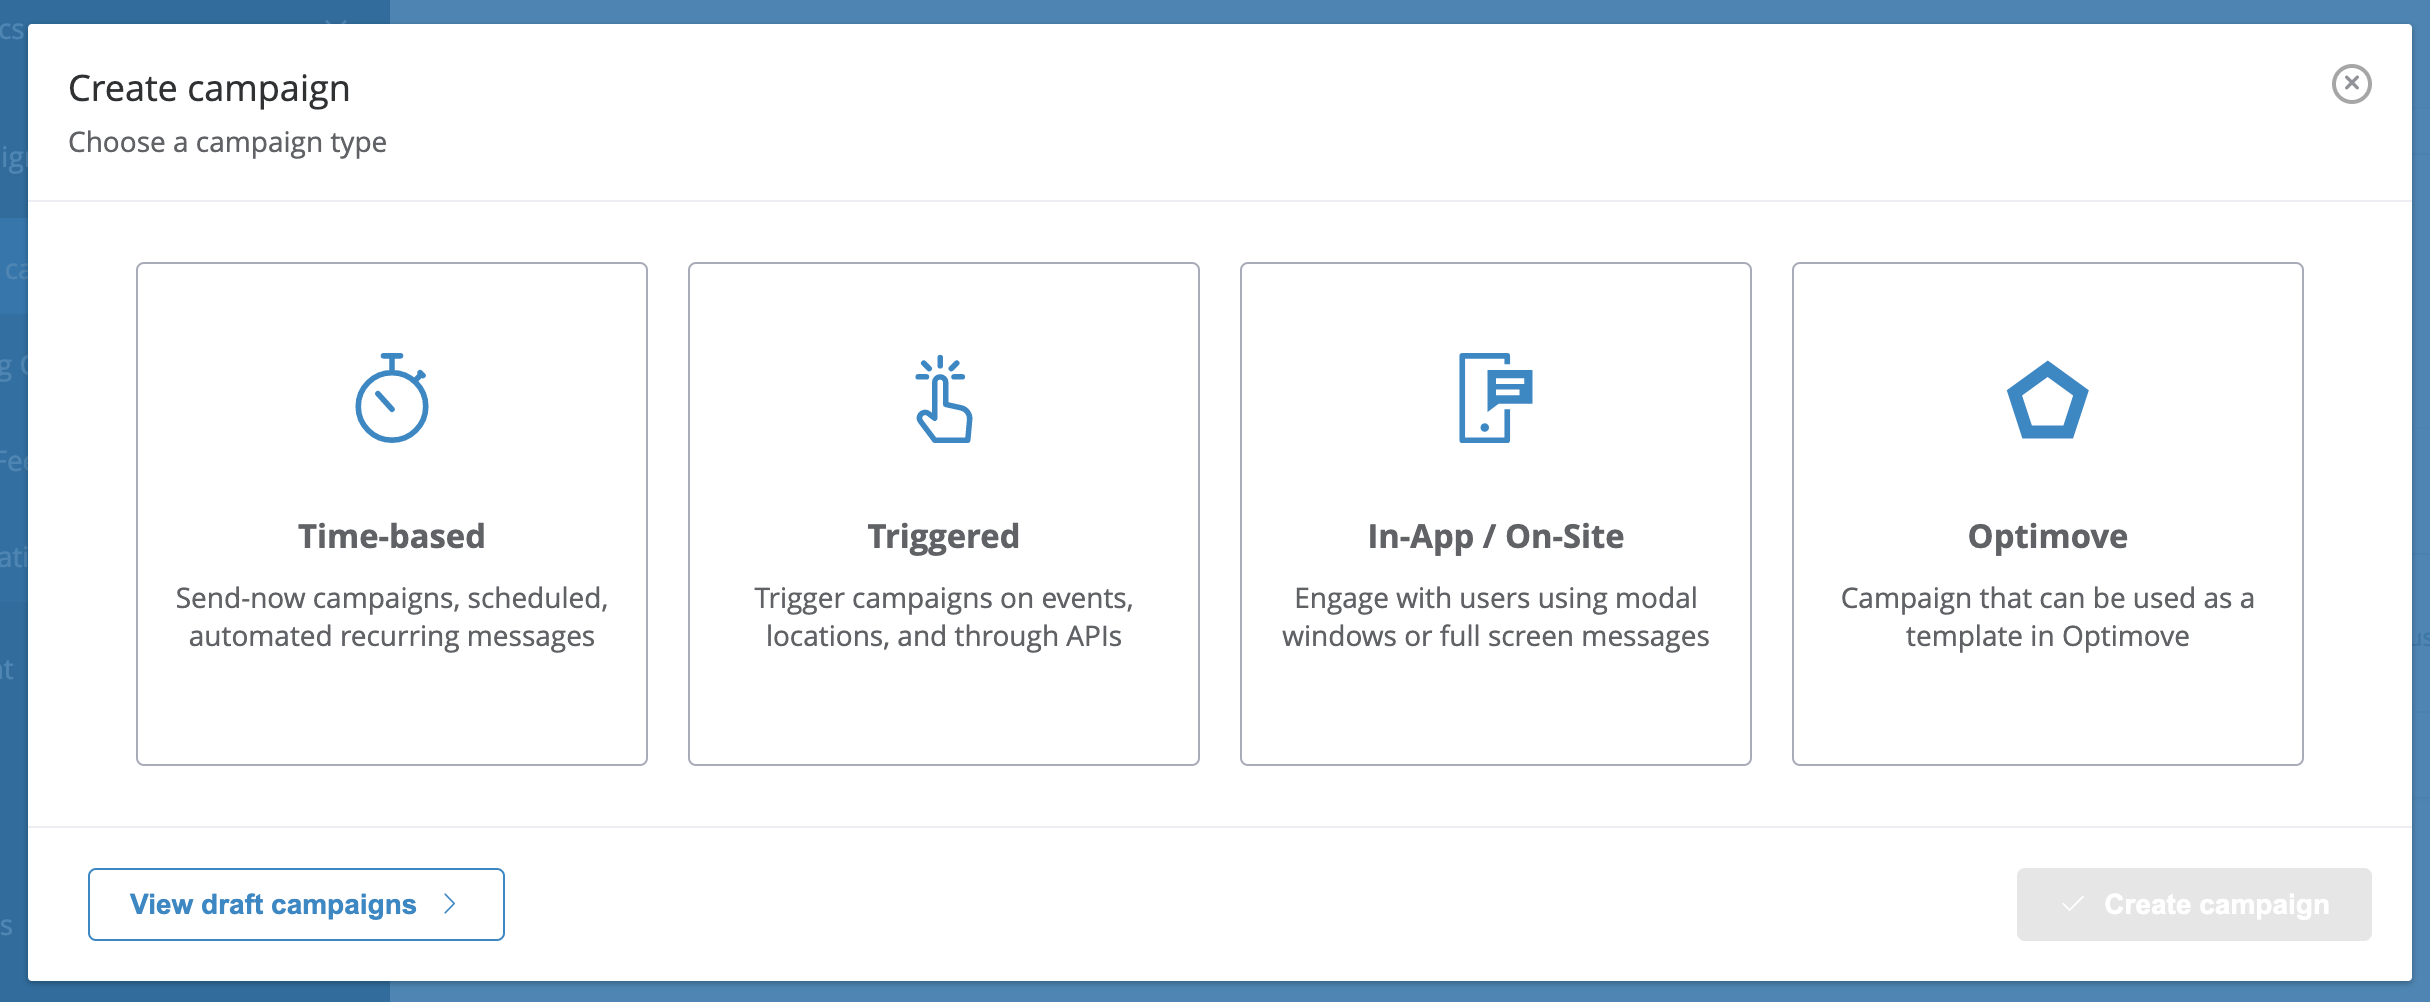
Enter a campaign name and choose engagement channels in the Setup tab. You can also enable split testing, multi-language support and set a campaign goal to track conversions.
Enter message content for every engagement channel to be used in your campaign. If you have Optimove attributes (known in Optimove as Legal Attributes) configured, they will be available for use in the content. Use the Xtremepush Personalisation and dynamic programmable content capability as normal and if Optimove attributes are available, they will appear in the list of available attributes by clicking on the Optimove button and can be added with the format {{ optimove.ATTRIBUTE_NAME }} as shown below. Insert them into your content as needed.
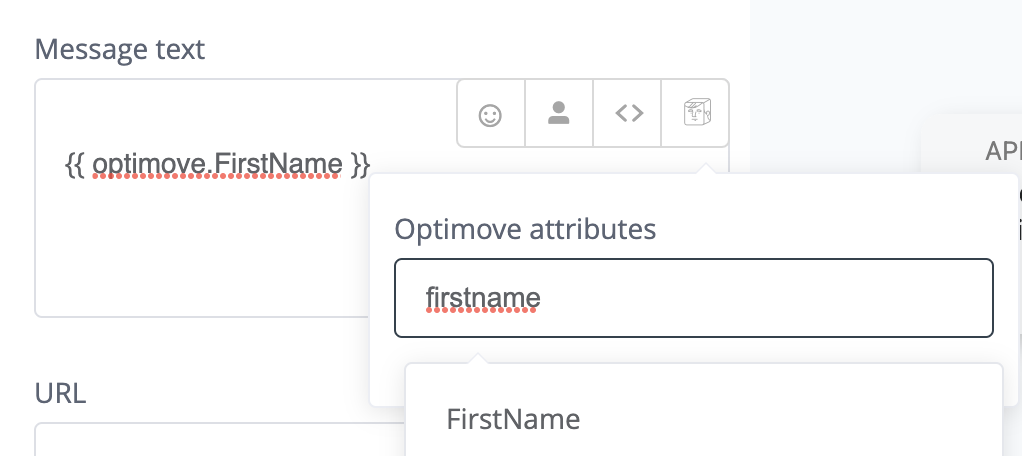
Optimove attributesThese need to be enabled beforehand. Get in touch with your Account Manager to get this configured.
Add additional segmentation rules in the Segment tab if needed. If you choose Send to everyone the message will be sent to all users segmented by the Optimove campaign. If you choose Create Custom segment and add additional segmentation rules, the message will be sent to the subset of users segmented by the Optimove campaign that matches your criteria.
Scheduling
Optimove campaign templates are scheduled in Optimove, but options to stop the campaign can be set in the Schedule tab. There can be up to three channels to select from, of which only one can be selected. The channels available are dependent on the setup defined in the Optimove integration set-up in Settings > Integrations > Marketplace. See Optimove for more information.
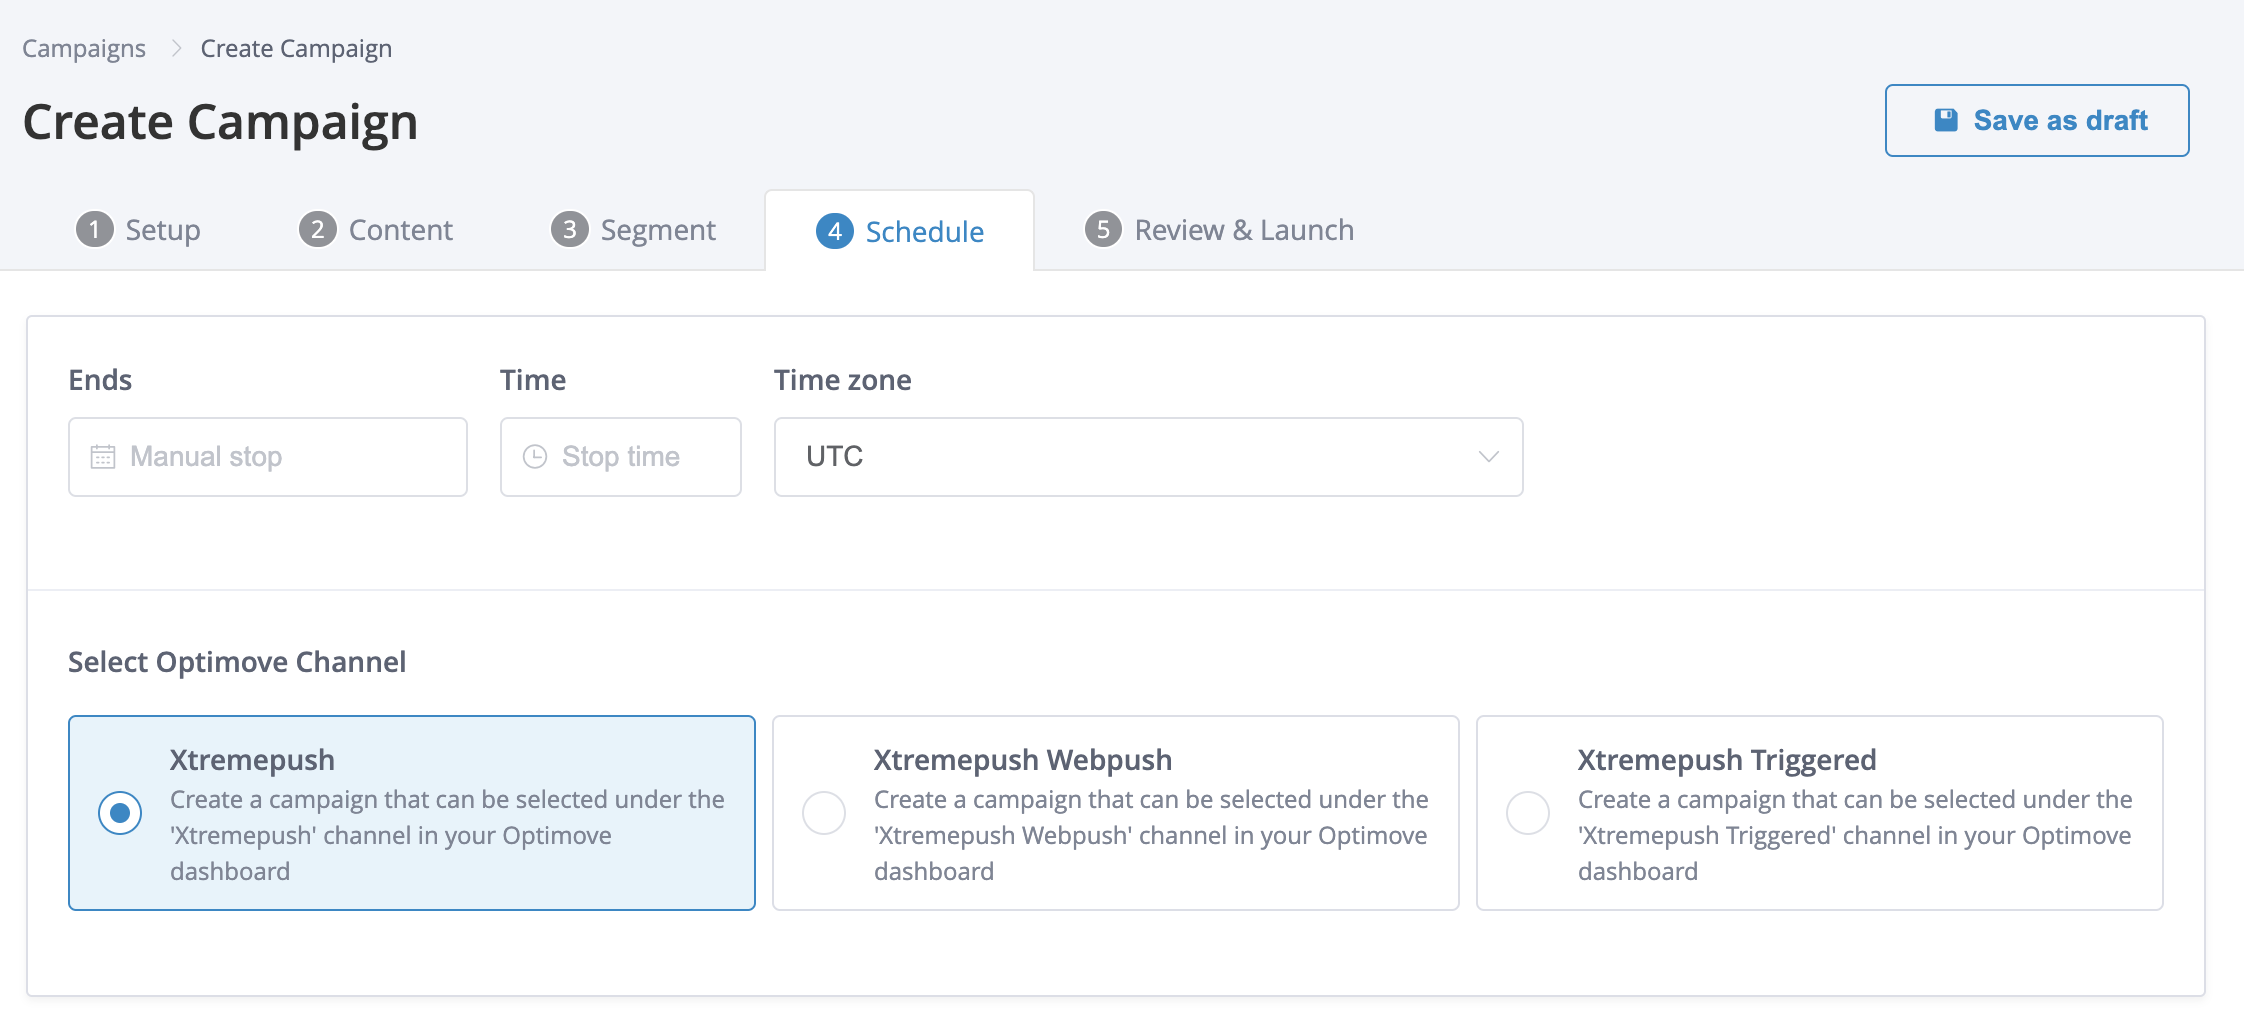
Schedule tab for Optimove campaigns.
This example shows an integration with 3 options
- Xtremepush: This will save an Optimove scheduled campaign template on the Xtremepush channel
- Xtremepush Webpush: This will save an Optimove scheduled campaign template on the Xtremepush Web channel
- Xtremepush Triggered: This will save a real-time Optimove Track and Trigger campaign template. Track and Trigger campaigns allow you to execute campaigns in real time. Can't be used for on-site or in-app campaigns.
Put the template live when you are ready by clicking Save as Optimove Template from the Review & Launch tab.
On-site and In-app campaigns
To create an Optimove triggered on-site or in-app campaign you will need to create the campaign in Xtremepush as you would normally do by navigating to Campaigns > Create campaign > In-app/On-site. Then, from the Schedule tab click on Schedule in Optimove.
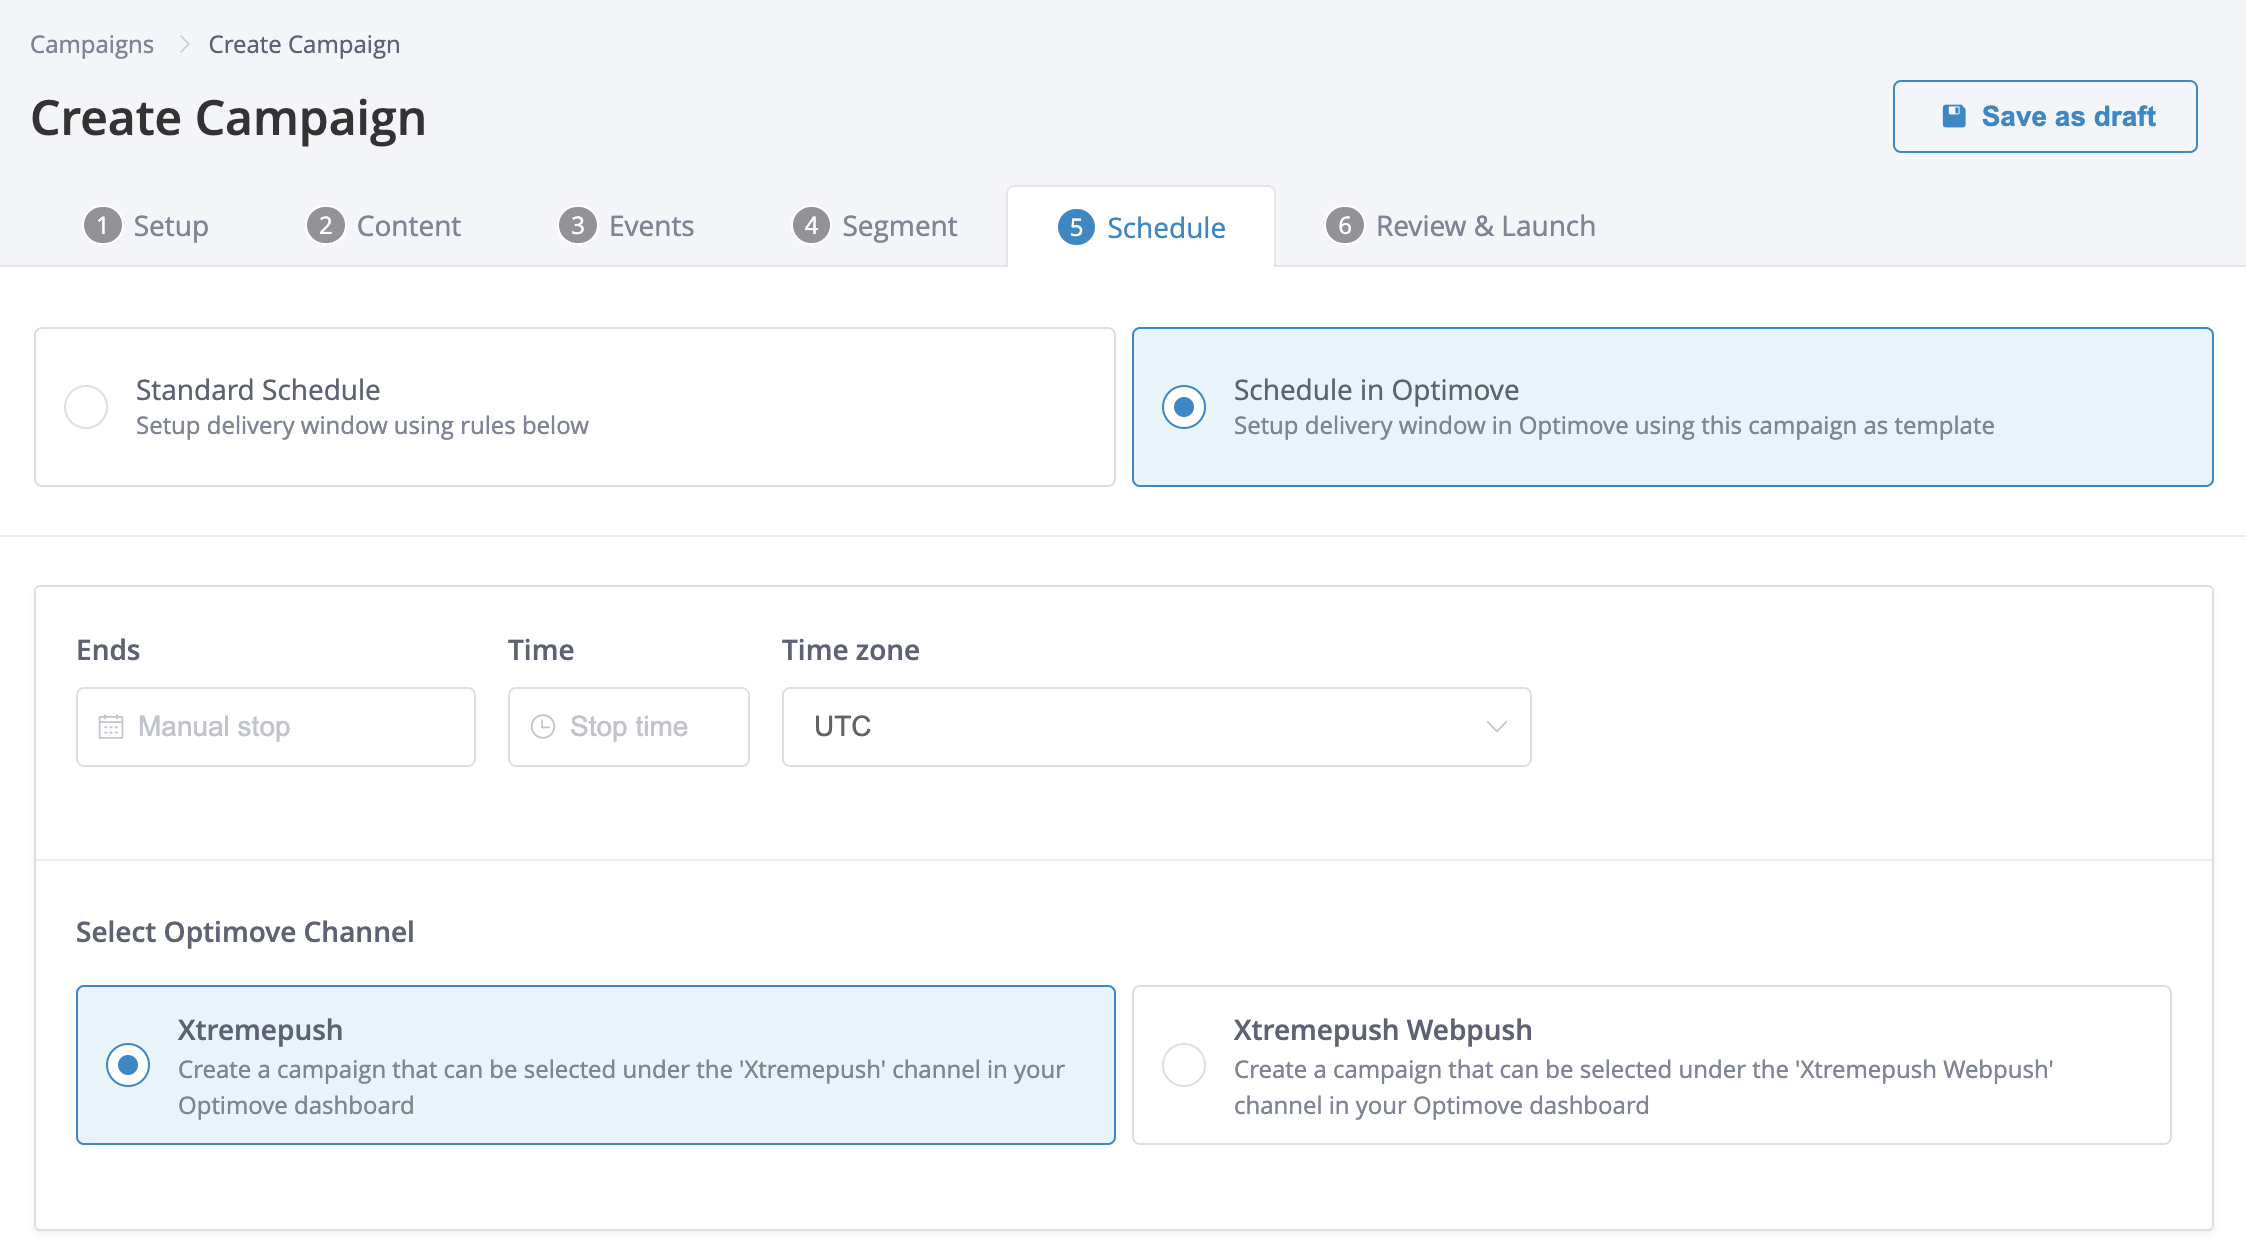
Example of on-site campaign that will be scheduled in Optimove.
Live campaigns
Live Optimove campaigns will appear in Campaigns > Live Campaigns, with a campaign type of Optimove Triggered.

The campaign should now also be visible in Optimove under the Xtremepush or Xtremepush Web Channel.
For users integrated before the addition of the Optimove Campaign ButtonIf you were running Optimove Campaigns before the dedicated Optimove campaign button was added, your workflow would have been a little different. You would have added campaigns by going to the create campaign page and clicking on API Triggered Notification, then you would have saved your template campaign by clicking Save as Draft. You can now use the approach described above, but campaigns created using old approach are still supported.
Try with a test audience first
If you want to test your content internally before putting it live you can do so.
First, get a list of user IDs for internal test users. Then navigate to Data > Audiences and click Create Segment in the Segments tab to create a new segment for your test users. Add a condition based on Identifiers > User ID (this is the player/customer user ID you are using to sync platforms). Choose the One of operator and enter the list of IDs.
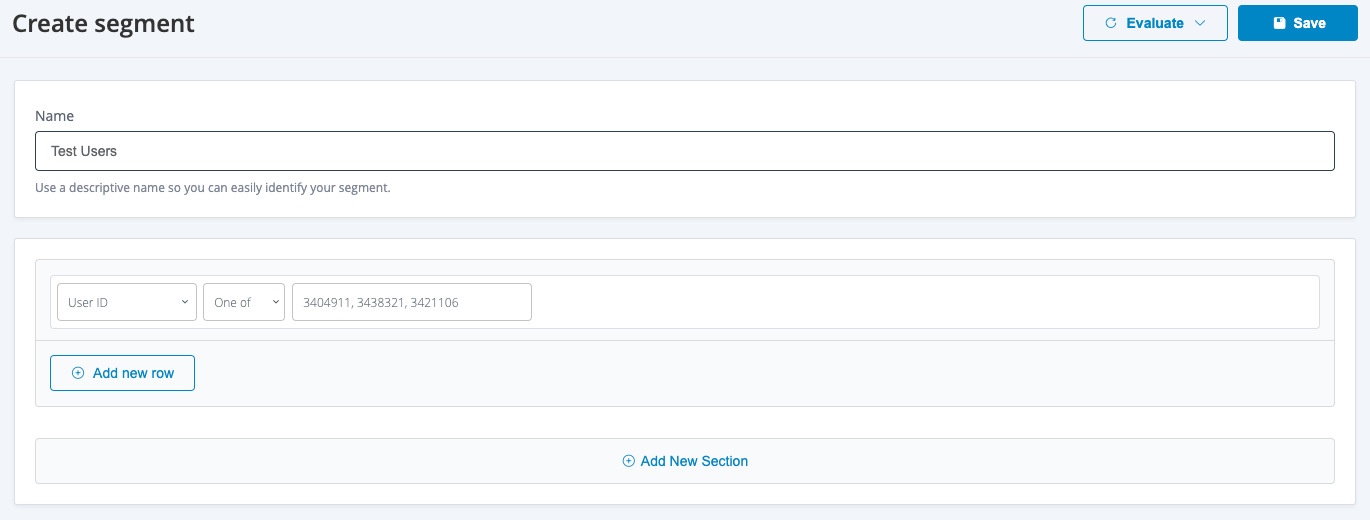
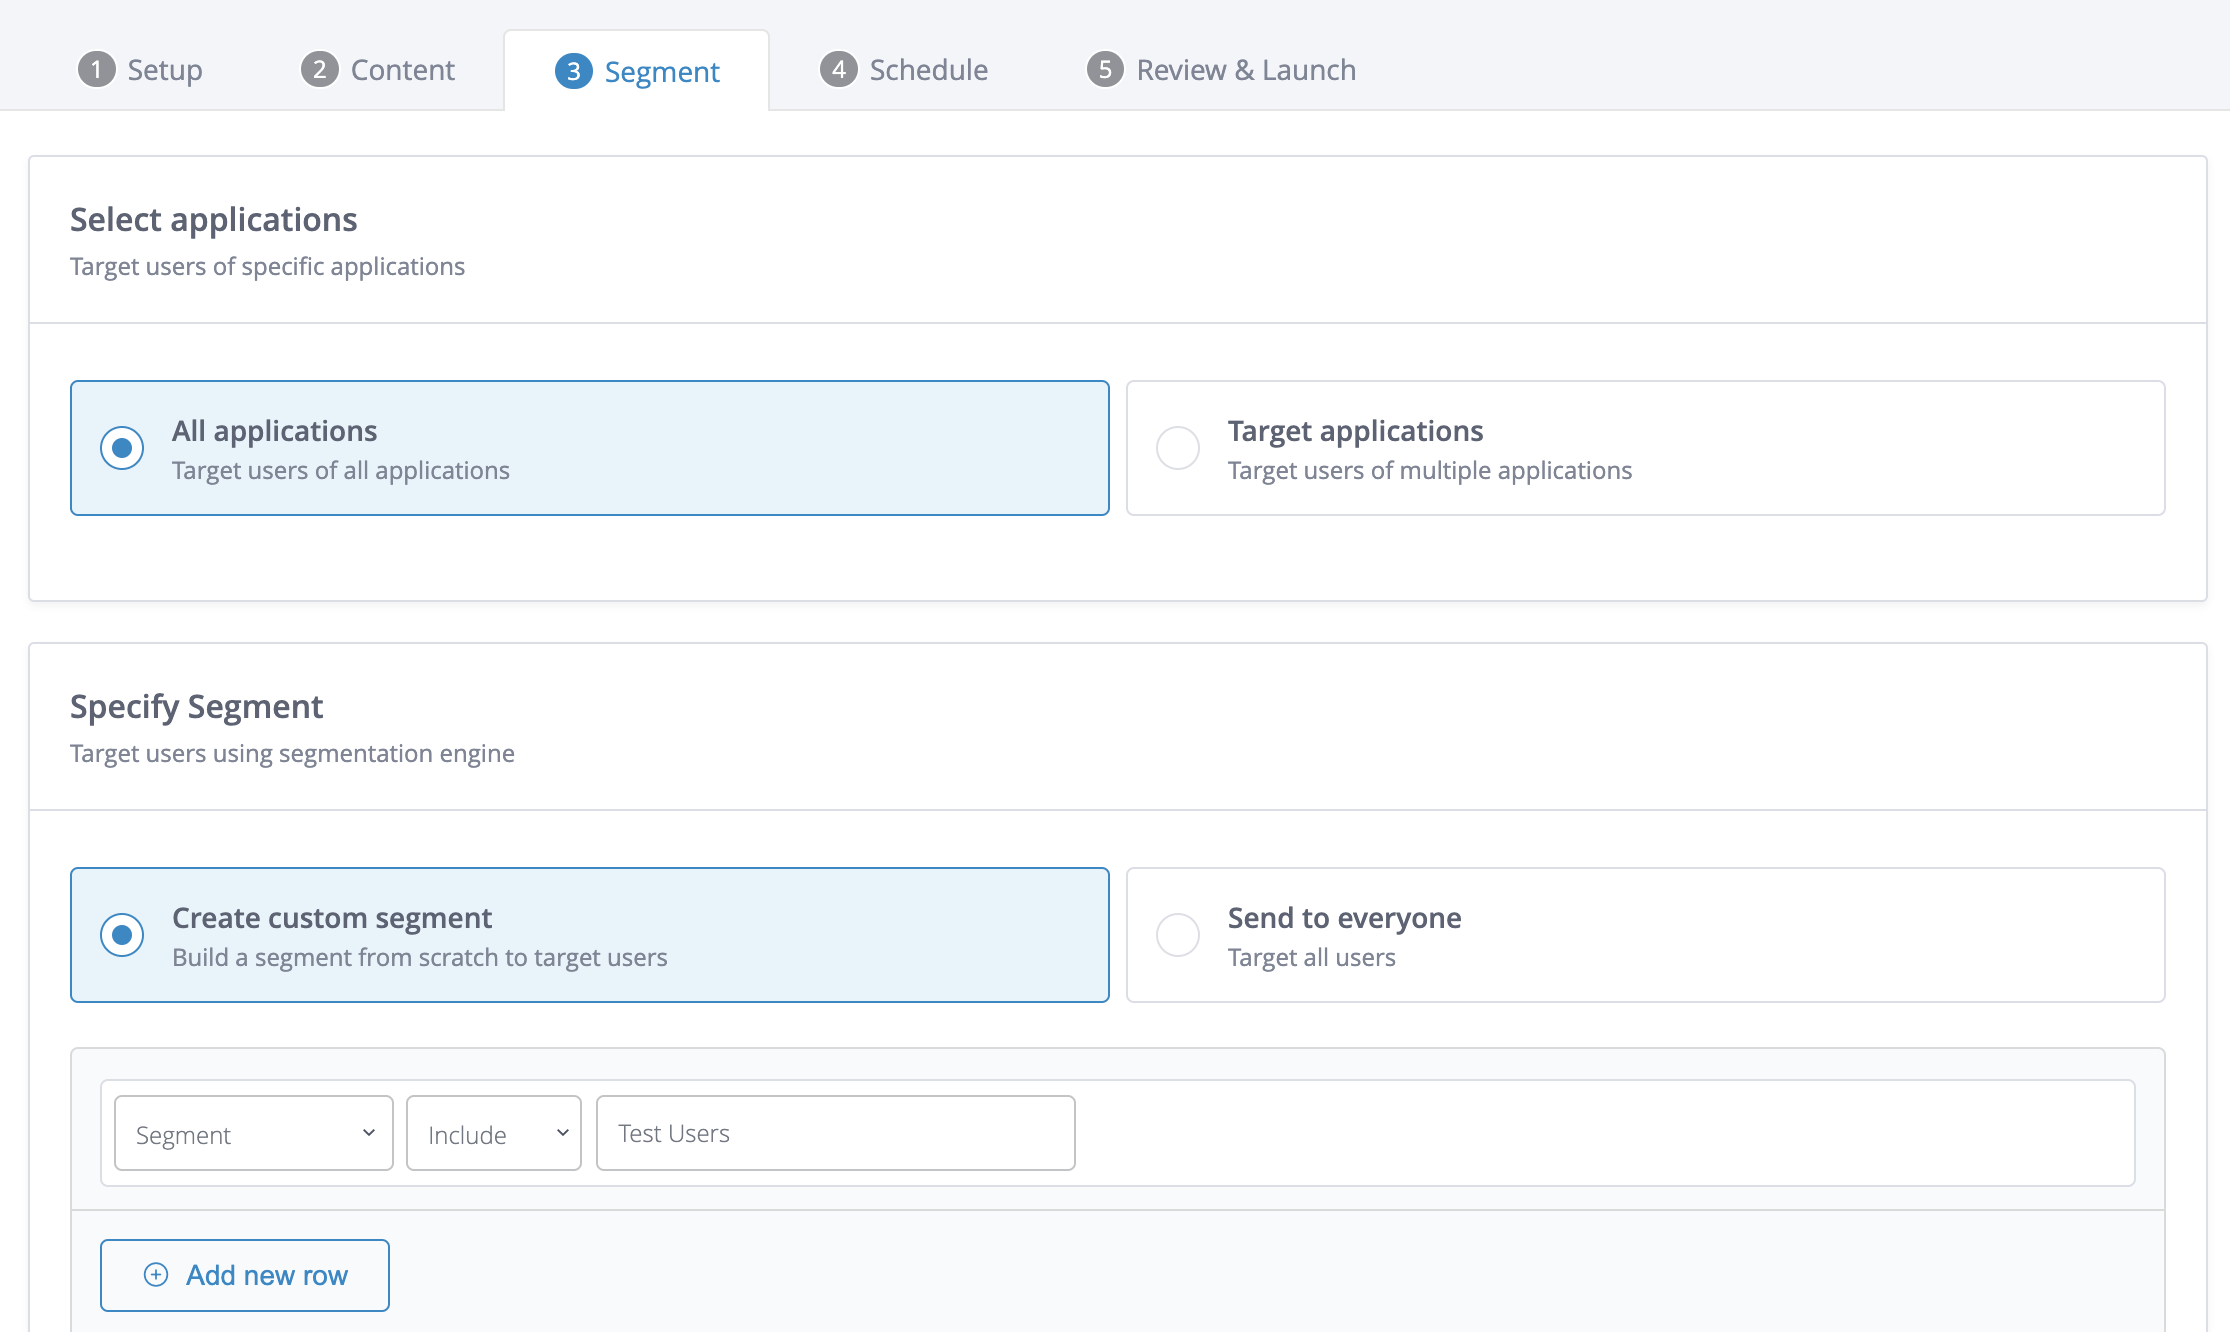
When you want to test a campaign, add this segment to your campaign in the Campaign > Segment tab and then trigger it from Optimove. Click on Create custom segment. The condition you need to add is Segment > include > Test Users and when you click the Calculate recipients button to check the number of recipients you should see it matches the number in the test list.
Launch the campaign from Optimove
Once you have created the Optimove campaign from Xtremepush, you'll need to go to Optimove to launch it. To do so, navigate to One to One campaigns > Campaign builder from the Optimove dashboard and first choose the target group. Complete the Scheduling section and finally in the Execution Details section choose the action from the dropdown menu and select from the available Xtremepush channels:
- XtremePush is typically used for mobile App push (and or SMS, Inbox, email and on-site/In-pp campaigns).
- XtremePush Web is typically used for Web Push (and or SMS, Inbox and email campaigns).
- XtremePush Triggered maps to the Optimove Real Time Track and Trigger functionality. It allows users to send a campaign in real-time as a response to an event triggered by Optimove.
Finally, select one of the existing Xtremepush templates (which refers to the campaign that was created beforehand in Xtremepush) by clicking on the Template(s) dropdown. It is possible to select more than one template at once.
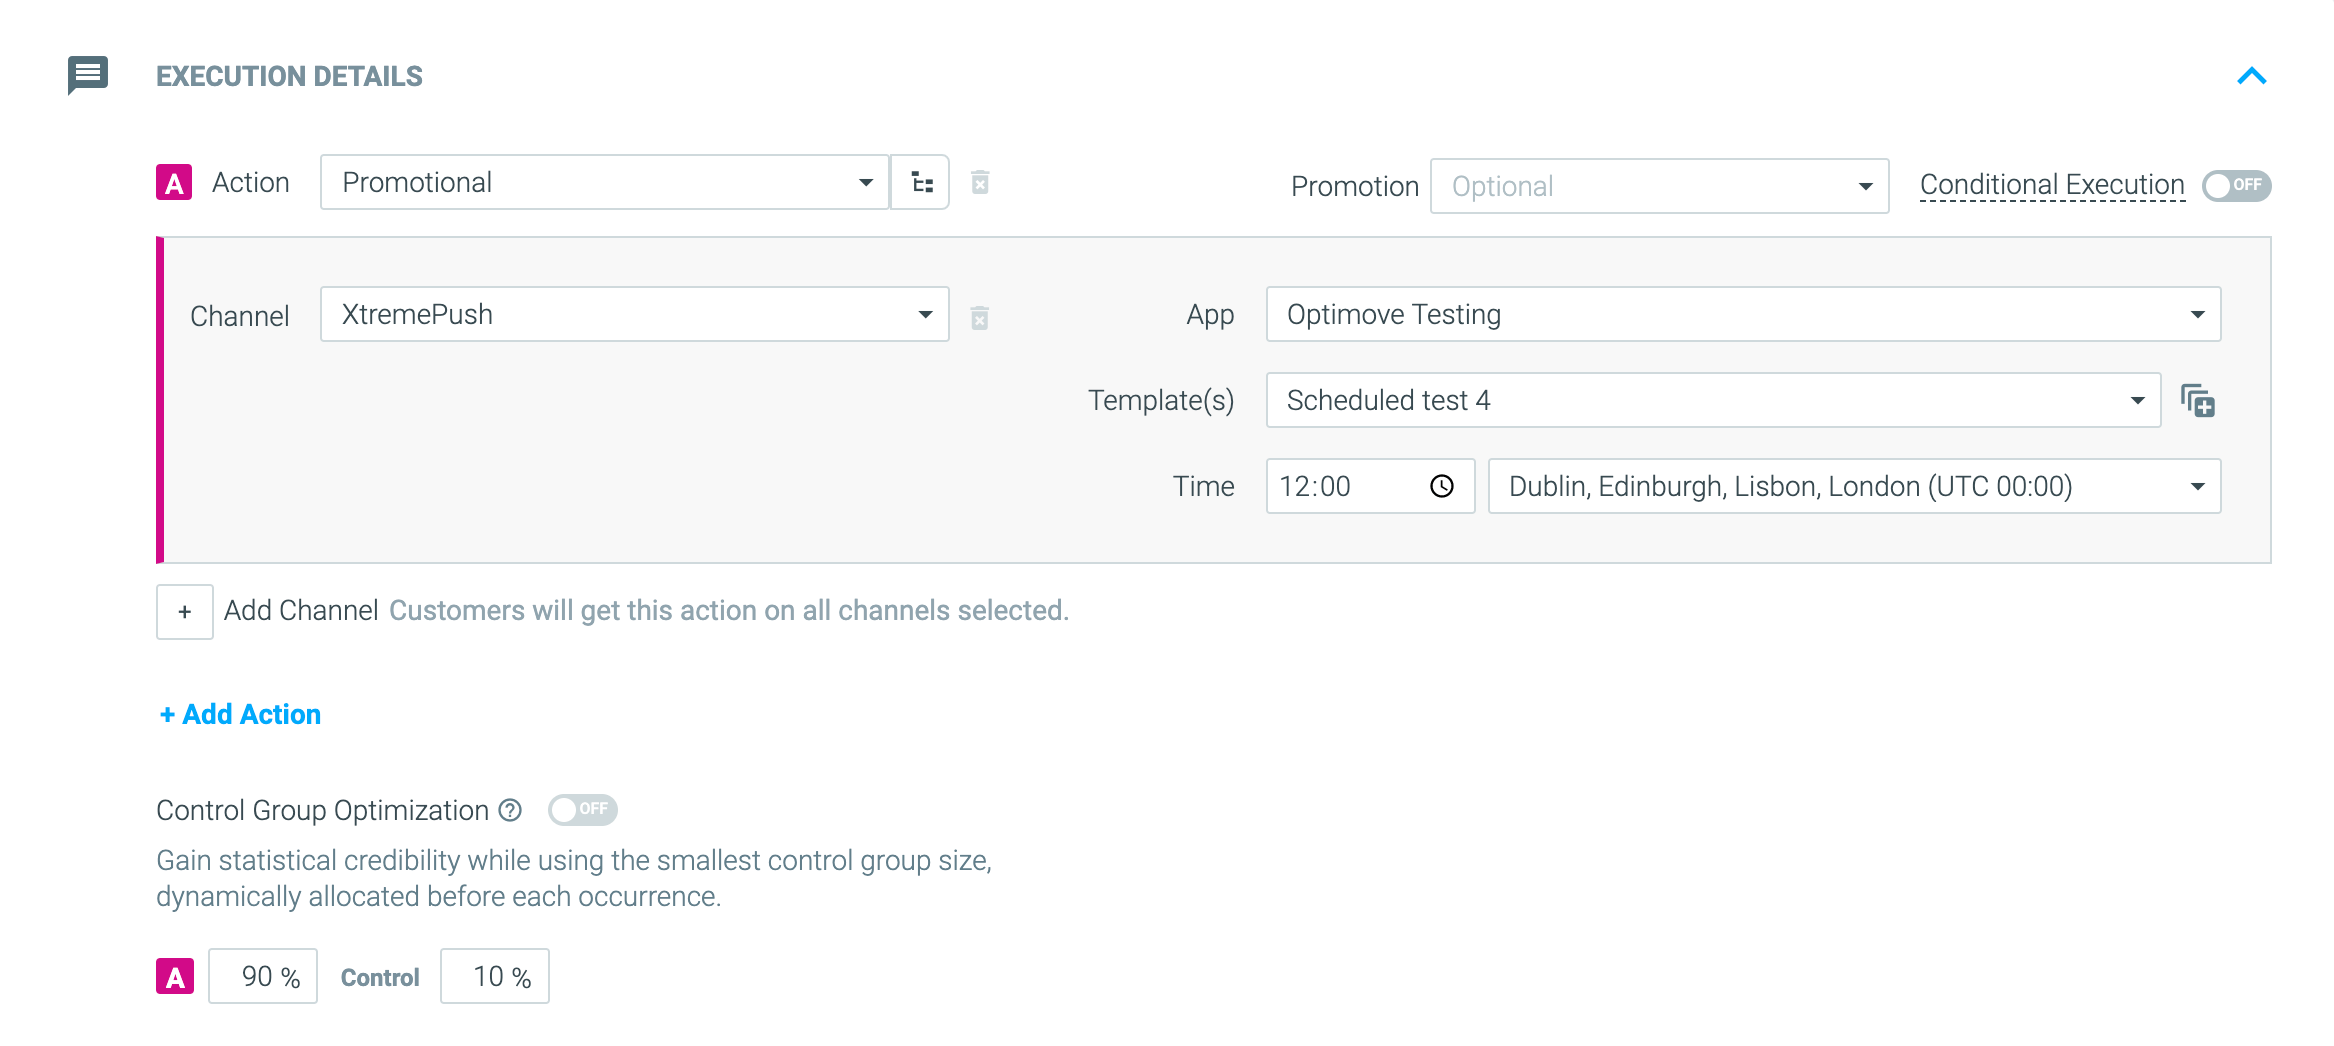
Launch the campaign. It will be automatically created and executed by the Xtremepush platform.
Confirm execution of campaign
When an Xtremepush campaign is scheduled from Optimove, an API call is sent with a campaign send time and a list of Optimove campaign IDs that match the Xtremepush user ID.
When this API call is received by Xtremepush a duplicate of the Optimove template is created in Xtremepush as a scheduled campaign. The campaign name of this scheduled campaign will have the send time appended to it. This new campaign that is created can be found in Live Campaigns until it has been executed by Xtremepush, when it will be moved to the Past Campaigns menu. This new campaign will be a Scheduled campaign and stats will be attached to it (accessible by clicking on the Options:fa-ellipsis-v: menu button on the right of the campaign > Analytics).

Stopping a campaign
To stop an Optimove campaign choose Options:fa-ellipsis-v: menu button on the right of the campaign > Stop Ensure that you are stopping the original template and not the timestamped copies.
Updated 4 months ago