Multi stage journey: message action
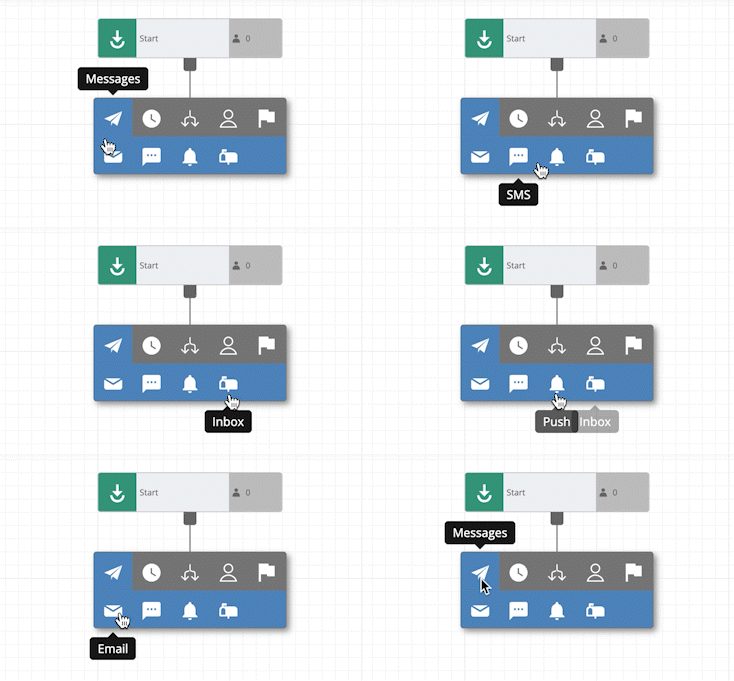
The message action allows you to communicate with your users via email, SMS, web push, mobile push or inbox. Select the desired message type from the Messages action.

Email message
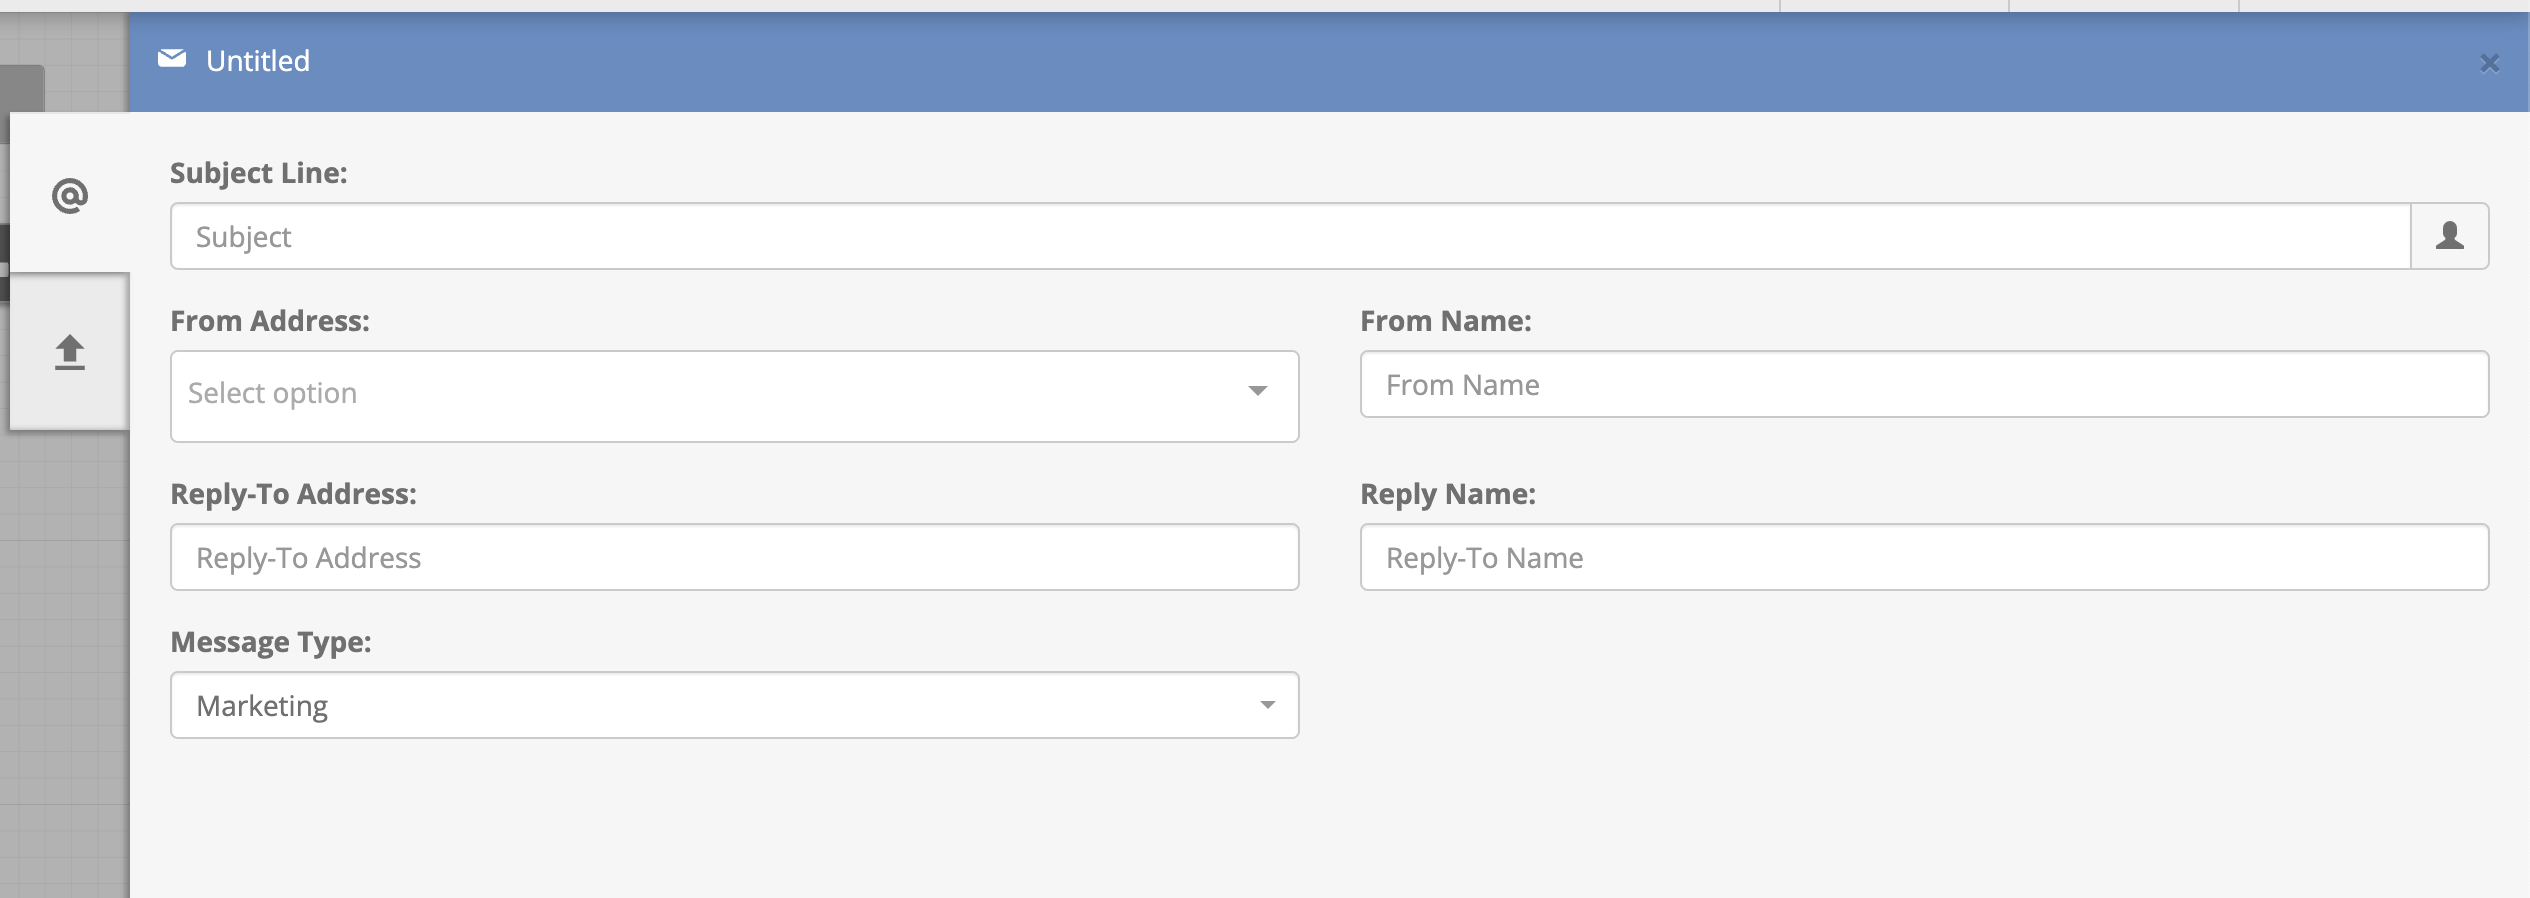
An overview of the email setup and preview of the content can be seen on the small toolbox which opens out when selecting an email action from the workflow. Selecting Edit from the top of the overview toolbox will open the larger Email edit toolbox.
Set up the Subject Line, From Address, From Name, Reply-to Address and Reply Name from this section.

Select Marketing as Message type (default option) to enable an unsubscribe header which is a requirement for major email clients such as Gmail and Yahoo and boosts sender reputation. When the unsubscribe header is present, major email clients will show a quick unsubscribe link to your recipients if you are fully authenticated and have built reputation with them. The unsubscribe header is not added for Transactional emails. Also, when the Message Type is set to Transactional, the recipient's subscription status will not be taken into consideration, therefore subscribed, not subscribed users and users that don’t have a subscription status set will be eligible to receive the email campaign.
Ignore subscriptionThis should be used with extreme caution and in compliance with consumer data protection laws like GDPR.
Import content
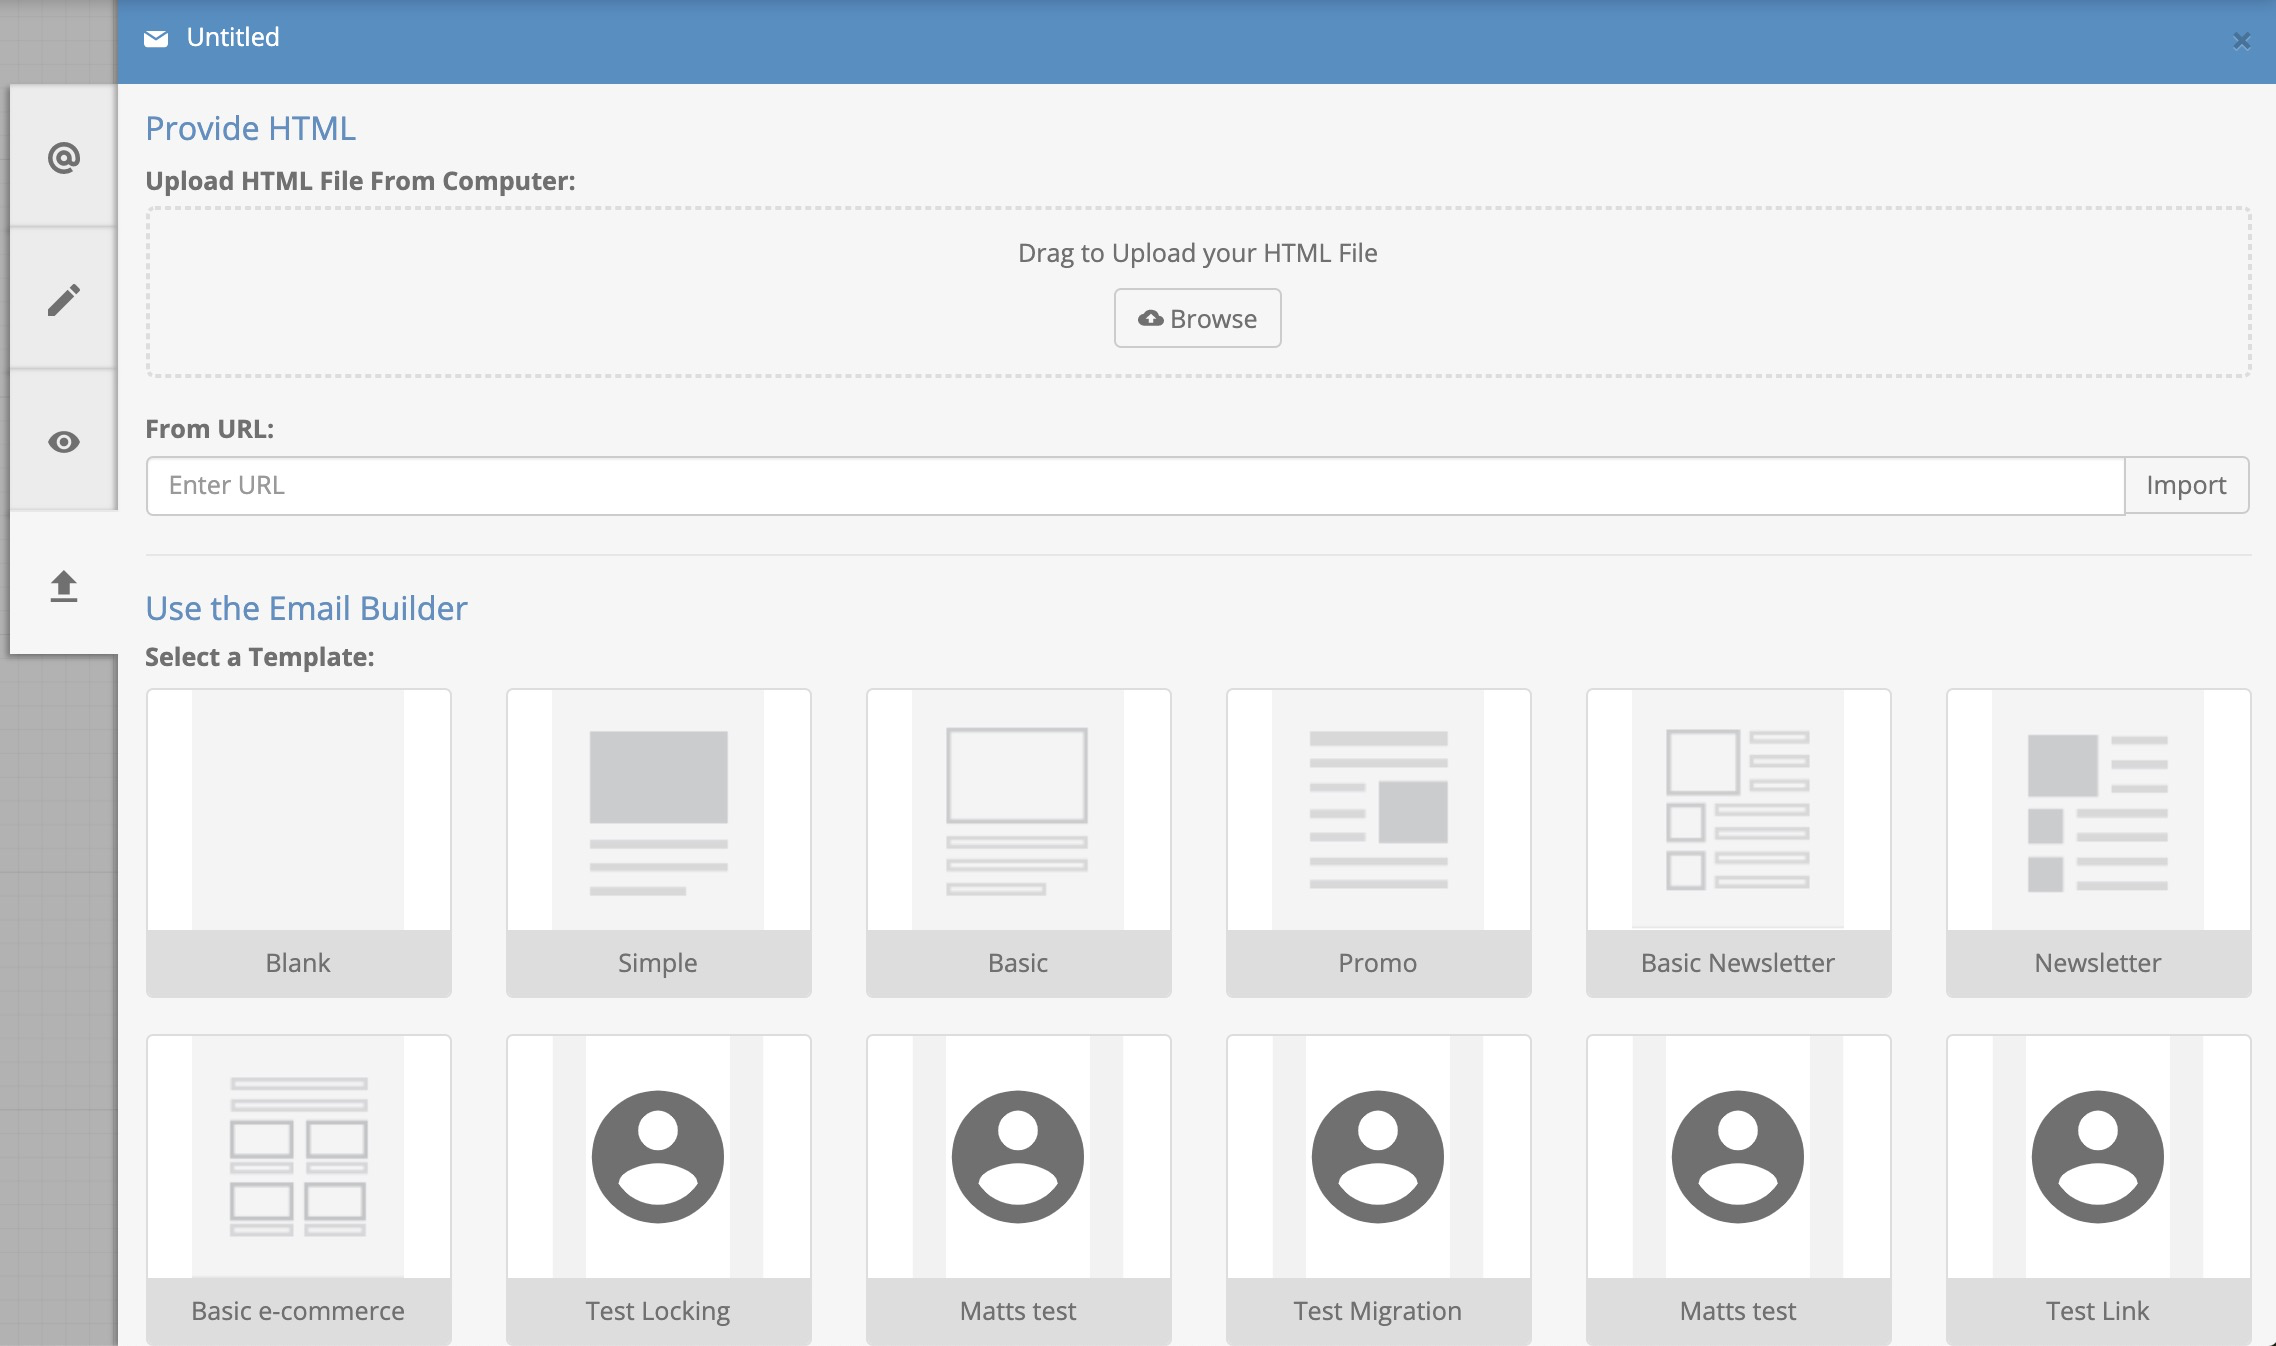
If the email you want to create already exists as HTML then you can import it to the email in one of two ways (both options are available from the source tab in the large edit toolbox):
- Uploading from a file on your computer.
- Importing the file from a URL.
Using images if building the email from HTMLAny images in the HTML content must have an absolute link to a location online, since the images will not be imported to your Xtremepush account.
Selecting a template
A selection of basic email templates, as well as any email templates you have created in your Xtremepush project are available to select from the source tab. Select a blank template to start your email from scratch.

Once you have selected one of the templates or uploaded the HTML content, two new tabs will be generated, to edit the email and to preview it.
SMS message
An overview of the SMS preview of the content can be seen on the small toolbox which opens out when selecting an SMS action from the workflow. Selecting Edit from the top of the overview toolbox will open the larger SMS edit toolbox.
The first tab allows to set up the language of the campaign (for multi-language campaigns). Selecting the SMS tab allows you to edit the content of the SMS message (set up the from name for the campaign and the content). It is also possible to select whether you want to include an unsubscribe link.
Toggle on Ignore subscription to send SMS messages to your users regardless of their subscription status (subscribed, not subscribed users and users that don’t have a subscription status set). This can be used for service messages.
Ignore subscriptionThis should be used with extreme caution and in compliance with consumer data protection laws like GDPR.
Using content elements
You can add emojis and dynamic content to your SMS messages.
Click the smile icon to display a list of emojis and click the one you want to add to your message.
Click on the user icon to add data from your user attribute fields. Type the name of the field you want to use, or select it from the presented pick list.
Select a template
Any SMS templates you've created in your Xtremepush project are now conveniently accessible for selection from the Content tab. You can also perform a search for an SMS template. Once you've chosen a template, make sure to review your message content before finalising it.
Push message
An overview of the preview of the content for iOS, Android and web push can be seen on the small toolbox which opens out when selecting a push action from the workflow. Selecting Edit from the top of the overview toolbox will open the larger Push edit toolbox.
From the first Edit tab it is possible to toggle the different sliders to enable the different platforms, to set up the language of the message if you want to create a multi-language campaign and to configure retry options for offline users. For more details on how retry options work see our Schedule tab page. Once you do, new tabs will be activated, that will allow you to build your push messages.
Mobile push (iOS and Android)
By selecting the iOS or the Android tab you can build the push notification for each platform. It is possible to include title, body and an image. Review our best practices for push notifications.
Rich media messages in iOSIn order to be able to send iOS push notifications with images, GIFs, and video, clients must create a service extension following the steps outlined in this guide.
You can select the default action that will occur when the user clicks on the notification; the options available are:
- None (selected by default): opens app
- Open URL: to open it either inside or outside the app. Enter the URL you wish to use in the accompanying input field.
- Go to deeplink: to open a certain part of the app. Enter the app deeplink you wish to use in the accompanying input field. See our deeplinks guide for more details.
Finally, a key/value payload can be added to the notification delivered to the user. You may have custom payloads available as part of your integration. Payloads are not initially visible to the user but if the push is opened, the app can access some payload values from the push message and perform some custom behaviour with them.
Web push
The notification must include a message title, body and a URL. Optionally an icon and a picture that will be displayed alongside the message can be included too (read best practices).
Using content elements
You can add emojis and dynamic content to your mobile and web push notifications, for both the title and the body of the message.
Click the smile icon to display a list of emojis and click the one you want to add to your message.
Click on the user icon to add data from your user attribute fields. Type the name of the field you want to use, or select it from the presented pick list.
Selecting a template
Push templates previously created in your Xtremepush project are now conveniently accessible for selection from the Content tab within each push channel. You can also perform a search for a push template. Once you've chosen a template, make sure to review your message content before finalising it.
Inbox message
An overview of the Inbox preview of the content can be seen on the small toolbox which opens out when selecting an Inbox action from the workflow. Click on Edit to open the inbox editor.
The first Edit tab allows you to set up the language of the campaign (for multi-language campaigns). Select the Inbox tab to edit the content of the Inbox message. Set up the message title and text, upload an image, select the default action and add a key/value payload similarly to how you would do for Mobile Push messages).
Using content elements
You can add emojis and dynamic content to your inbox messages, for both the title and the text of the message.
Click the smile icon to display a list of emojis and click the one you want to add to your message.
Click on the user icon to add data from your user attribute fields. Type the name of the field you want to use, or select it from the presented pick list.
Review our best practices for these types of messages.
Inbox message persistence
This option allows to set how long the message will remain in the users' inbox.
The available options are:
- Do not remove: enabled by default. Suitable when your goal is to persist a message in the inbox and have it naturally move down over time.
- Remove on: a time and date based on a chosen timezone when the message will be removed from the inbox. This is great for content related to events that run at a specific time or are limited in time, for example, an offer that runs for a month.
- Remove after: specify the time after which you want the message to be removed, such as 7 days, 12 hours, etc. This is the right choice if your message is repeating or triggered and should only last for a certain amount of time, for example, a limited-time offer triggered when a user signs up on your site.
Updated 4 months ago