Salesforce Marketing Cloud
Include Xtremepush messages as part of a multi-stage journey in Salesforce Marketing Cloud
The Salesforce Marketing Cloud integration allows you to create campaigns in the Xtremepush platform that will then be available to be triggered from Salesforce Marketing Cloud's Journey Builder.
Setup steps in Salesforce Marketing Cloud
To start, go to your Salesforce Marketing Cloud account and navigate to Settings > Setup > Apps > Installed Packages and click New. Give a name to your package (e.g, Xtremepush) and click Save. Once done, you will need to add two components to the app: one for the Journey Builder Activity and another for the API integration.
Create the API Integration
Click Add Component, which will open up a window with the different component types and select API Integration as your component type. On the next screen select Server-to-Server as your integration type and click Next. Give read access at the Contact > List and Subscribers section, read and write access from Data > Data Extension and click Save.
Add the Journey Builder Activity component
After configuring the API integration, from Settings > Setup > Apps > Installed Packages > Xtremepush application click on the Add Component button again.
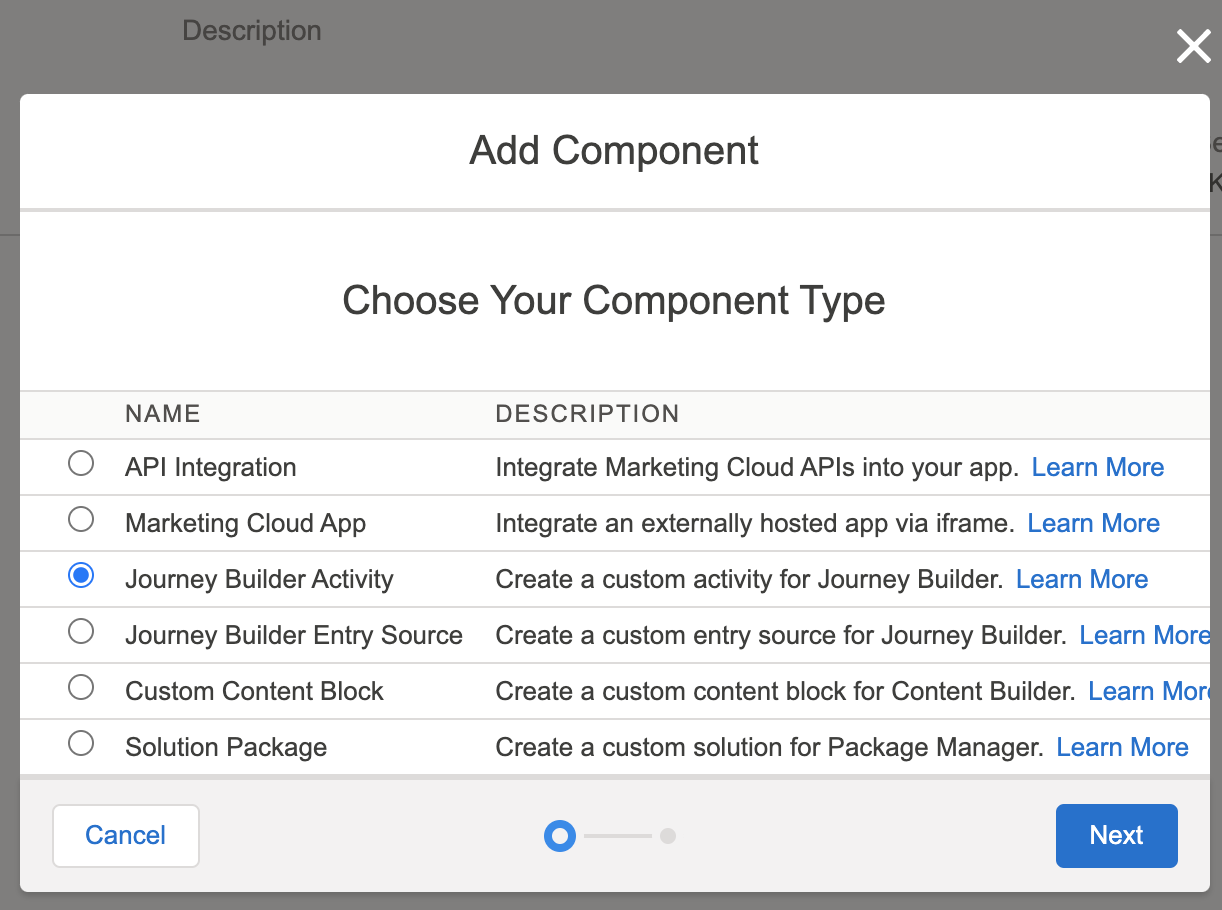
Select Journey Builder Activity as your component type and click Next . Give a Name to your Journey Builder Activity, select Messages as Category and include the Endpoint URL. Finally click Save.
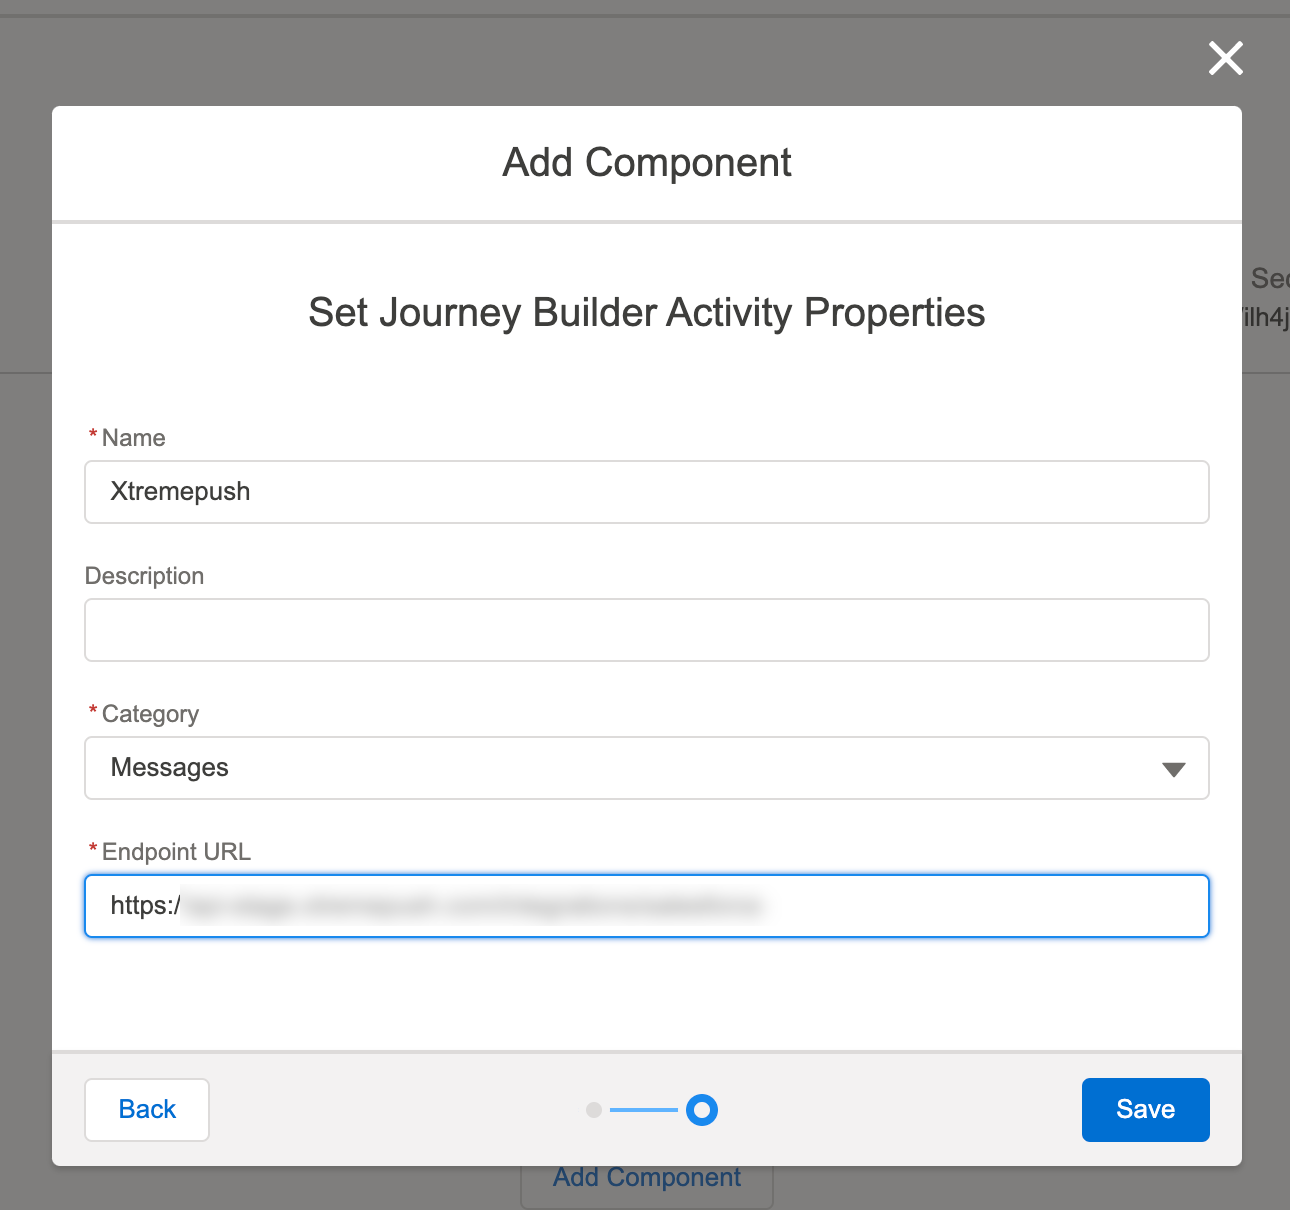
Endpoint URLThe Endpoint URL can be obtained from Settings > Integrations > Connect New page under the Activity Key field.
Setup steps in Xtremepush
Once you have completed the steps above, open a new tab in your browser and log-in to your Xtremepush account. Navigate to Integrations > Marketplace, select the Salesforce Marketing Cloud card in the Integrations Marketplace tab and click Connect.
You'll need to configure the Connection Settings and Data Mapping sections.
Connection Settings
You'll need to retrieve the details for your Xtremepush application in your Salesforce Marketing Cloud by navigating to Settings > Setup > Apps > Installed Packages > Xtremepush application . In particular, you will need:
- Auth Base URL
- Rest Base URL
- SOAP Base URL
- Client ID
- Client Secret
- Client MID: click on your name on the main bar to find your Client MID
- Activity Key: found under the Journey Builder Activity section, where it's referred to as Unique Key
- JWT Token: referred to as JWT signing secret in Salesforce
After filling these details, you'll need to map Salesforce's ContactID to Xtremepush identifier.
Map ContactID to Xtremepush customer_idIf you would like to map your ContactID to Xtremepush
customer_ididentifier, and it is not enabled for your project, please contact your Account Manager.
After mapping the ContactID, you should move to the Data Mapping section.
Data Mapping
In this section, you will be able to map Salesforce system and custom attributes to Xtremepush system and custom attributes respectively.
To configure the mapping, click on Add Data Extension to open the data extension list created in your Salesforce MC. Pick a data extension from the list and click on Apply.
Salesforce custom attributes for the selected data extension are shown in the first column. For each of these you can optionally choose to store the value to an Xtremepush attribute, which you can select from the drop-down in the final column.
Salesforce's Contact Key, email and mobile_number attributes (listed in the Column fields) will be automatically mapped to Xtremepush's system attributes user_id, email and mobile_number.
You can add multiple data extensions and do the attribute data mapping for each one.
Creating attributesSystem attributes are automatically created on Xtremepush. However, in order to map custom attributes you need to create these attributes on the Xtremepush system first. Review our Attributes & tags guide to see how to do so.
Email and phone number attributesIn order to send Email and SMS campaigns, you need to ensure that the email and phone number attributes from Salesforce account are mapped to Xtremepush standard
mobile_numberattributes.
Event Mapping
In this section, you will be able to map Salesforce's events to Xtremepush's events which will allow using Xtremepush events as API event entry source for Salesforce journeys.
To configure the mapping, click on Add Event Mapping to open the Salesforce Add Salesforce event modal. Enter the Salesforce API event name and the event definition key, which needs to be retrieved from Journey Builder > Events > Entry Sources in Salesforce. Then pick the Xtremepush event that you would like to map and pick the data extension that you would like to link to that event.
After configuring the mapping from the modal, click on Apply. To map more events, follow the same steps.
Mapping Salesforce EventsSalesforce API events need to be created beforehand in Salesforce to be able to map them to Xtremepush events.
Once the event mapping is done, click the Connect button and your integration will be successfully connected.
Reviewing and modifying an existing integration
Navigate to Integrations > Marketplace > Configured Integrations > Salesforce Marketing Cloud > Settings to review and modify the settings.
If you add any new attributes in your data extension at Salesforce Marketing Cloud, make sure you click the Update button. This will update the attribute list for that data extension and you will be able to map it to the appropriate Xtremepush custom attribute from the Data Mapping section of the existing integration.
Create a Salesforce campaign in Xtremepush
You can create a campaign in Xtremepush which can be selected to be triggered in the Salesforce Journey Builder custom activity window for Xtremepush.
In Xtremepush, navigate to Campaigns > Create Campaign and choose Single Stage Campaign > Salesforce campaign and follow the usual campaign setup steps.
You can also add your dynamic content using a Salesforce's attribute in your message text via clicking the Salesforce icon and choosing related dynamic attribute from the dropdown.
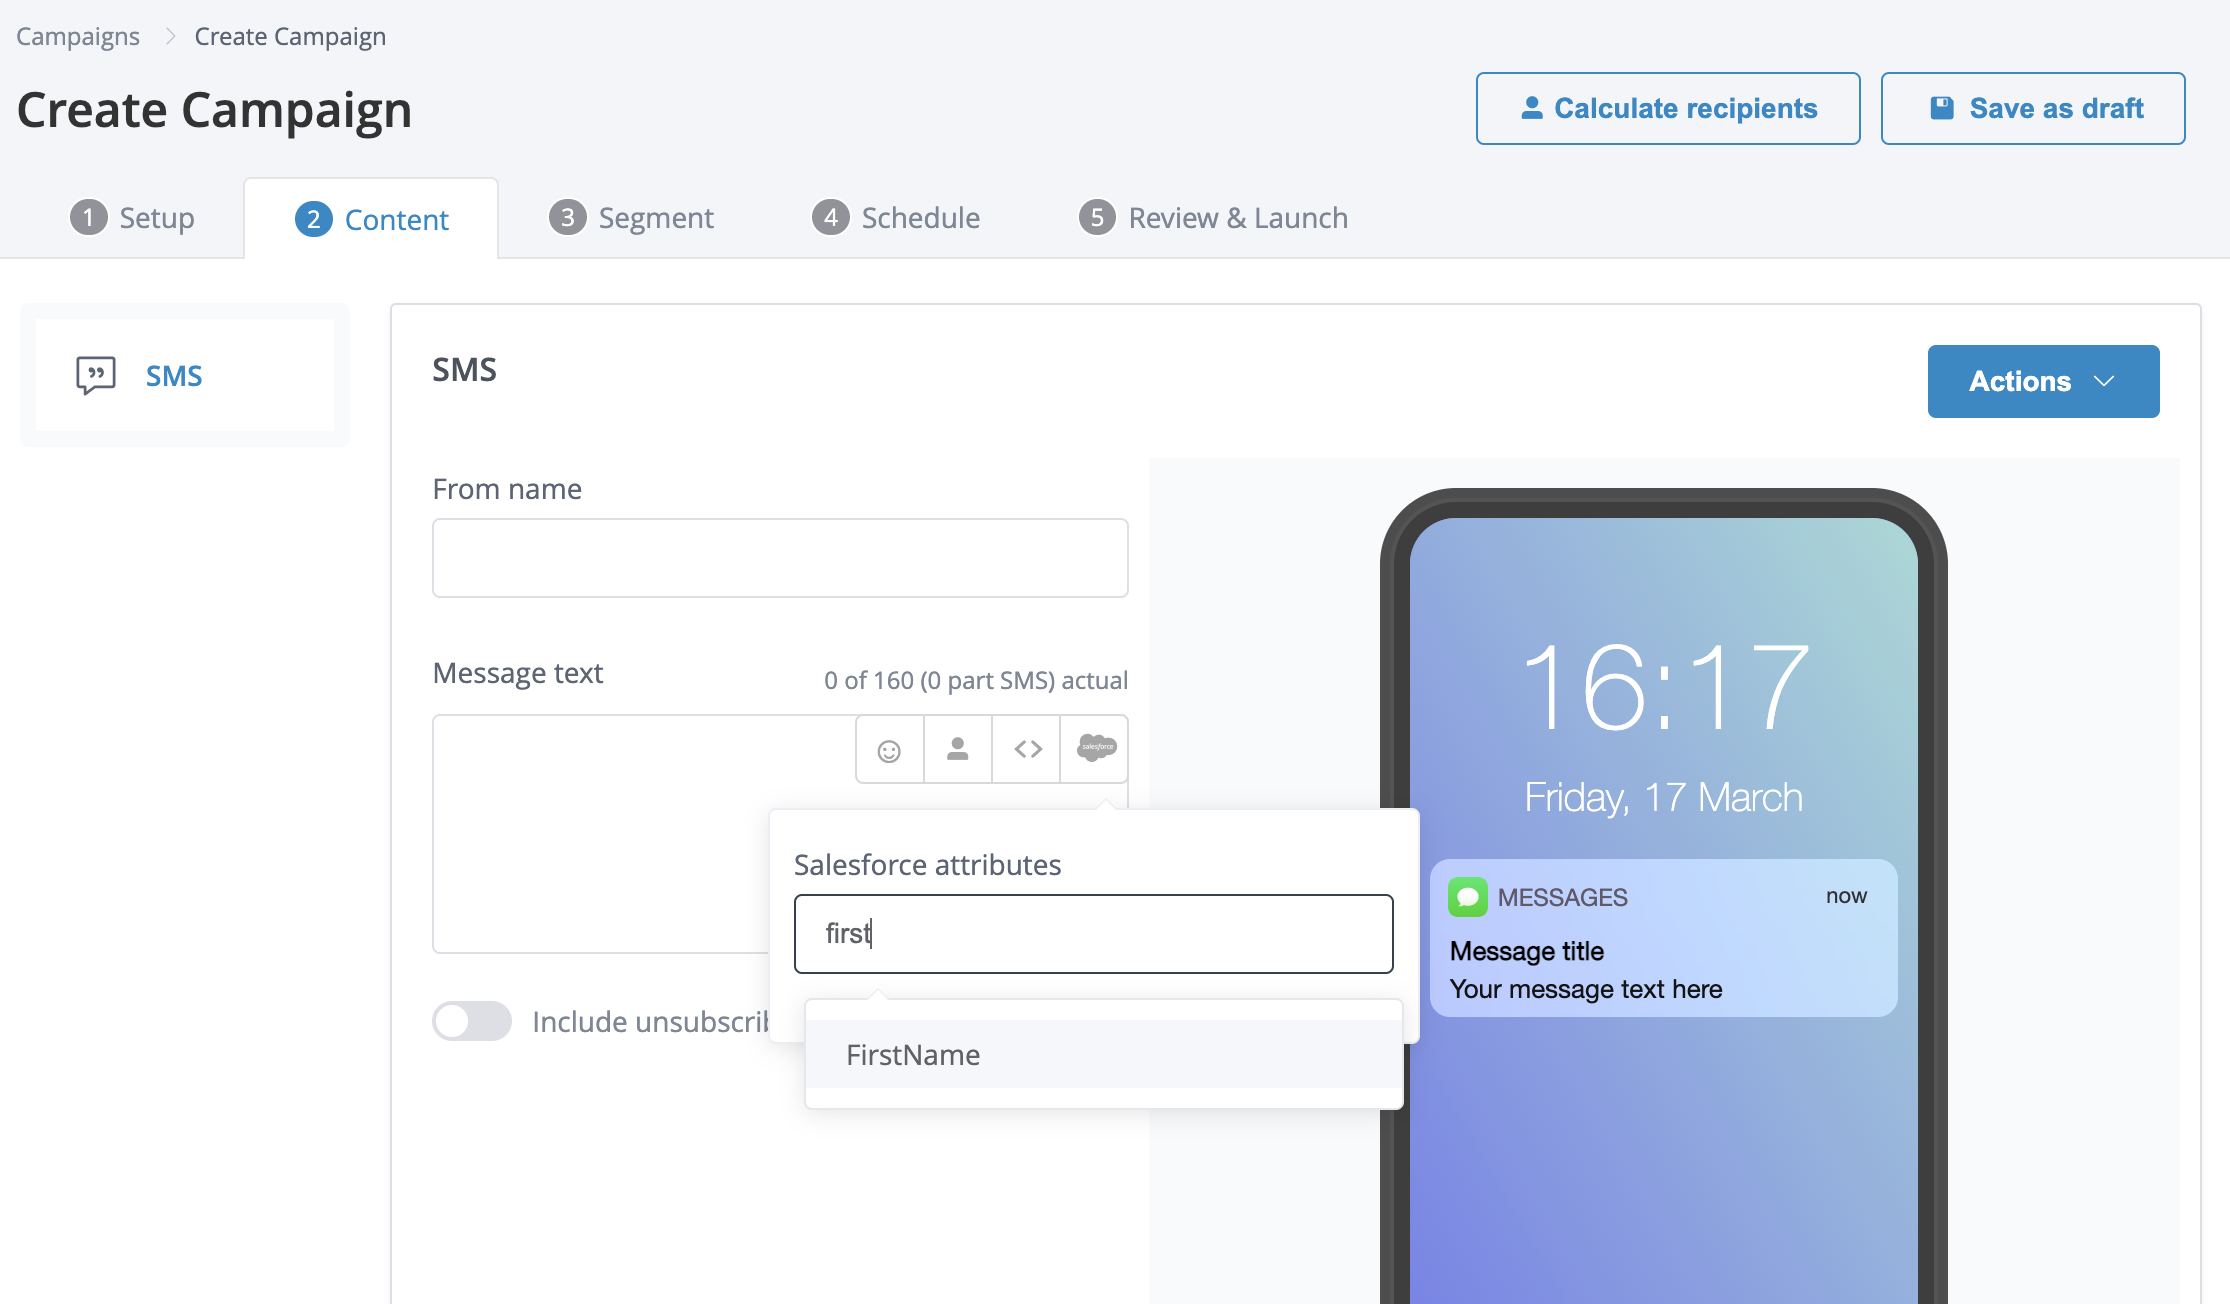
In this example, click on the Salesforce icon to pull the list of available Salesforce attributes, to include the users' first_name.
Use Xtremepush in your Salesforce Journey Builder
When you navigate to the Journey Builder from your Salesforce Marketing Cloud to create a multi-step journey, you will now be able to list Xtremepush message activity at the Activities section.
To choose an entry source drag it from the menu on the left. Xtremepush activity currently supports Data Extension, API Event and Event (Date Based only) as the entry sources.

Click on the entry source to select it from your pre-created entry sources (Data Extensions, API Events, Event) in your Salesforce Marketing Cloud account.
Date Based EventDate-base event (DBE) passes the data extension ID to the Xtremepush activity only after saving the journey. Because of this, you need to add DBE into the journey, and then save it before adding the Xtremepush activity to the journey. Otherwise, the campaign will not be triggered.
Once you have selected the entry source, you will be able to manage the Schedule of the journey.

The scheduling of the campaign is set by clicking on 'Schedule'.
Then, drag the Xtremepush activity type into the journey from the Activities > Messages section on the left.
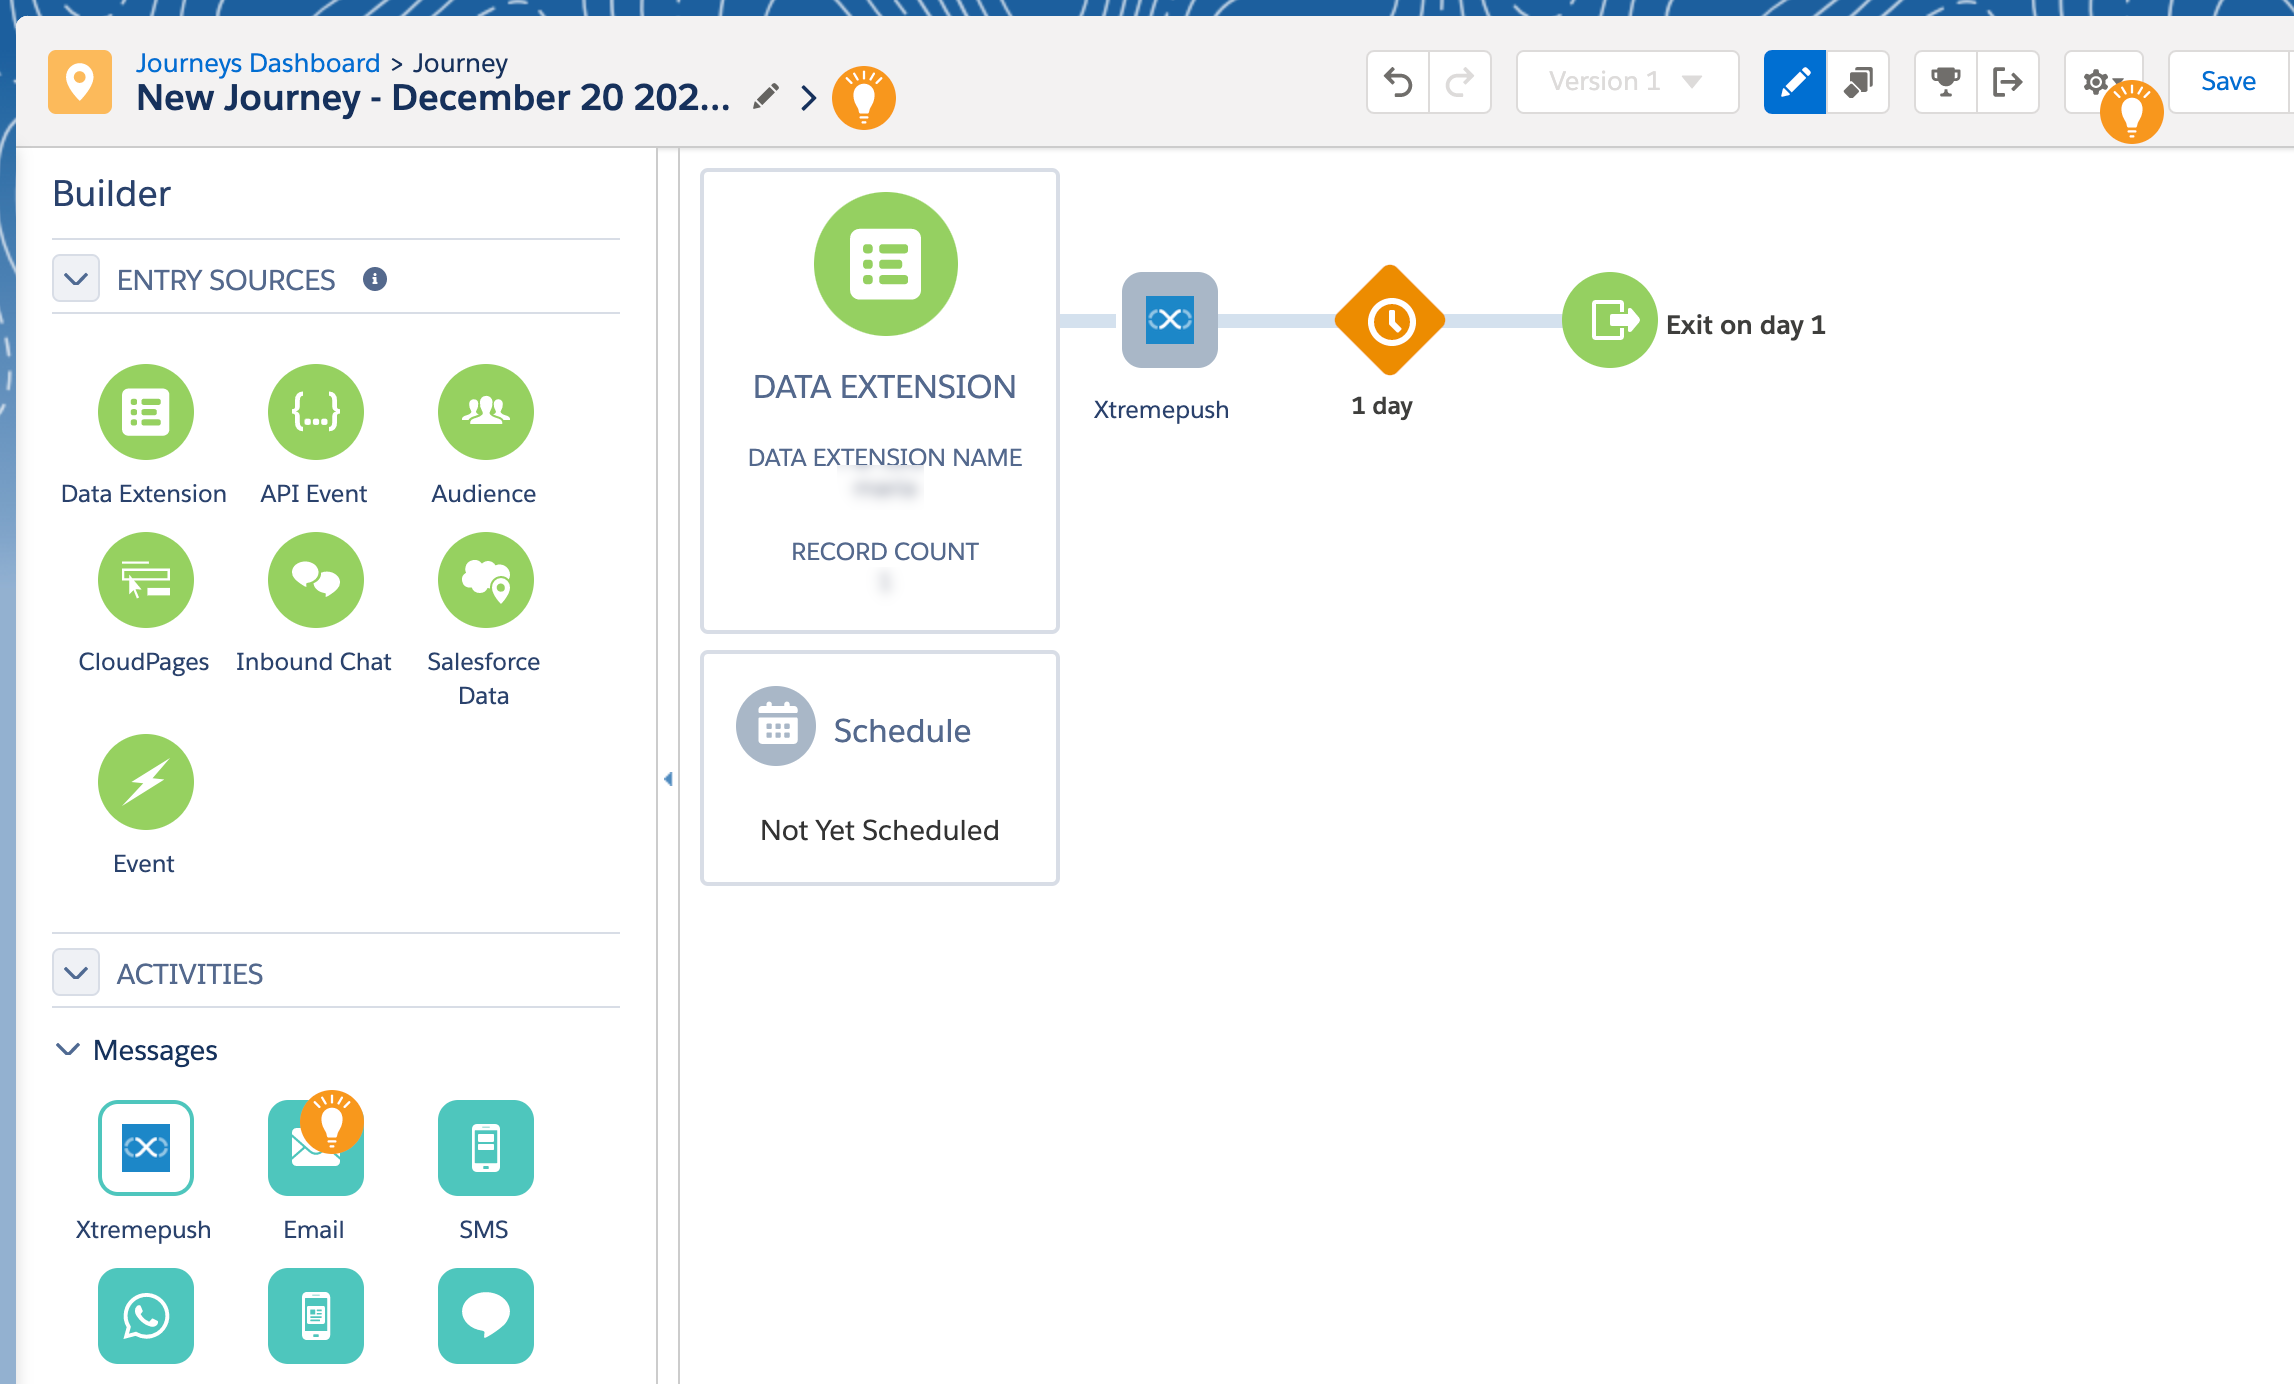
The name that we gave our component when we configured the integration will be the name that will be shown for the Xtremepush message (in this case, we called it Xtremepush).
Click on the Xtremepush activity icon which will open a two step window. On the 1st step (Configuration tab) you'll need to select the campaign you want to trigger in Xtremepush.
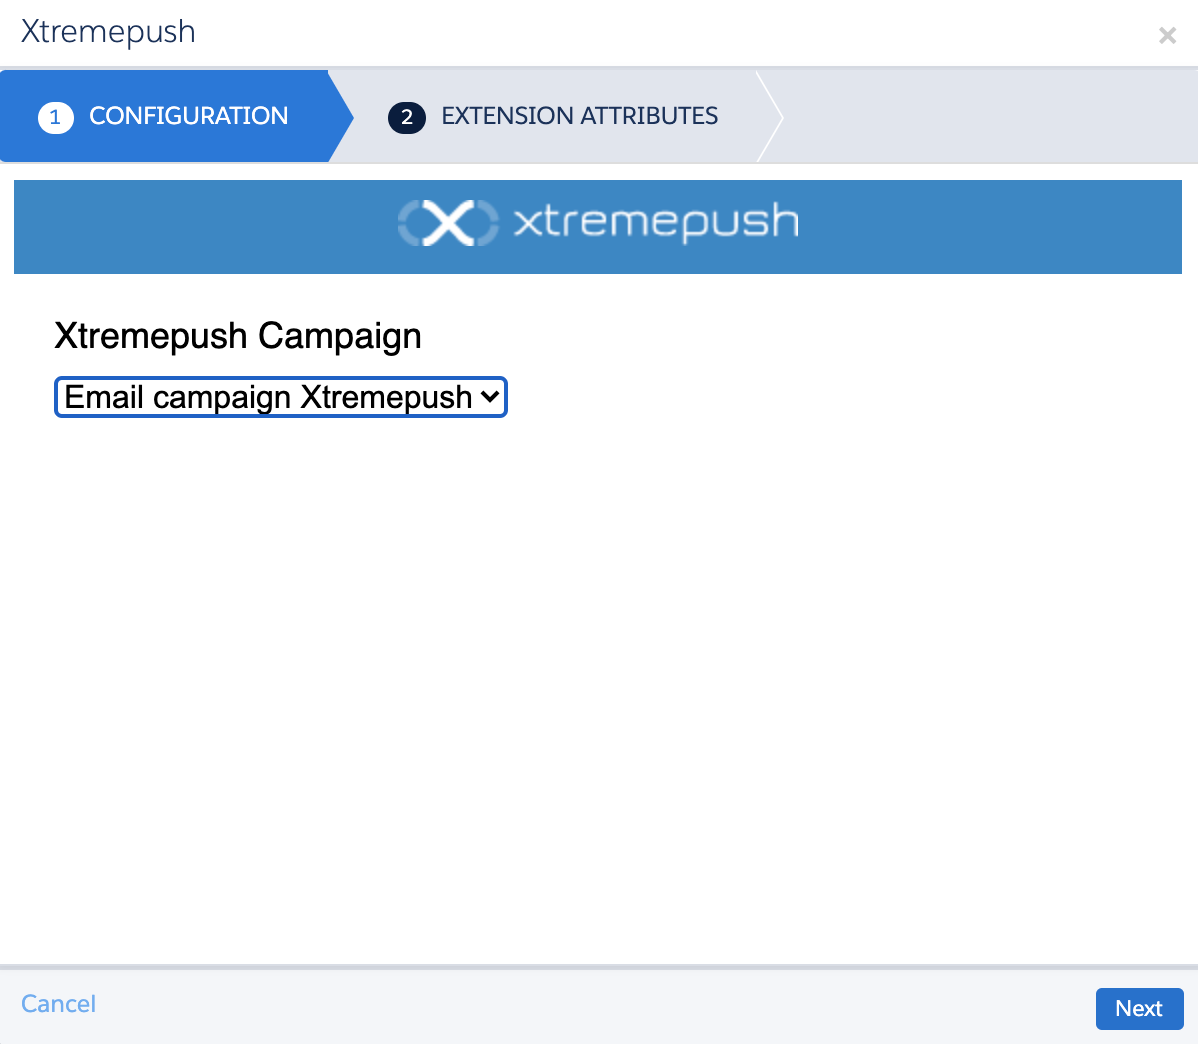
Select the Xtremepush campaign from the dropdown.
Click Next to navigate to Extension Attributes tab to check which attributes will be updated with this journey. Finish your journey by adding as many steps to it as you require and click on Activate once you have finished editing it.
List campaign statsTo check your campaign performance, after sending the journey, you navigate back to your journey and hover your mouse over the XP activity icon, which will show a 'campaign performance' window. Click on Expand button to see the details on campaign performance.
If you use the same Xtremepush campaign in different journeys, campaign stats will present total numbers of all journeys. If you want to see individual campaign stats for each journey, you need to ensure each Xtremepush campaign is only used in one Salesforce journey.
Data Extension change after campaign configurationIf you change your data extension after configuring your campaign, you must open and reconfigure each Xtremepush activity within that campaign.
Use Xtremepush message events and subscription data
Once the campaign is sent on Xtremepush, campaign message events and subscription data will be sent back to Salesforce.
Campaign engagement data will be stored in the XP Message Events data extension, which updates every 10 minutes. This data extension will be automatically created with the integration.
The XP Message Events data extension will have these columns below:
| Column | Description |
|---|---|
contact_key | Identifier of the contact |
journey_id | Salesforce journey ID from where the related event data is being sent |
campaign_id | Xtremepush campaign ID from where the related event data is being received |
event_name | Message activity of the contact |
event_time_utc | Message activity timestamp |
Subscription status data will be stored in the XP Subscription Statuses data extension which updates every 10 minutes. This data extension will be automatically created with the integration.
The XP Subscription Statuses data extension will include the addressability and subscription data of the related contacts. You can read more about Xtremepush addressability and subscription data here
Use data in targetingIn order to use these data extensions (XP Message Events and XP Subscription Statuses) in your future campaigns, make sure you assign them to an attribute group from the Contact Builder in Salesforce.
Updated 4 months ago