iOS content
Engage your iPhone users with push notifications
The iOS tab allows you to design push notifications that will be sent to iPhone users.
Build your iOS push
Using content elements
You can add emojis and dynamic content to your iOS push, for both the title and the body of the message.
Click the smiley icon to display a list of emojis and click the one you want to add to your message.
Click on the user icon to add data from your user attribute fields. Type the name of the field you want to use, or select it from the presented pick list.
Click on the code icon to add content snippets. Type the name of the field you want to use, or select it from the presented pick list.
Image upload
As well as the title and the body of the message, the push notifications can also include an image. Review our best practices for push notifications.
Rich media messages in iOSIn order to be able to send push notifications with images, GIFs, and video, clients must create a service extension following the steps outlined in this guide.
Category
You can select what push category your message falls under. Start typing the category name that you want to assign, a pick list of matching names is provided, and select the one required.
Each category allows you to set up a default action and a list of buttons for your message. Push categories must be created beforehand. Read this guide for more information about push categories.
Default action
You can select the default action that will occur when the user clicks on the notification; the options available are:
- None (selected by default): opens the app.
- Open URL: to open it either inside or outside the app. Enter the URL you wish to use in the accompanying input field.
- Go to deeplink: to open a certain part of the app. Enter the app deeplink you wish to use in the accompanying input field. See our deeplinks guide for more details.
- In-app message: when added, it creates an in-app tab within the campaign. When users click on the notification, an in-app message gets triggered.
Interruption level
iOS 15 introduced Focus modes which let the user automatically filter notifications based on what they're currently doing. Focus modes will stop messages from lighting up the screen and/or making a sound when received.
It is possible to override these focus settings with interruption levels which Xtremepush can apply to your push messages. It is down to the campaign creator to do this responsibly and in accordance with the Apple guidelines.
They suggest you should "use the time Sensitive interruption level only for notifications that are relevant in the moment" and to "never use the time-sensitive interruption level to send a marketing notification". It is important that you build up trust with your users by not interrupting their set focus mode needlessly. It is possible for users to block messages which break the focus level if they do not believe the reason is valid.
The default interruption level is Active.
Full details of how each interruption level works can be seen in the table below:

Payload
A key/value payload can be added to the notification delivered to the user. You may have custom payloads available as part of your integration. Payloads are not initially visible to the user but if the push is opened, the app can access some payload values from the push message and perform some custom behaviour with them.
Preview the message
The right-hand pane will show a preview of what your message will look like on an iOS device. If you are using dynamic data, you will need to send a test message to see the data included.
Multi-language and variants
It is possible to create a multi-language campaign with new titles and messages based on the languages selected at the campaign level. It is also possible to do a split test to see which variant has a better engagement. Both options are enabled and configured from the Setup tab.
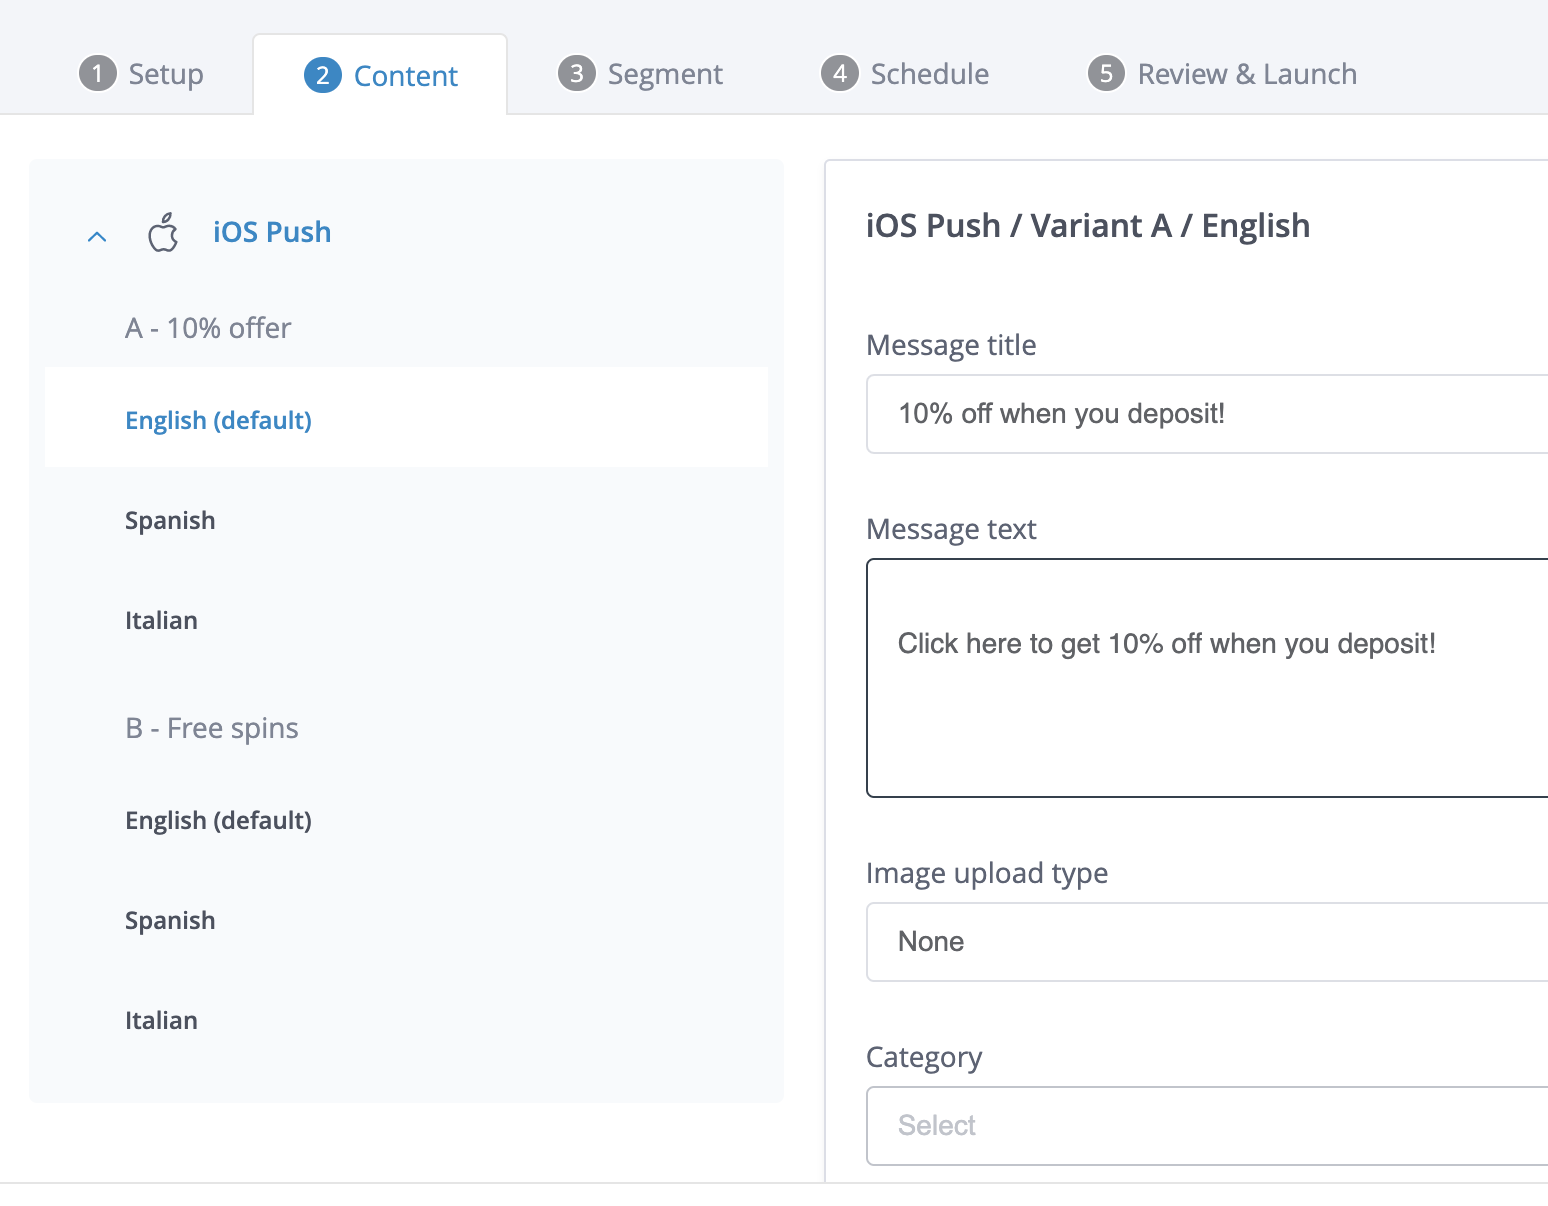
The languages you have selected, together with the variants selected are shown on the left side of the campaign. To be able to identify with which variant and language you are working, this information is shown on the top of the screen.

This example shows a multi-language campaign for English, Spanish and Italian speakers, combined with split testing. Currently, the content shown is for the English version of variant A.
Actions
The Actions button allows you to Apply a template that has been previously created from Content > Templates to a campaign and to copy the content from a specific language & variant. To copy the content, click on Copy From when you are on the variant and language where you want to apply the content. The system will show the available options to copy from.
Restrict delivery to production or sandbox appThis option used to be available on this page, it has now moved to the Segment tab.
Updated 3 months ago