Schedule campaign
Manage when your campaign will be sent
The Schedule tab allows you to control when you would like your campaign to be sent.

This tab will look slightly different depending on your campaign trigger and the type of campaign. This is covered in detail in this guide.
Schedule
Send now
Use this option if you have a campaign you want to send just once to a segment of users or to all your users at launch. This is the default selection.
Send later
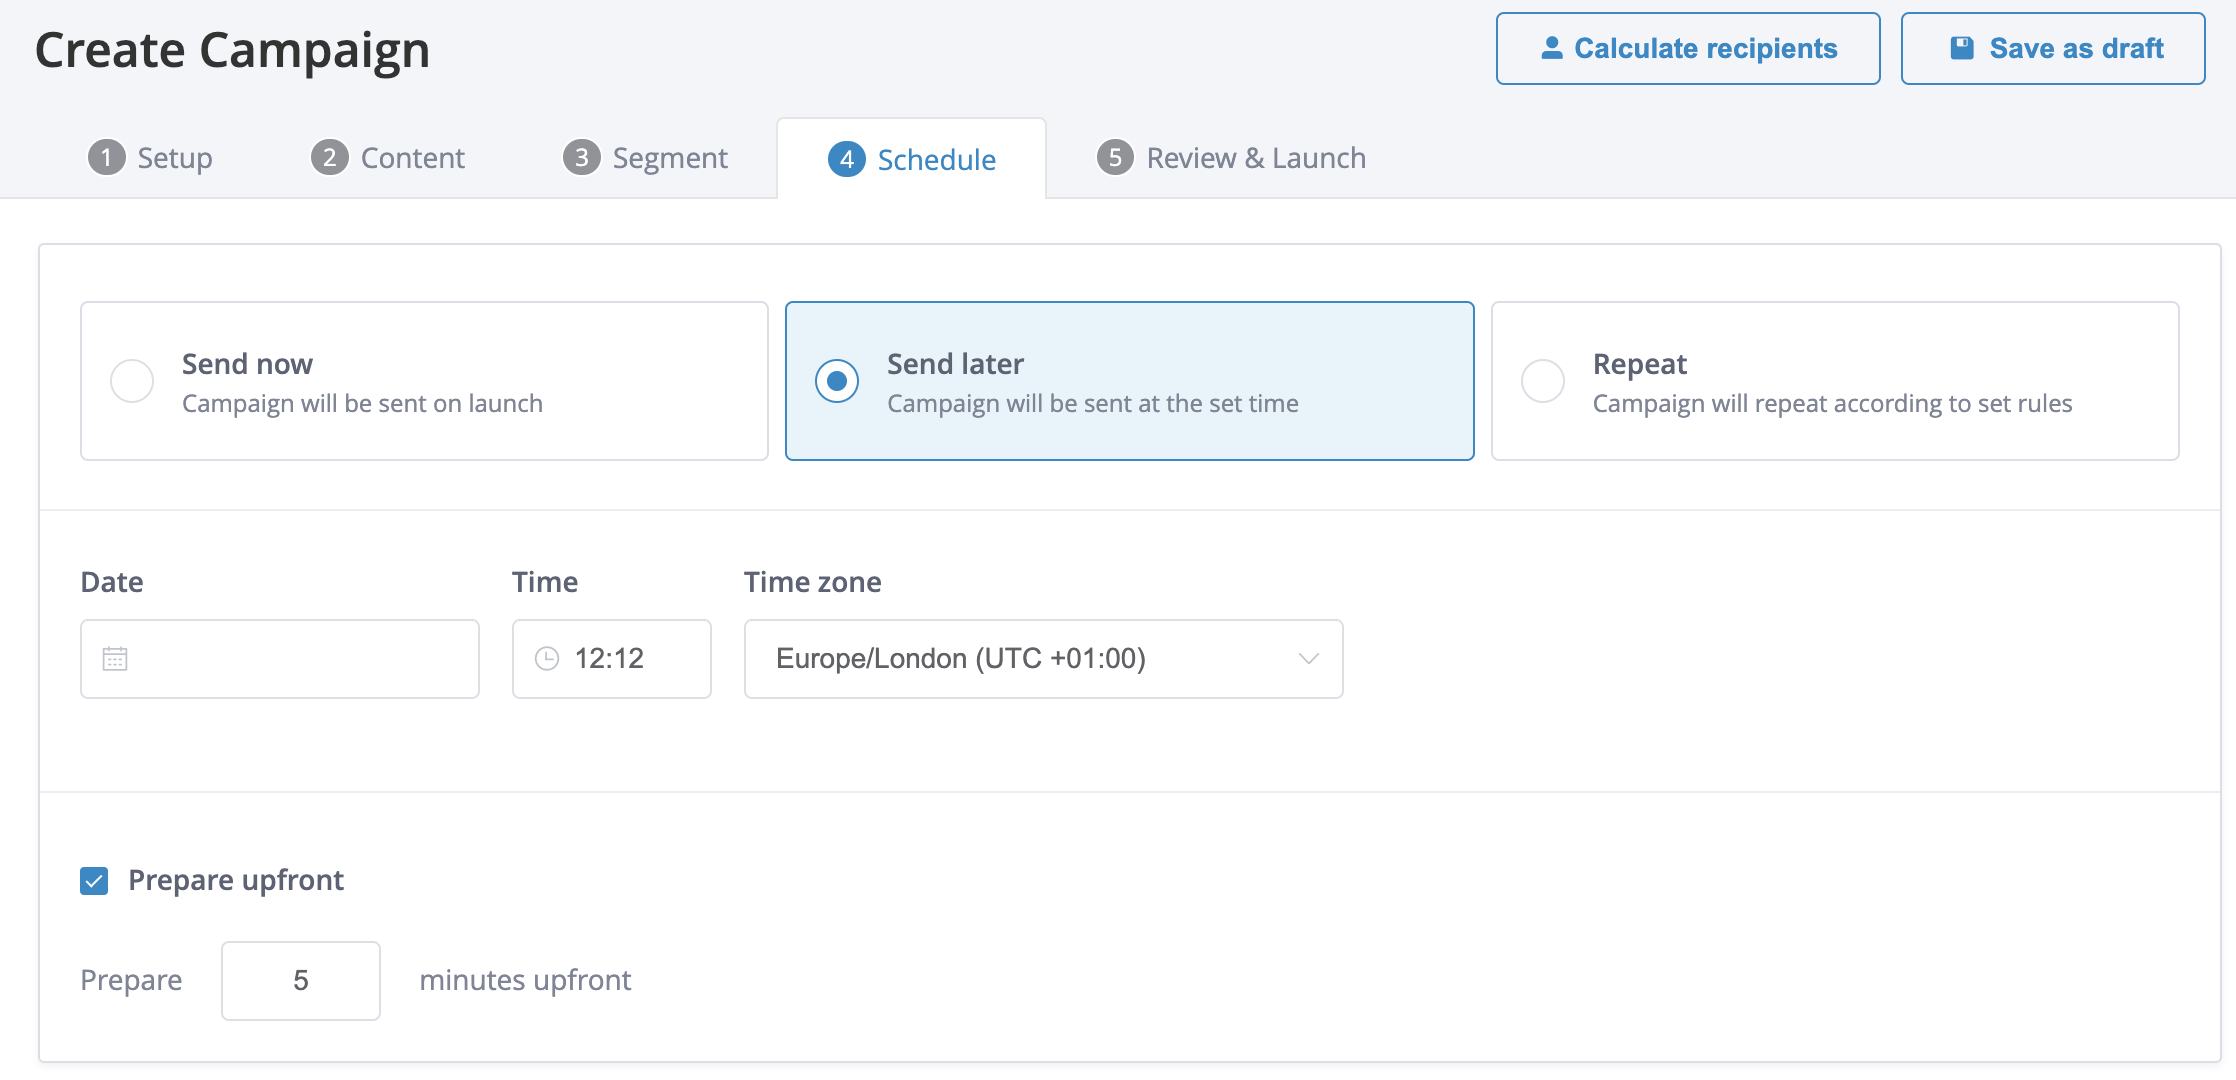
This option allows sending a message in the future. When you select this option you will be presented with a number of fields to complete:
- Date: select a calendar date to send the campaign.
- Time: select hour and minute for your campaign to be sent.
- Time zone: select the time zone that will be taken into consideration to send the campaign.
Repeat
With this option, you can set up a campaign to send daily or on certain days of the week or monthly. This option is useful when new users enter a segment. A classic example is automating a message to users who haven't opened the app in a certain date range, for instance, in the last 14 days.
Field descriptions:
- Starts: Set the day, time and time zone for your campaign
- Custom Schedule:
- Repeat every weeks or months. Set the desired frequency (week(s) or month(s)).
- Repeat on: Days of the week to send on. Select the weekdays on which your campaign will be sent, based on the chosen frequency.
- Ends: controls when the campaign ends.
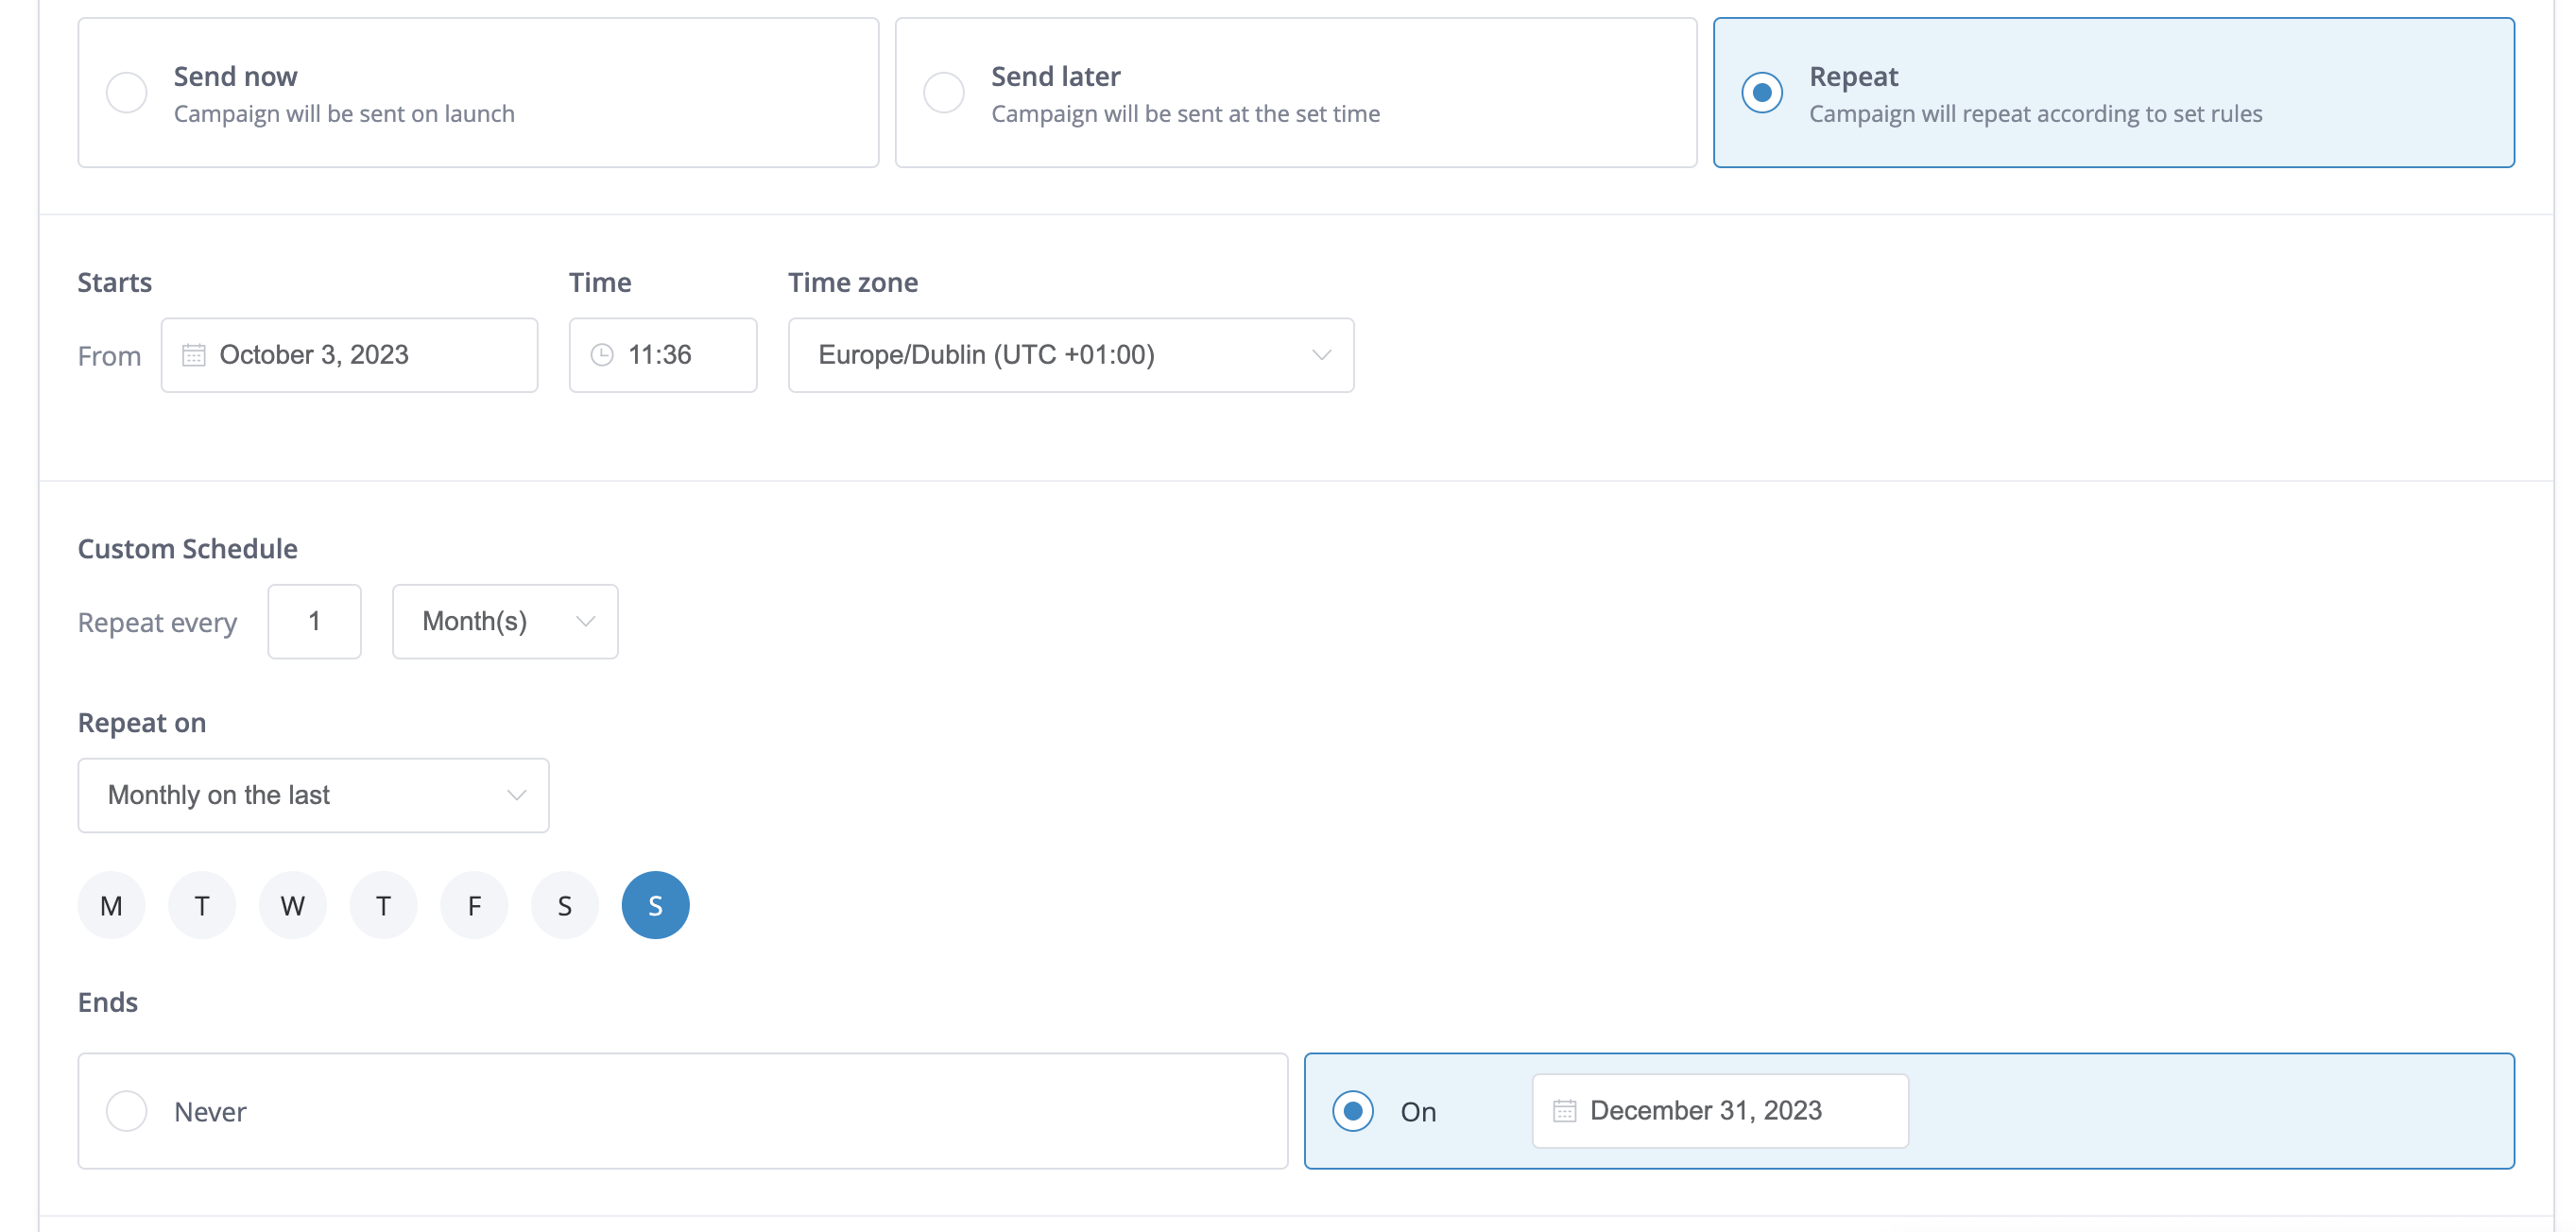
If you choose Month(s) as the desired frequency, the system allows you to select either Monthly on the first or Monthly on the last, along with the specific weekday. This way, you can schedule recurring monthly campaigns to be sent on the chosen weekday of the month, for example, the last Sunday of each month.

The example shows a repeating campaign that runs every last Sunday of the month at 11:36 UTC+1 from the 3rd of October of 2023 until the 31st of December 2023.
Recurring Frequency Options
This option in the Repeat section of the Schedule tab provide enhanced control over user interactions in workflow journeys. These settings allow you to manage how often users can re-enter a journey:
- Block Re-entry During Active Journey
Enable this toggle to prevent profiles from re-entering the journey while they are still actively participating. Users can only re-enter after completing the current journey. - Run Only Once for a Profile
When this toggle is enabled, profiles can enter the journey only once, regardless of its recurrence settings.
These options apply exclusively to workflow journeys configured with the Repeat scheduling option, offering precise control over user engagement.
Prepare upfront
Check this box if you want to prepare your campaign before sending it. This is useful for larger campaign sends as it pre-calculates the segment that is being used in the campaign, which in turn enables the campaign to be ready to send at the moment the campaign is due to go out.
Send by users' timezone
By default, your notifications will be delivered at the local time zone you have configured when you created your project. However, you can use a different time zone or your users' time zone. If you schedule your campaign by your users' time zone, if for example, 50% of your users are in New York City and 50% are in London and your campaign is scheduled to send at 1 pm, then your notification will be delivered at 1 pm GMT to your London users and at 1pm EST to your NYC users.
Send by user's timezoneIf you configure the campaign to be sent by users' time zone option, only users that have a time zone set against their profiles will receive the campaign.
Offline users
For some campaign types (Android, iOS push and web push), if users are offline when a notification is initially sent it is possible to send the notification when they are back online.
You can set:
- Retry for: The default configuration for the retry period (4 weeks) is based on Apple and Firebase's defaults, which means that the user will be able to receive the notification when/if they come back online within 4 weeks. A custom time to retry for—such as 1 day, 12 hours, 5 minutes—can be configured.
- Retry until: A time and date after which the notification expires and will not be sent. This is great for scheduled notifications related to events that run at a specific time. It considers the project's timezone.
- Do not retry: Not recommended for most cases. See more information below:
Retry periodIt's best practice to set a retry time to the longest period that is relevant for the campaign. Even for time-critical content, such as breaking news stories, it's more appropriate to set a 10-minute retry period than setting don't retry.

This example shows the default option (the system will keep on trying sending the campaign during 4 weeks).
Retry period cannot be altered after sendThe retry period cannot be altered after send, as this information is sent to the push gateway at the time the campaign is launched. The setting is used by the push gateway to understand how long it should keep trying to reach offline devices.
Inbox message persistence
When a message is being placed in the inbox, on the Schedule tab you can set how long that message will remain in the inbox. Thus, this option is only available for inbox campaigns.

You can set:
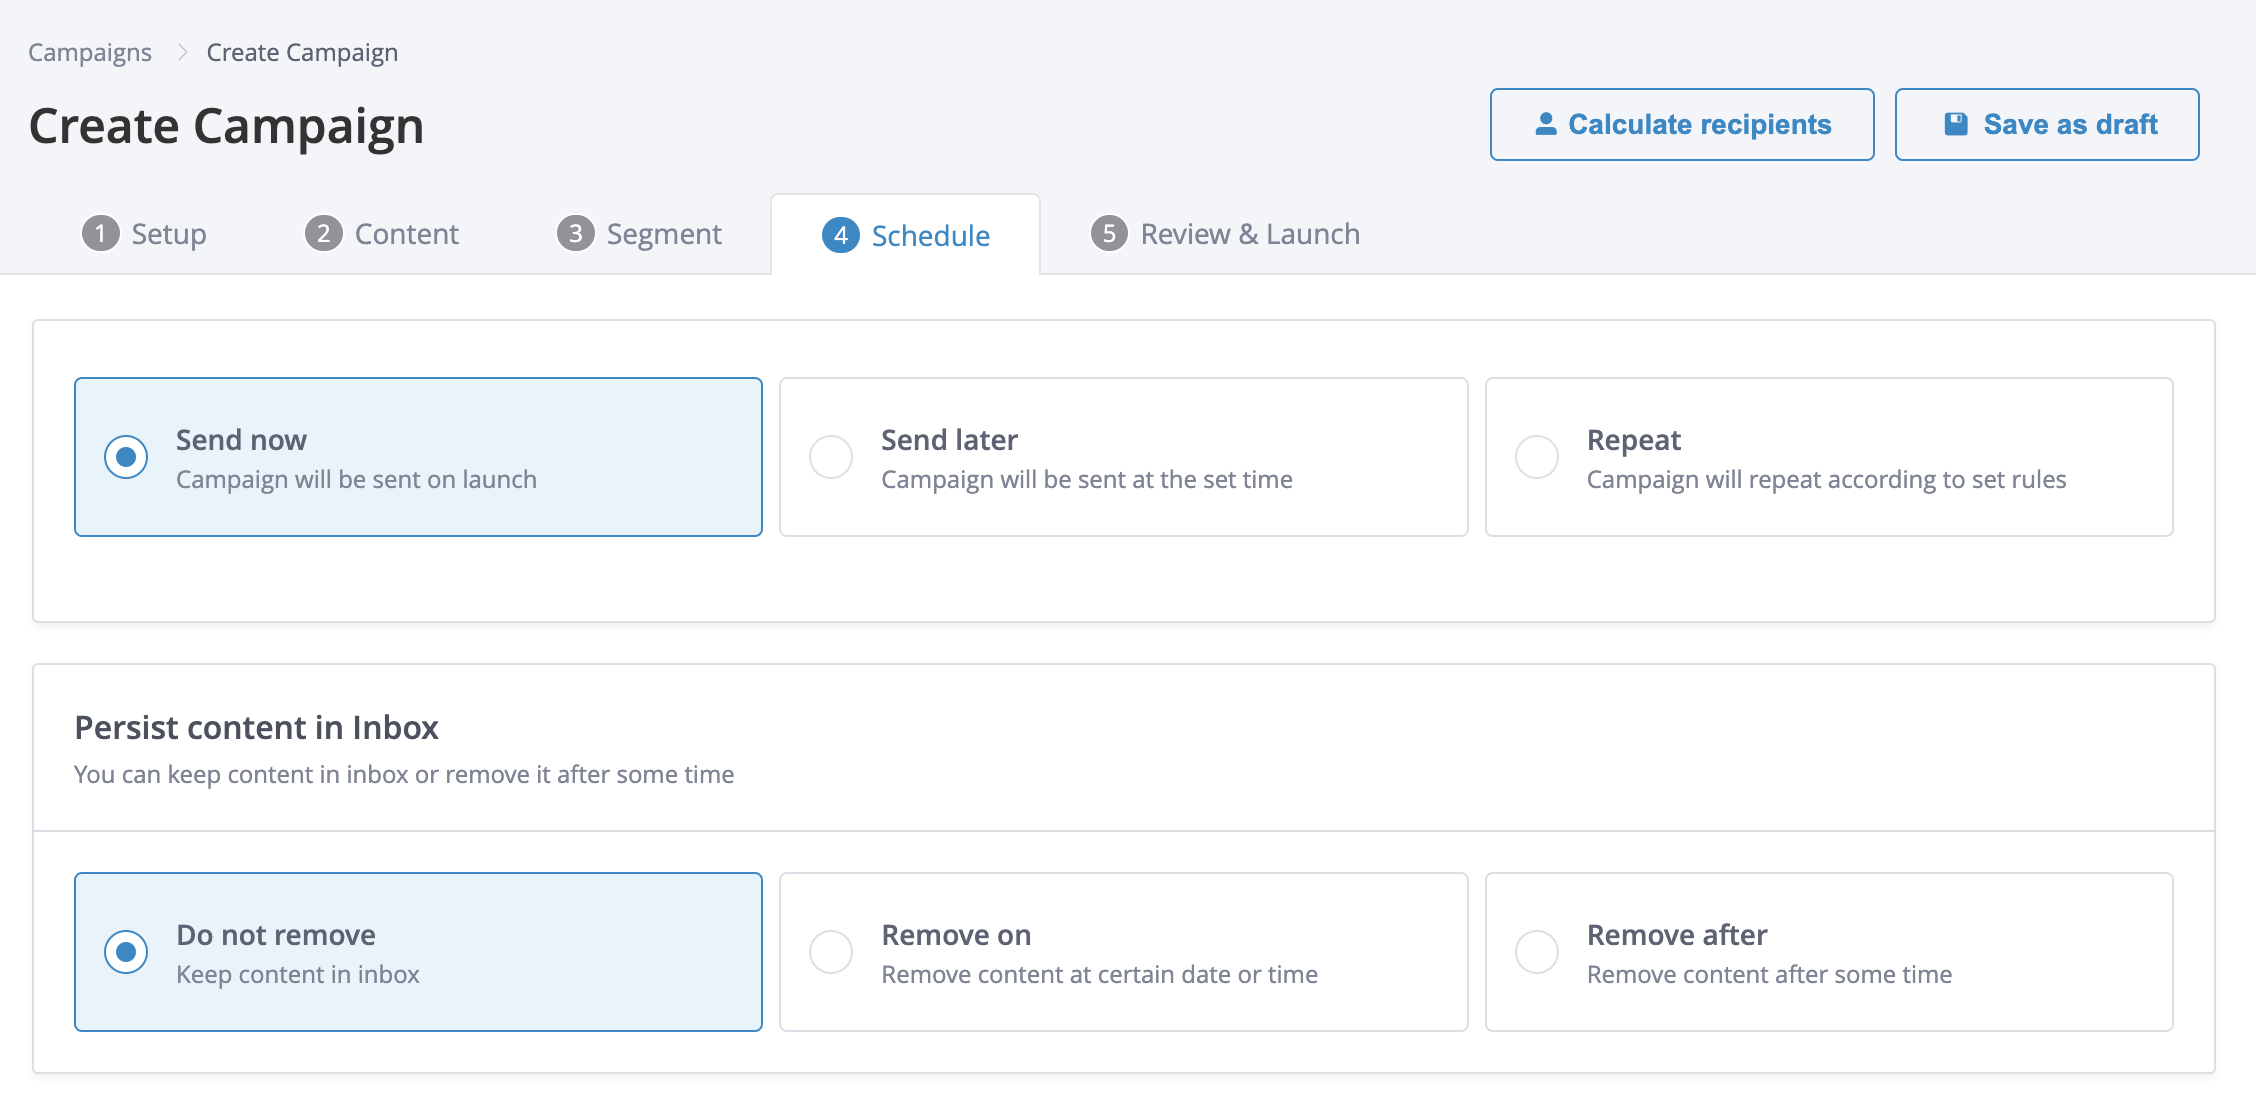
- Do not remove: enabled by default. Suitable when your goal is to persist a message in the inbox and have it naturally move down over time.
- Remove on: a time and date at which the message will be removed from the inbox. This is great for content related to events that run at, or for a specific time for example a limited time offer that runs for a month.
- Remove after: you can indicate the time after which you want the message to be removed, such as 7 days, 12 hours, etc. This is the right choice if your message is repeating or triggered and should only last for a certain amount of time, for example, a limited time offer triggered by entering a location.
Not possible to edit the campaign after it has been sentOnce an inbox message has been sent it cannot be updated. This includes the content and the persistence settings. However, you can expire an inbox messages manually from the inbox feed.
Set up delivery window
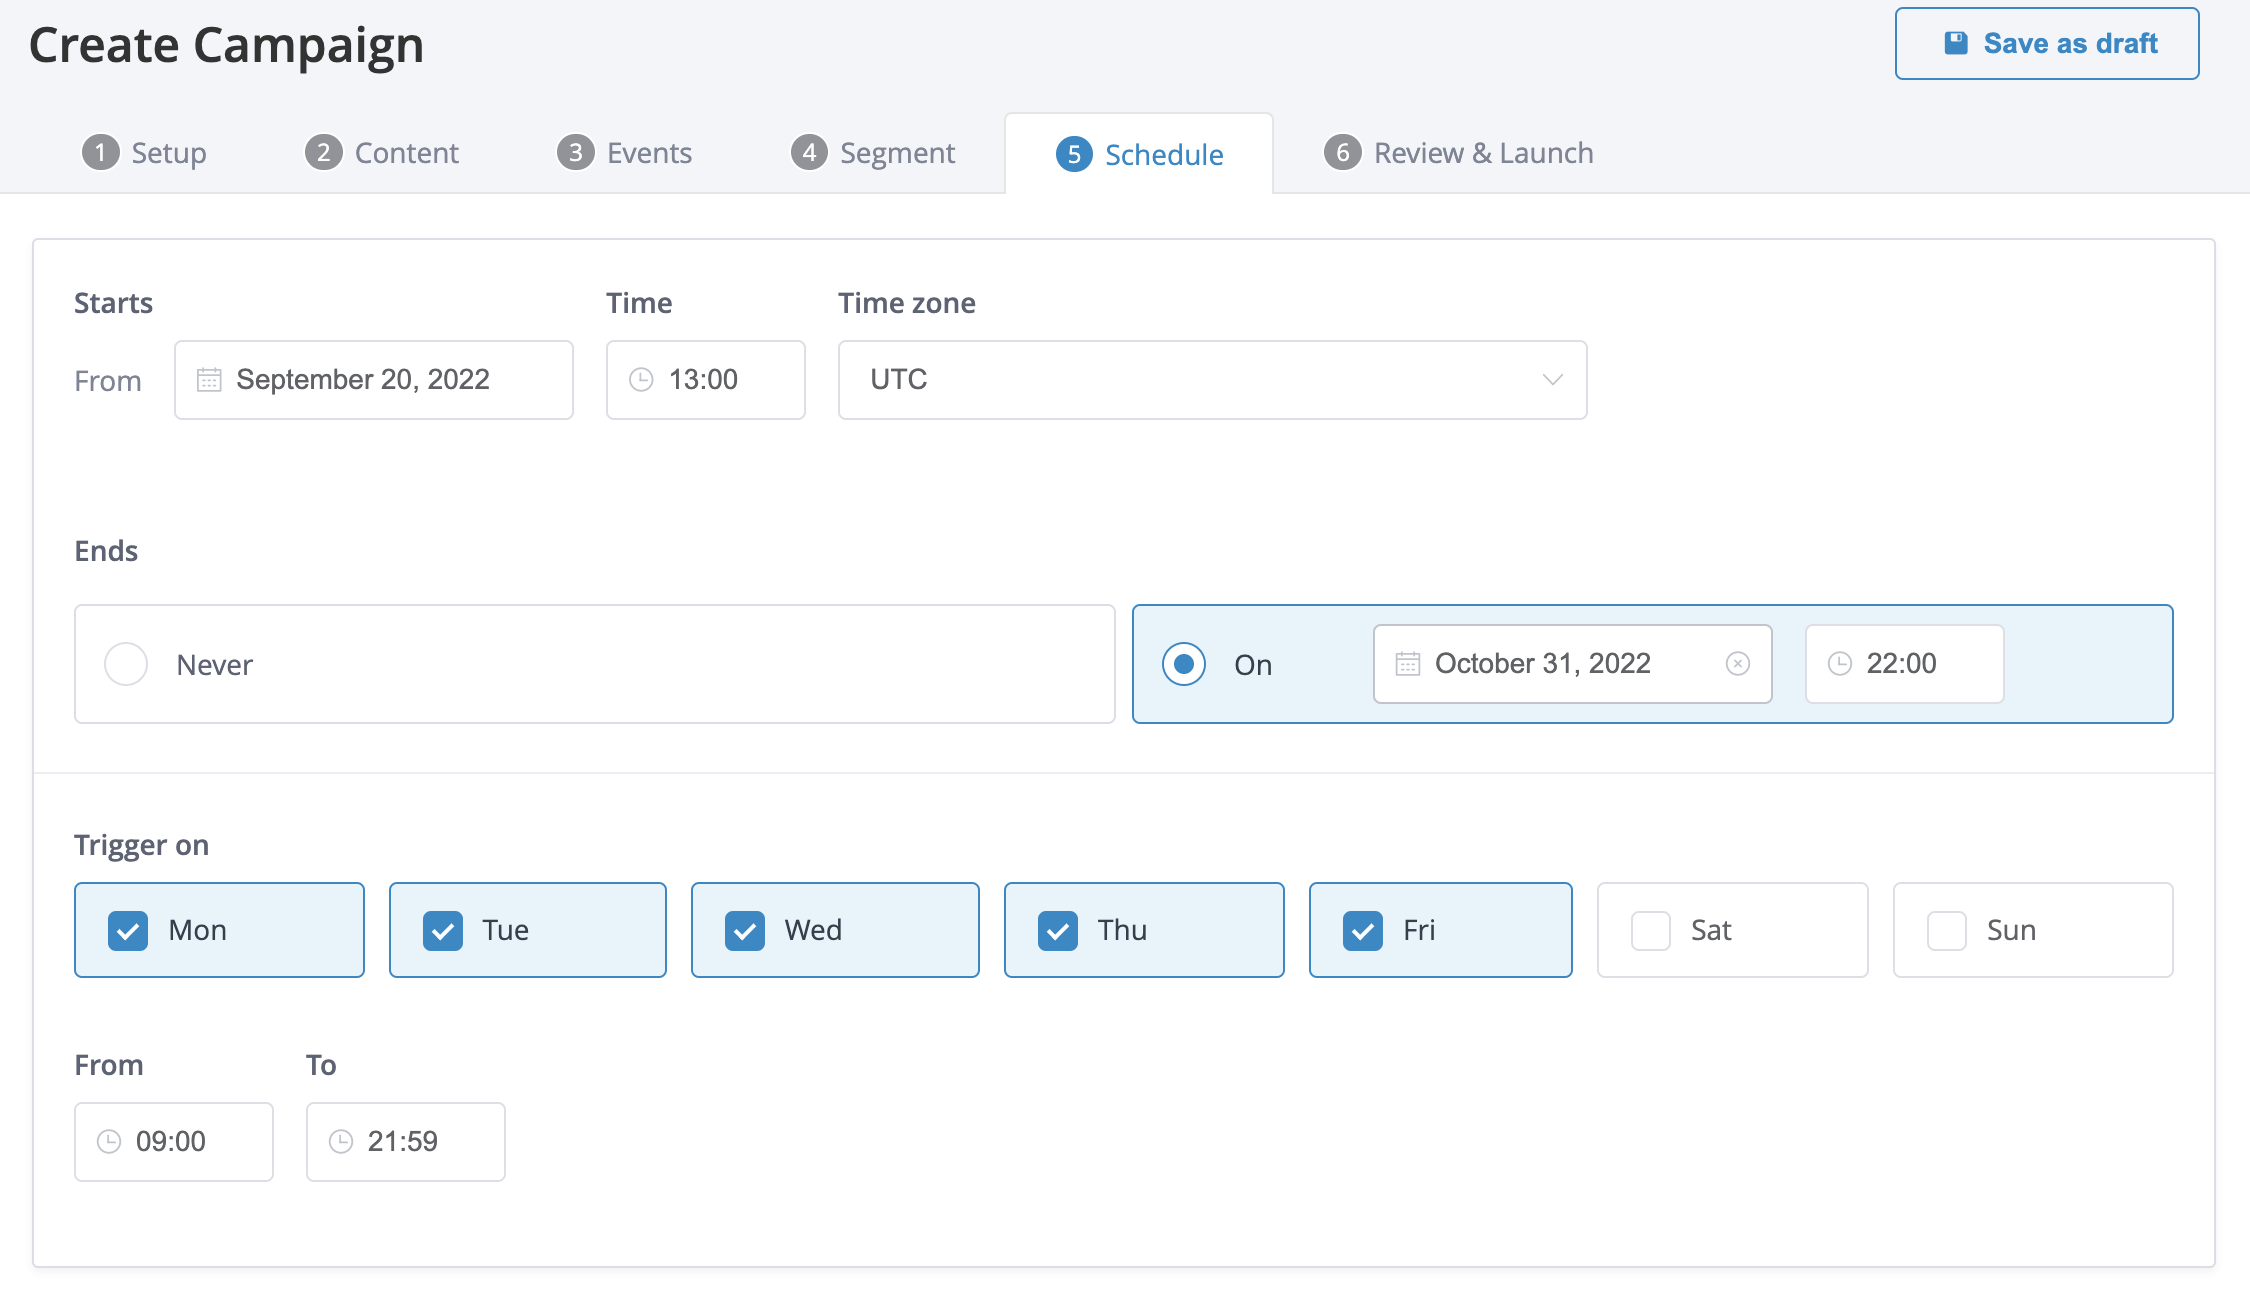
For campaigns triggered externally (API-triggered, event-triggered or location-triggered campaigns), the Schedule tab can limit the period during which the campaign can be sent. By default, no limits will be set, but it is possible to:
- Allow or disallow specific days of the week
- Set up the hours of the days where triggering campaigns is allowed, in a specific timezone
- Date and time when the campaign starts
- Date and time when the campaign stops

In this example, it is only possible to trigger the on-site campaign from Monday to Friday, from 9:00 until 21:59 (UTC).
Third-party integrations
Some third-party integrations such as Optimove allow users to set the stop time of the campaign from Xtremepush. See our Optimove guide for more information.
Updated 4 months ago