Notifications log
A powerful tool to troubleshoot campaign issues
Xtremepush keeps a record of all the outbound campaigns that you send in the notifications log. You can access the notifications log for all your activity or for a specific campaign. You do so respectively by navigating to Campaigns > Notifications Log or Campaigns > Campaigns > Options menu on the right of the desired campaign > Log.
For best results, if you do many daily sends it's recommended to access the Notifications log for specific campaigns.
Anatomy of the notifications log
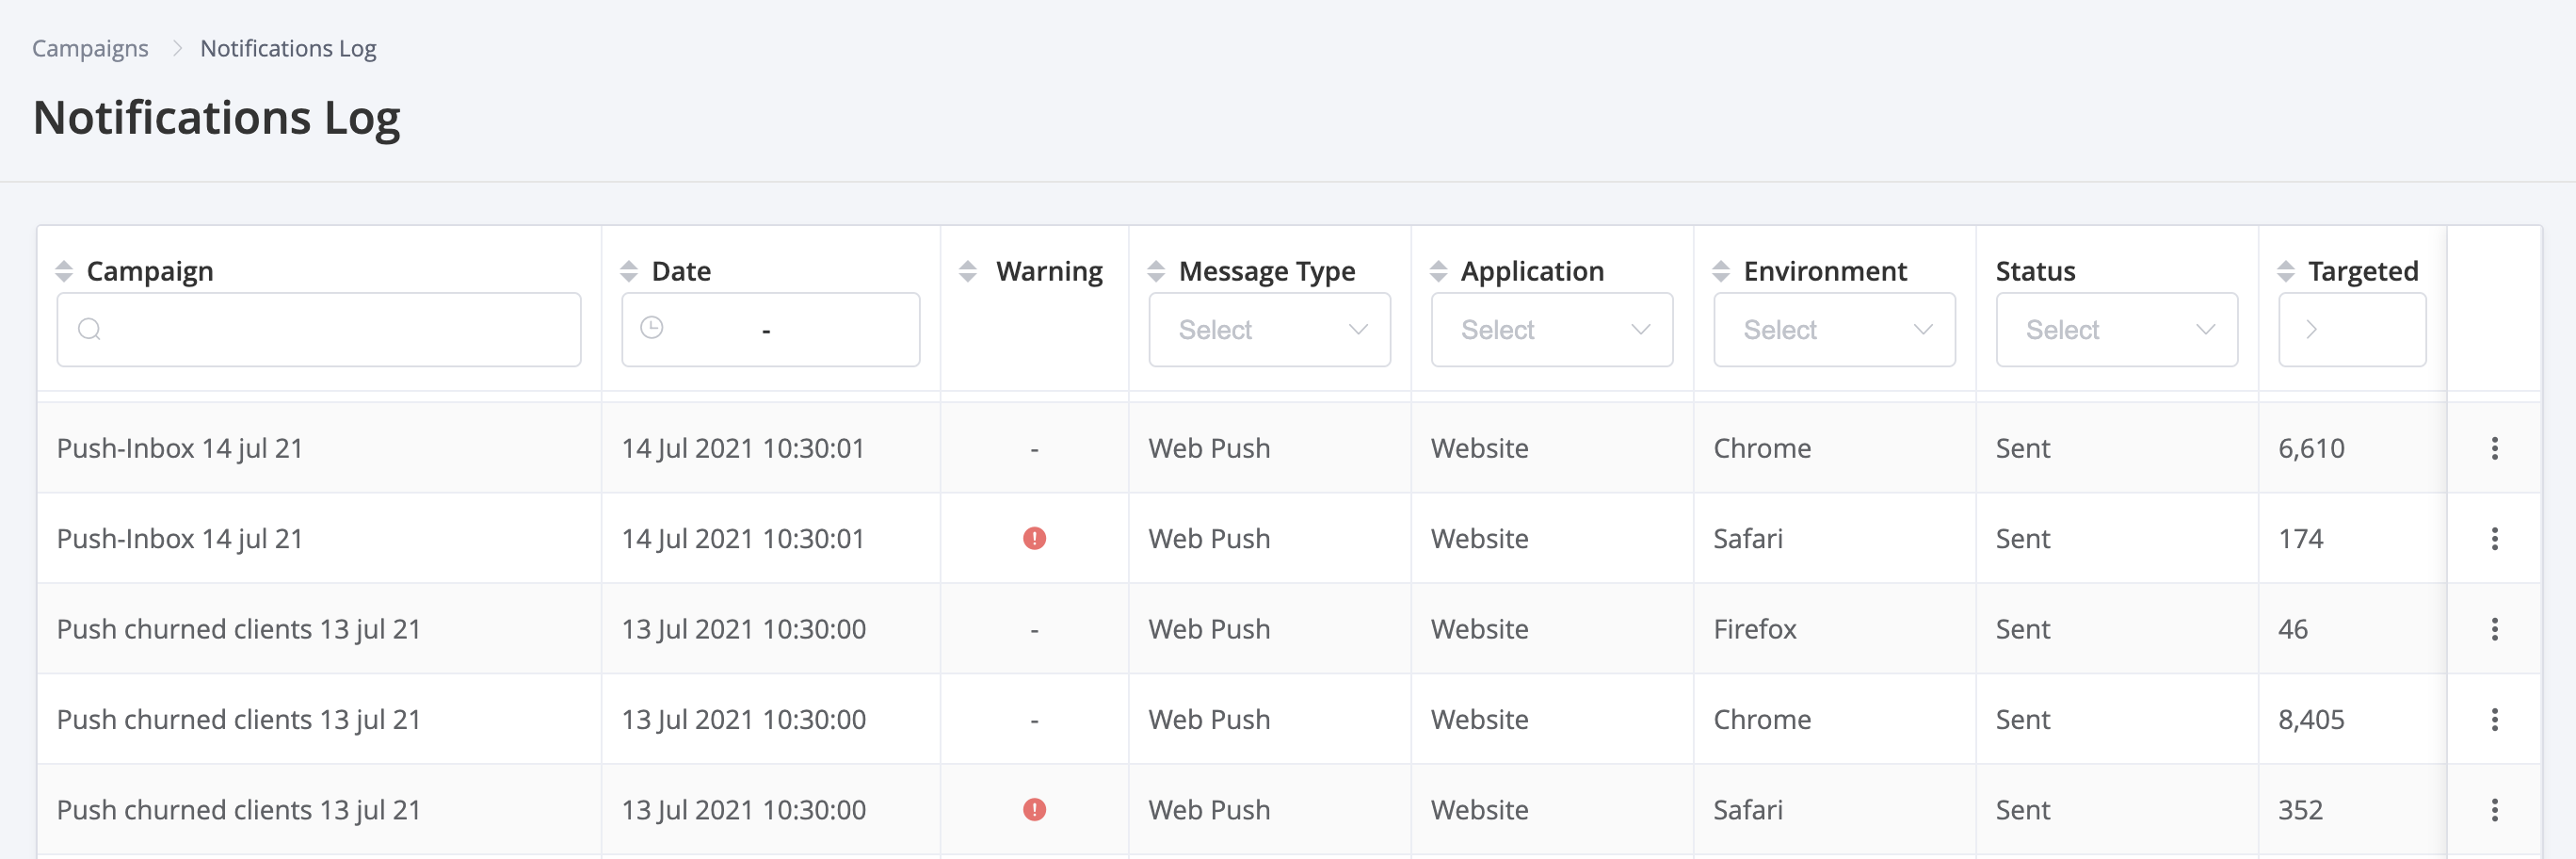
This page contains several columns, by which you can search and sort. To fit all of them in a single page, some of them are hidden, and you'll need to scroll to the right to reveal them.
There is a row for each individual send action, so there might be more than one row for a specific campaign. For instance, if you create an API triggered email campaign to send transactional emails, you will see a line item for each batch of sends that you execute from your backend.
Columns:
- Campaign: Shows the campaign title.
- Date: Date in which this line item was sent.
- Warning: Important warnings are displayed here in red and orange. Click on the warning to review the details for this specific line item. This can also be achieved by clicking on the options menu:fa-ellipsis-v: > Details). The warning will be displayed on the top of this page.
- Message type: shows the campaign type, such as web push, email, SMS, iOS push, Android push, etc. Workflow entries indicate the action by which a user profile enters a workflow (also known as multi-stage journey).
- Application: Refers to the mobile or web app through which the message is delivered. By default, messages will go through all the available apps for that channel. If you want to just target some applications, you can use the Target application option from the segment tab when configuring each campaign.
- Environment: The environment for this specific line item (only applicable for web push and mobile push). For web push this will be the targeted browser. For Android this will always be Production and for iOS it can be Production or Sandbox. These options are configured from the web push and iOS push tabs respectively.
- Status: Whether the message is sent, processing, preparing, scheduled, cancelled. etc.
- Targeted: number of targeted users depending on the segmentation of the campaign

Default view of notifications log.
If you scroll to the right you will be able to review additionally:
- Sent: Number of sent messages for this specific line item.
- Opened: Number of opened messages for this specific line item.
- Processing: will only show more than 0 if the message is still processing.

View of the Notifications log page when you scroll to the right.
Finally, the options menu on the right gives you two options: details (to review each line item with more granular detail) and download , to export a CSV file containing all user profiles which have been targeted for this specific line item.
Troubleshooting tipsIf the number of targeted messages is 0, then there was some issue with the segmentation of the campaign. If this is greater than 0, but the number of sent messages is 0, then go into the Details page to review errors for that send.
Notification details page
When you click on Details, this page is displayed. It is divided into three areas:
Main area
On the left, you can see the campaign title, channel (which includes the comms channel, the app name and the environment), send date for this specific notification and the expiration date.
On the right you will be able to review the raw details of the message.
Individual messages
This section shows one line item per each recipient for the campaign (the total number of individual messages will match the number of targeted messages that you saw in the main notifications log page) and the status for each recipient. For each recipient, you will be able to review the profile ID and the device ID.
The params field shows personalisation params used for this campaign. Click on expand to review these params.

In this example you can see some personalisation params for a sport's related campaign.
The next field shows the status of the campaign:
- Failed: The message couldn't be delivered to this recipient. Review the error field for more details
- Sent: If delivery receipts are not available and there have been no failures, the message will show as sent by default.
- Delivered: This message arrived its intended destination. Only available for some channels. For mobile push, this is a paid feature part of the enterprise push package.
- Control Group: this recipient hasn't been sent a message as they are the control group of a campaign with A/B testing.
- Bounced: applicable only for email campaigns. The bounced reason will be displayed in the error field.
Finally, you can check for errors and review whether the message has been opened and the open date and time.
Interactions
This section shows only the recipients that have interacted with the campaign (opening, clicking or closing the message), the specific button with which the recipient has interacted (for campaigns such as on-site, in-app messages, web or mobile push) and the date of the first interaction.
Updated 3 months ago