Location geofences and iBeacons
To view existing locations, navigate to Data > Data Manager > Locations. This page displays a list of all locations within a project.
The table can be filtered using the search fields at the top. The table header's Settings icon can be used to display extra columns to search.
Add a location
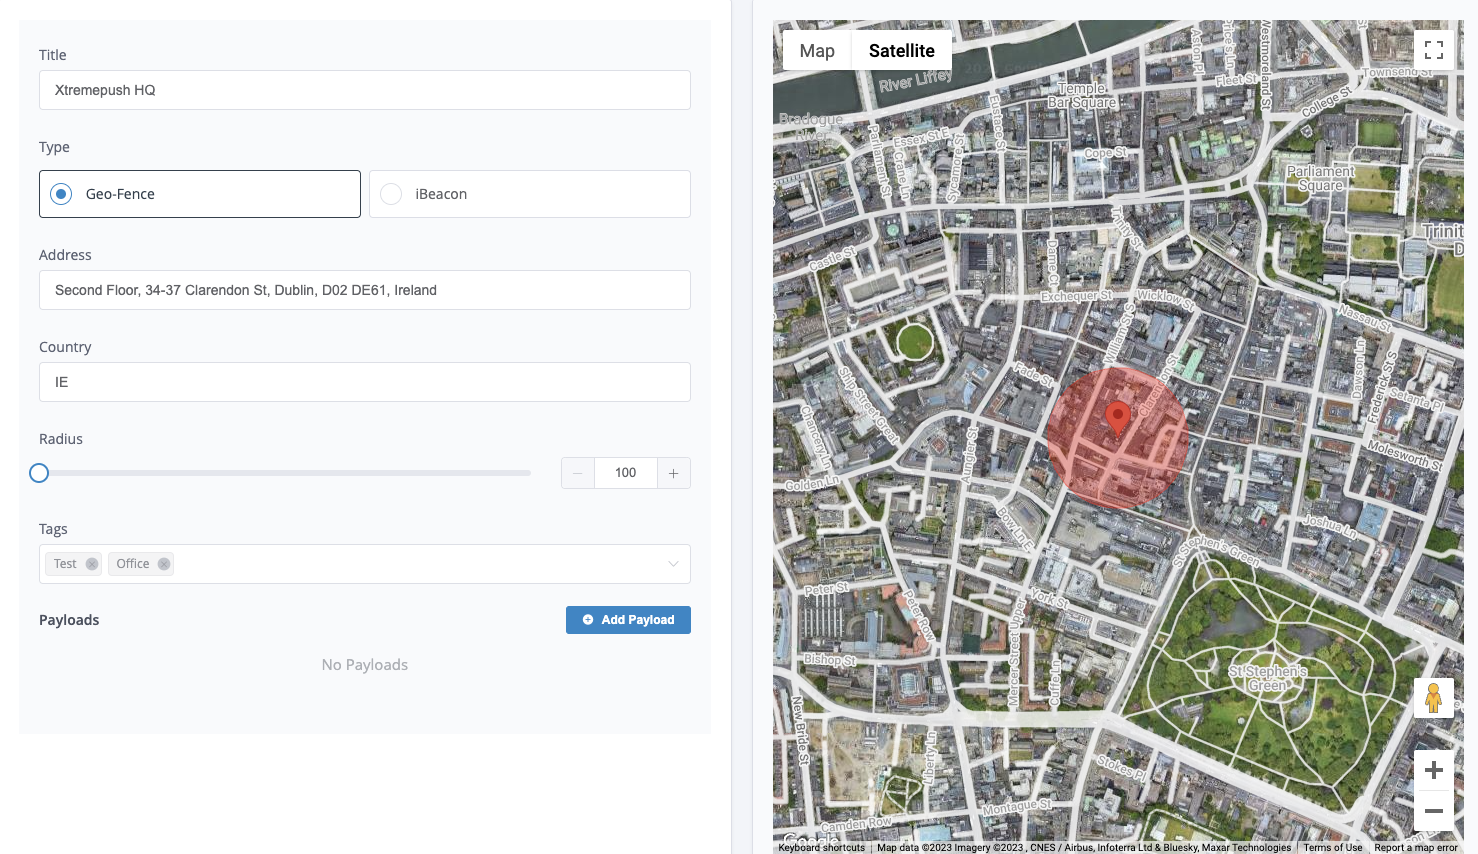
Navigate to Data > Data Manager > Locations and click Create Location. Start by choosing whether this location will be a geofence or iBeacon, and then search for a location by typing its name or address under Address. Select one of the search results to move the map to that location. You can adjust the precise location by moving the map pointer. The minimum size supported is 100m.

The geofence radius can be altered by dragging the slider or altering the number in metres. The covered area is displayed on the map.
The location title will be auto-generated from the address but can be altered to be easier to recognise later.
Additionally, you can add tags to a location. For example, if you have retail locations across 50 states and you have 10 stores in each state, you can tag each store in NYC with an NYC tag to quickly search and select your NYC locations when needed.
For iBeacons, the UUID has to be first configured for the project.
Click the Create Location button to save the new location.
Set up iBeacon UUIDs
To enable Beacon services via the platform you must add the list of Beacon UUIDs you intend to use across your beacon fleet.
To do this navigate to Data > Data Manager > Locations and click the iBeacon UUIDs button.
Click Create iBeacon UUID to add a new UUID. Add your UUID and save. You can now add iBeacons using this UUID when adding locations.
Updated 4 months ago