Chatbots & social messaging quick start guide
It is possible to connect with customers through social messaging apps such as Facebook and also to integrate chatbots.
Enable webhook channel
The webhooks channel is required in order to enable social messaging. If you are not familiar with this channel, check our webhooks quick start guide. Then you will need an account, credentials and API documentation for the service you want to send messages with. You can build your social messaging channel using a webhook template, mapped to a social messaging providers' API. In the next section, we detail sample social messaging channels built using different providers.
Create a Facebook messaging channel
We have documented Facebook Messenger as a sample social messaging provider that can be integrated with the Xtremepush platform.
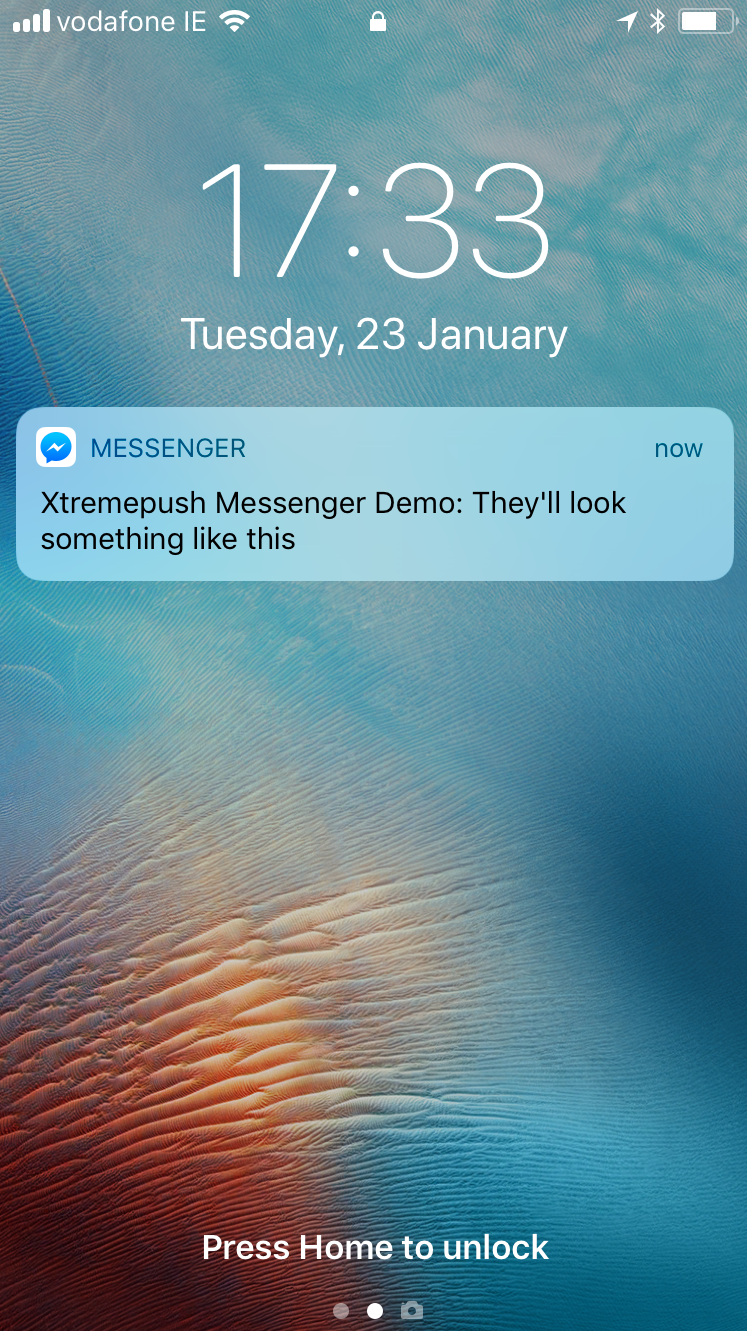
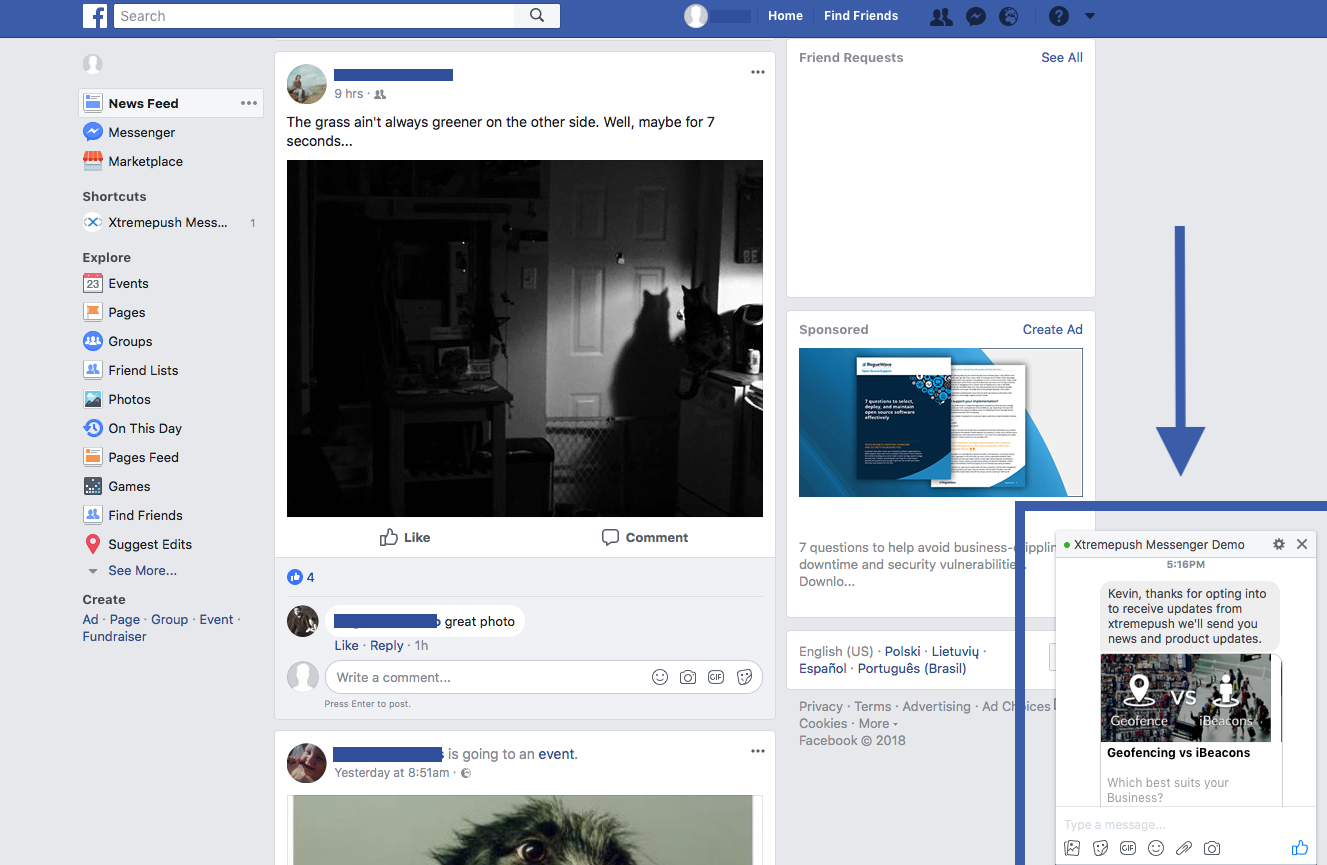
You can see both a simple text message and an example of a rich message with images and CTAs in the examples below.

Simple text message view in iOS lock screen.

Web view of Facebook rich message
If you want to use another provider you can simply build a channel template based on that provider's API for sending messages similar to the examples above. If you need help integrating with your service provider, please contact your account manager.
Once your channel is set up you now need to opt-in some users. The process for this varies based on the provider, but in general, you will need to embed a social plug-in on your site or in your app so you can opt-in users and you will need to capture opt-in details and send them to Xtremepush. Ideally, your messenger should be powered by a chatbot that would automate conversations and provide an intuitive UX. This allows a single integration point for Xtremepush even if you distribute your chatbot in multiple messaging channels.
Need a chatbot?Talk to your account manager today about Xtremepush's chatbot services or contact us.
If you are not a customer please request a demo.
Add a social messaging plug-in
We will use Facebook's Messenger again as an example for opting-in users. Review the Facebook messenger documentation for embedding a plug-in and opting in users. You can find these in the discovery and re-engagement section.
For this example, we will work with the send to messenger plugin:
It is possible to work with other plugins like the Facebook customer chat plugin.
Follow the Facebook Messenger docs for embedding the send to messenger plugin on your site to opt-in users for messaging. As a pre-requisite, you will also need to have Xtremepush's SDK on your website. See details on deploying our web SDK here.
You will need to modify the plugin's embed code to allow syncing of opted-in users to Xtremepush. To be able to connect the user to Xtremepush and enable you to message them on Facebook Messenger via your Facebook messenger channel you need to grab the Xtremepush ID and set the plugin's data-ref attribute to be equal to the Xtremepush ID.
See the following snippet where we use an Xtremepush SDK method to get the ID. Setting this attribute is key as once set it means the Xtremepush ID will be available in your chatbot when the user opts in.
var fbPluginElements = document.querySelectorAll(".fb-send-to-messenger[page_id='XXXXXXXXXXX']");
 if (fbPluginElements) {
 for (i = 0; i < fbPluginElements.length; i++) {
 fbPluginElements[i].setAttribute('data-ref', xtremepush('get','device_info').id );
 }
 }
Once the user's ID is pushed to your chatbot as part of the opt-in, then you can easily sync your user with the chatbot. The full example of JavaScript associated with the Facebook SDK and send to messenger opt-in is below:
window.fbMessengerPlugins = window.fbMessengerPlugins || {
  init: function() {
    FB.init({
      appId: "XXXXXXXXXXXXXXXX",
      xfbml: true,
      version: "v2.10"
    });

    FB.Event.subscribe('send_to_messenger', function(e) {
      // callback for events triggered by the plugin
      console.log("send_to_messenger event");
      console.log(e);

      if (e.event == 'rendered') {
        console.log("Plugin was rendered");
      } else if (e.event == 'opt_in') {
        var checkboxState = e.state;
        console.log("Checkbox state: " + checkboxState);
        if (checkboxState == 'checked') {
          window.confirmOptIn();
        } else if (checkboxState == 'unchecked') {}
        console.log(FB.getUserID());
      } else if (e.event == 'not_you') {
        console.log("User clicked 'not you'");
      } else if (e.event == 'hidden') {
        console.log("Plugin was hidden");
      }
    });
  },
  callable: []
};
window.fbMessengerPlugins.callable.push(function() {


  var fbPluginElements = document.querySelectorAll(".fb-send-to-messenger[page_id='XXXXXXXXXXXXXXXX']");
  if (fbPluginElements) {
    for (i = 0; i < fbPluginElements.length; i++) {
      fbPluginElements[i].setAttribute('data-ref', xtremepush('get', 'device_info').id);
    }
  }
});
window.fbAsyncInit = window.fbAsyncInit || function() {
  window.fbMessengerPlugins.callable.forEach(function(item) {
    item();
  });
  window.fbMessengerPlugins.init();
};
setTimeout(function() {
  (function(d, s, id) {
    var js, fjs = d.getElementsByTagName(s)[0];
    if (d.getElementById(id)) {
      return;
    }
    js = d.createElement(s);
    js.id = id;
    js.src = "//connect.facebook.net/en_US/sdk.js";
    fjs.parentNode.insertBefore(js, fjs);
  }(document, 'script', 'facebook-jssdk'));
}, 0);
Integrate Xtremepush with your chatbot to opt-in users
We have created a sample bot to demonstrate how you can integrate Xtremepush with your bot. This bot is based on the sample bot in the facebook messenger quick start guide. You will see in the Facebook docs that one option is to remix the Facebook Messenger sample bot on Glitch. This means you do not need a server to deploy your sample bot to, as Glitch will provide a public URL served over HTTPS for your bot. We have modified the Facebook sample to include an integration with Xtremepush. To create your own version of this bot on Glitch, do the following:
- Open our [starter webhook project on Glitch]:
This will allow you to set up the standard Facebook demo bot as per their docs but with Xtremepush integrated out of the box. The modified bot has the following change to support integration with Xtremepush.
In addition to setting the credential required to connect your bot to Facebook messenger in the .env file you need to:
- Set
XP_ACCESS_TOKENin the.envfile using the app token from App Settings > General Settings in your project.
The Xtremepush integrated bot uses the ID passed back from the opt-in to send a fb_messenger_id to the Xtremepush platform. This is the ID used to target recipients when creating channels as described in section 2 above.
In the bot.js there is a simple wrapper function around the Xtremepush external API method for syncing attributes:
function sendXPAttribute(xpID, attributeText, attributeValue) {
  var postData = {
    apptoken: process.env.XP_ACCESS_TOKEN ,
    device_id: xpID,
    tag: attributeText,
    value: attributeValue
  };

  callXPPostDataAPI(postData);
}


function callXPPostDataAPI(jsonData) {
  request({
    uri: 'https://external-api.xtremepush.com/api/external/hit/tag',
    method: 'POST',
    json: jsonData

  }, function (error, response, body) {
    if (!error && response.statusCode == 200) {
      console.log("Successfully registered recipient with xtremepush");
    } else {
      console.error("Unable to register.");
      console.error(response);
      console.error(error);
    }
  });
}
This can use the Xtremepush ID to target an attribute update for a user, and it is used in this way in a method in the bot that can initialise a user on Xtremepush after an opt-in event. In this example, we also use the Facebook graph API to retrieve a few additional user params and we sync those with Xtremepush along with the messenger ID:
function initialiseProfile(PSID, xpID) {
  request({
    uri: 'https://graph.facebook.com/v2.6/' + PSID,
    qs: { access_token: process.env.PAGE_ACCESS_TOKEN },
    method: 'GET',
    json: {"fields":"first_name, profile_pic, gender, is_payment_enabled"}

  }, function (error, response, body) {
    if (!error && response.statusCode == 200) {
      var first_name = body.first_name;
      var last_name = body.last_name;
      var gender = body.gender;
      var profile_pic = body.profile_pic;

      sendXPAttribute(xpID, "fb_messenger_id", PSID);
      sendXPAttribute(xpID, "first_name", first_name);
      setTimeout(function() {sendXPAttribute(xpID, "last_name", last_name)},10000);
      setTimeout(function() {sendXPAttribute(xpID, "gender", gender)},20000);
      setTimeout(function() {sendXPAttribute(xpID, "profile_pic", profile_pic)},30000);

      sendTextMessage(PSID, first_name + ", thanks for opting into to receive updates from xtremepush we'll send you news and product updates." );
      typingToggle(PSID, "typing_on");
      setTimeout(function() {sendGenericMessage(PSID)},10000);
      setTimeout(function() {sendTextMessage(PSID, "They'll look something like this")},20000);
      setTimeout(function() {typingToggle(PSID, "typing_off")}, 30000);

      } else {
      sendXPAttribute(xpID, "fb_messenger_id", PSID);
      sendTextMessage(PSID, "Thanks for opting into to receive updates from xtremepush we'll send you news and product updates.");
      typingToggle(PSID, "typing_on");
      setTimeout(function() {sendGenericMessage(PSID)},10000);
      setTimeout(function() {sendTextMessage(PSID, "They'll look something like this")},20000);
      setTimeout(function() {typingToggle(PSID, "typing_off")}, 30000);

      console.error("Unable to retrieve data.");
      console.error(response);
      console.error(error);
    }
  });
}
The method used to initialise a user is called from the method that handles opt-in events; the Xtremepush ID is available as it has been passed in as outlined in the previous section.
function receivedOptin(event) {
  var pageID = event.recipient.id;
  var timeOfMessage = event.timestamp;
  var optin = event.optin;
  var userRef = optin.user_ref;
  var xpID = optin.ref;
  var PSID = event.sender.id;

  if (event.sender){
  console.log("Received optin for xtremepush user %d and page %d at %d with message:",
    xpID, pageID, timeOfMessage);
  console.log(JSON.stringify(optin));

  initialiseProfile(PSID, xpID);
  }
  else {

  console.log("Received optin for user %d and page %d at %d with message:",
    xpID, pageID, timeOfMessage);
  console.log(JSON.stringify(optin));
  sendOptinMessage(userRef, "Thanks for opting into to receive updates from xtremepush", xpID)
  sendXPAttribute(xpID, "fb_user_ref", userRef);
}
Once you have your bot integrated and are in a position to capture some user IDs from the social messenger you are now ready to test sending some messages.
Test social messaging
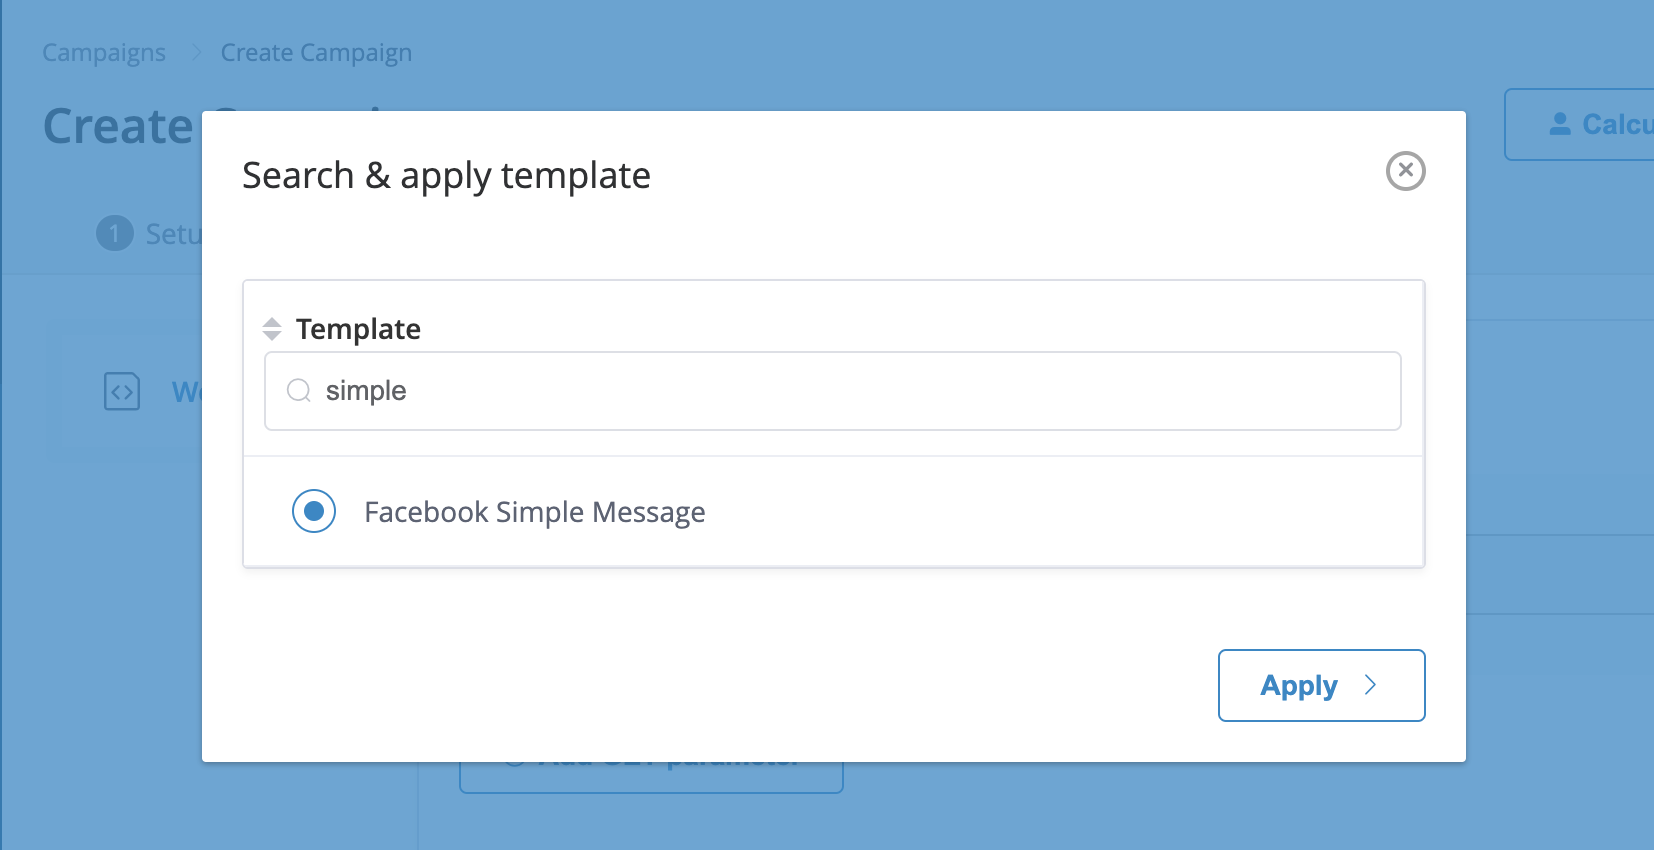
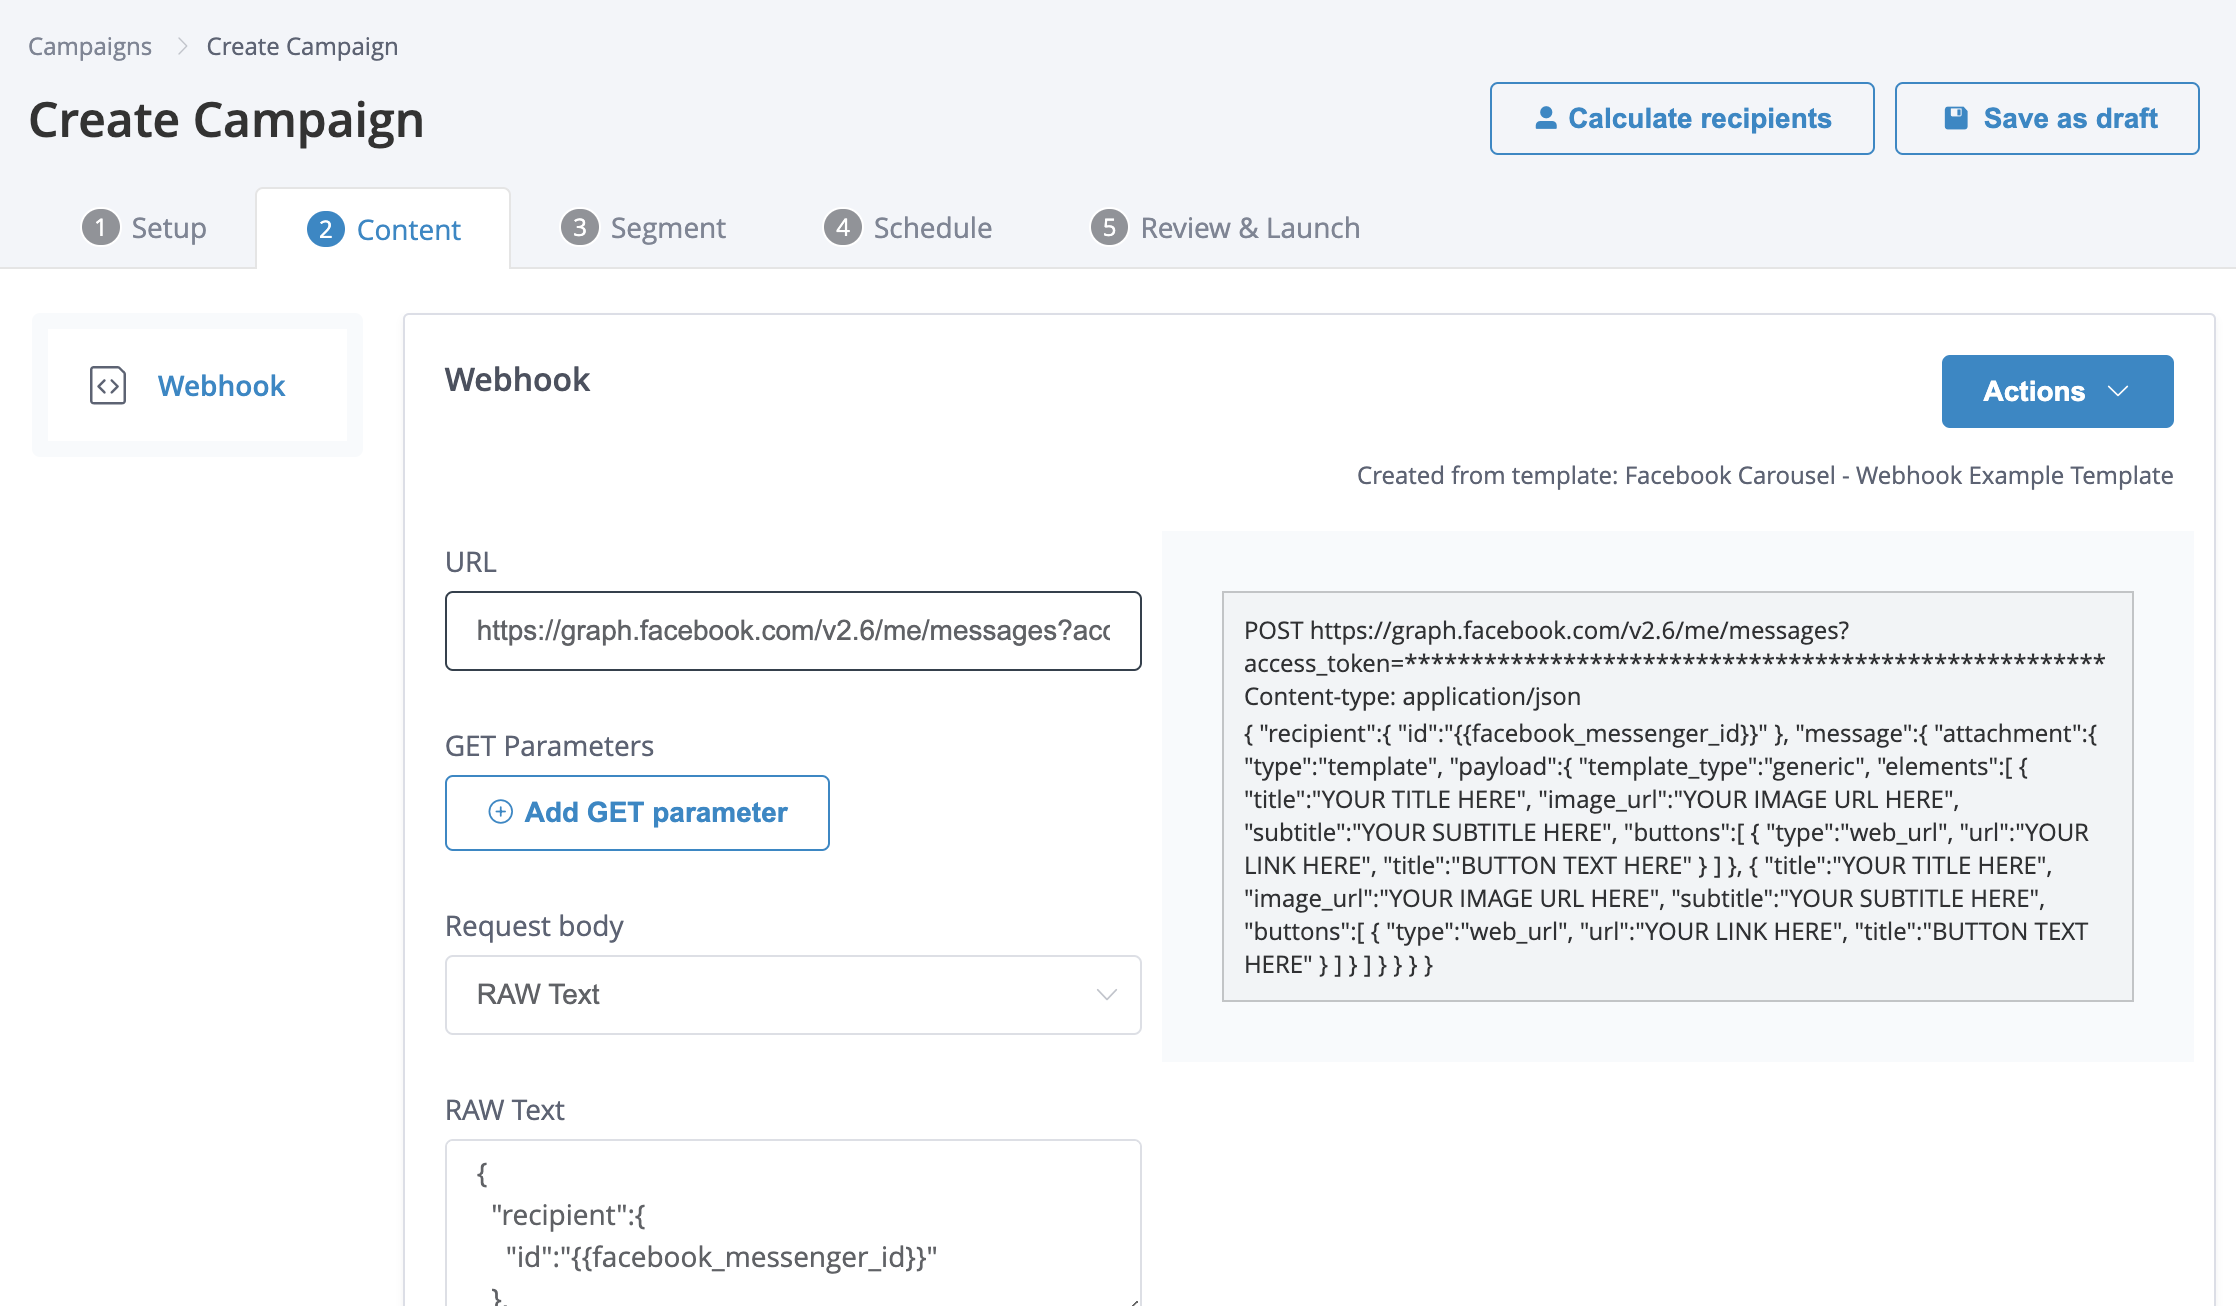
To test social messages create your campaign by navigating to Campaigns > Create Campaign > Single-stage > Time-based > Create Campaign > select Webhook from the Setup tab. On the Content tab click on Actions to apply the template which was previously created from Content > Templates:

You can target test user(s). For example for a Facebook Messenger channel like below you can target your own Facebook messenger based on a segment that targets your user if you know your ID. Details on how to upload test users with the necessary attributes and target them can be found in our set test users guide.

Run a test and you should receive your test message to Facebook messenger. If you have any errors troubleshoot them as described in the webhook guide. Your messenger channel can be added as a complimentary channel to a campaign that also includes a notification or another comms channel. One common use case is to use the messenger channel as a fallback channel for users who have not opted-in to other notifications. Also, the messenger channel can be triggered just like other channels; one use case for this is basket or other drop-off recovery type campaigns.
Updated 6 days ago
