Customise a Game Grid
Customise the size and dimensions of a game grid using the Editor
This use case explains how to edit the dimensions and size of the game grid for tile-based games like Scratchcard, Thunderboard, and Progressive Thunderboard.
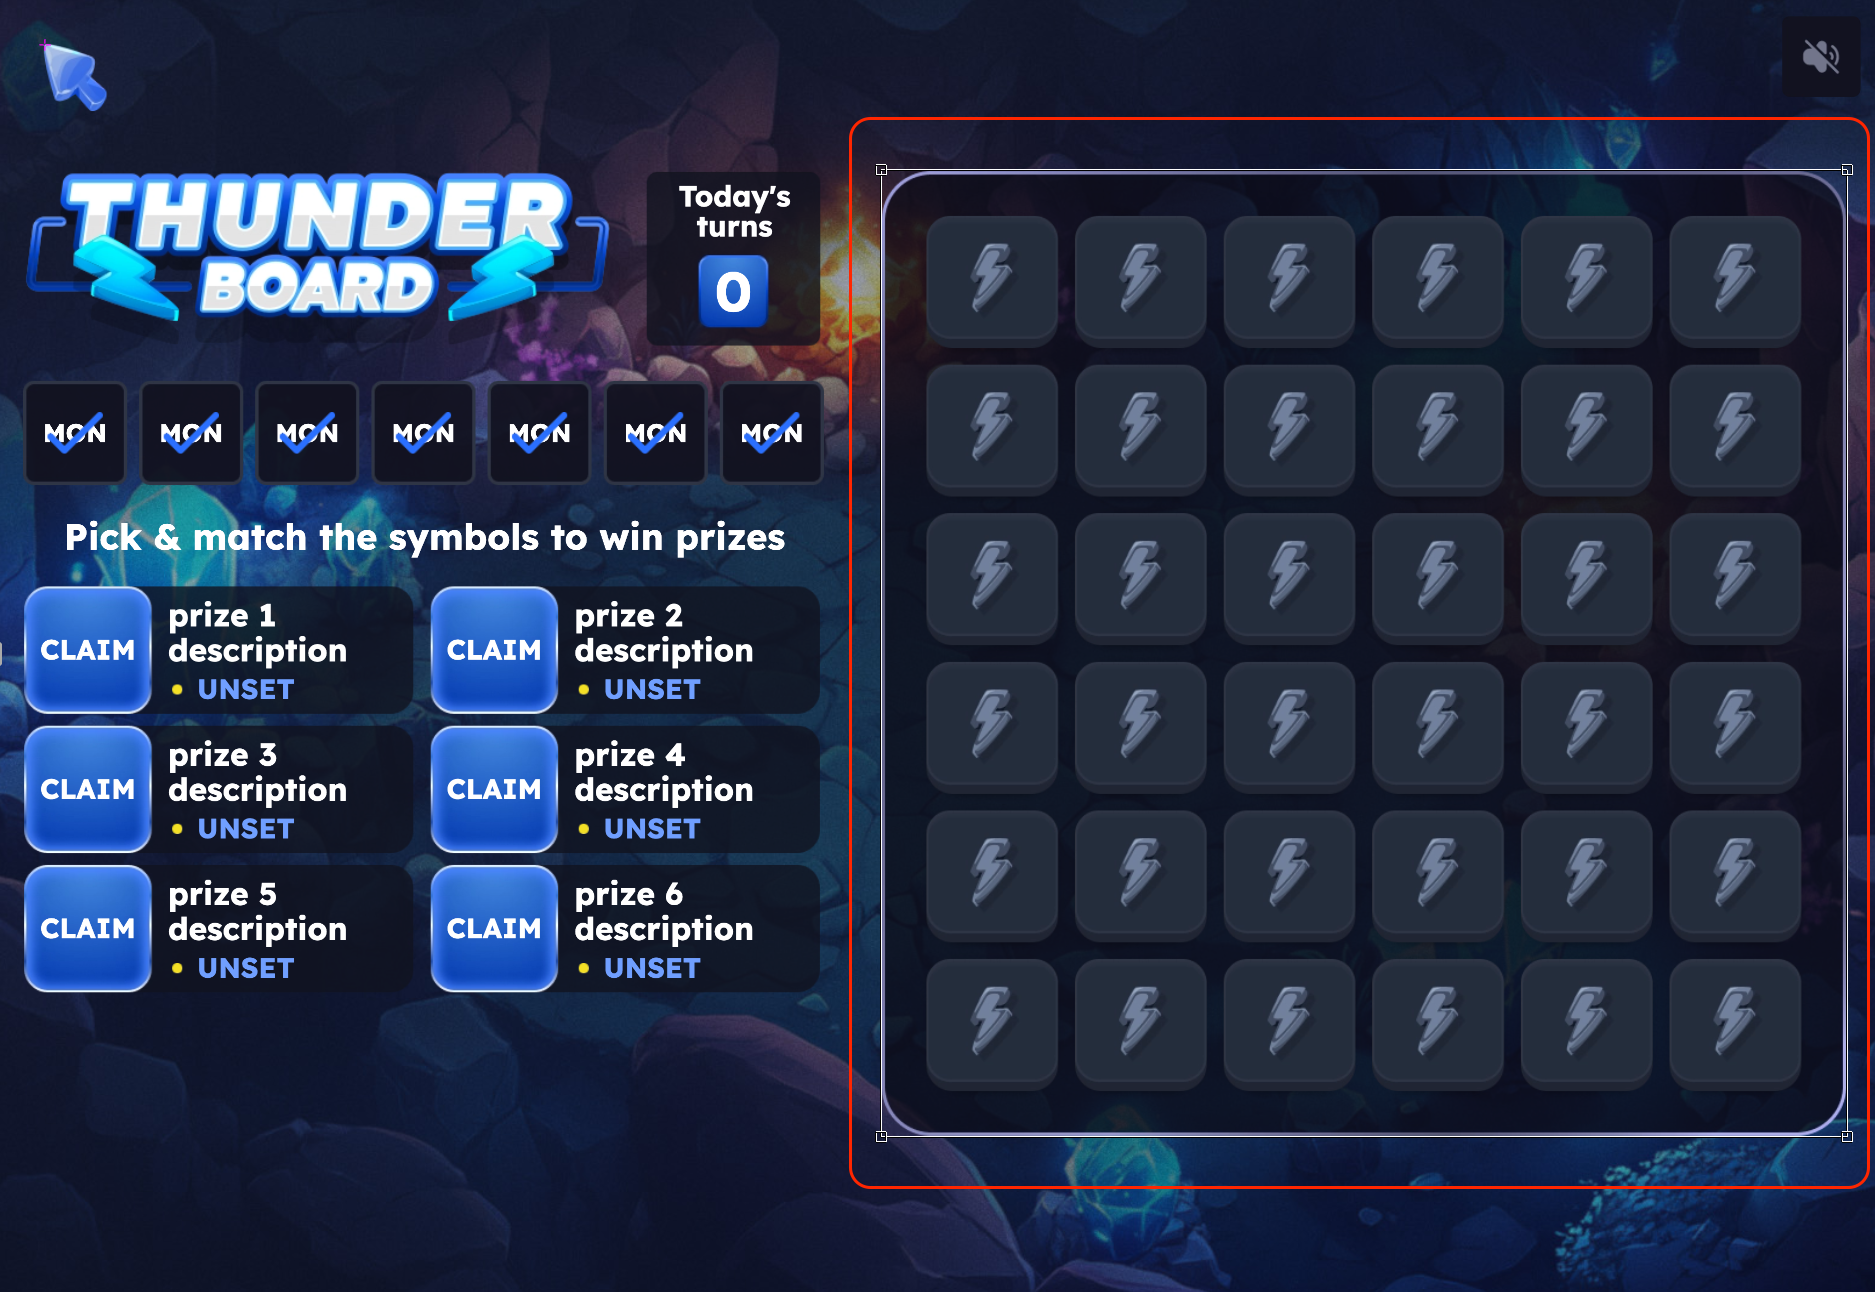
Using the game Editor, this example demonstrates how to change a 5x5 grid to a 4x4 grid by using the Component Creator and Grid Arranger. This example uses a Progressive Thunderboard game as the base as shown in the image below::

Grid in a Progressive Thunderboard game
Resize and Rearrange the Game Grid
First, open the Editor in your game campaign. From the Layout drop-down at the top of the editor, select Board and do the following:
-
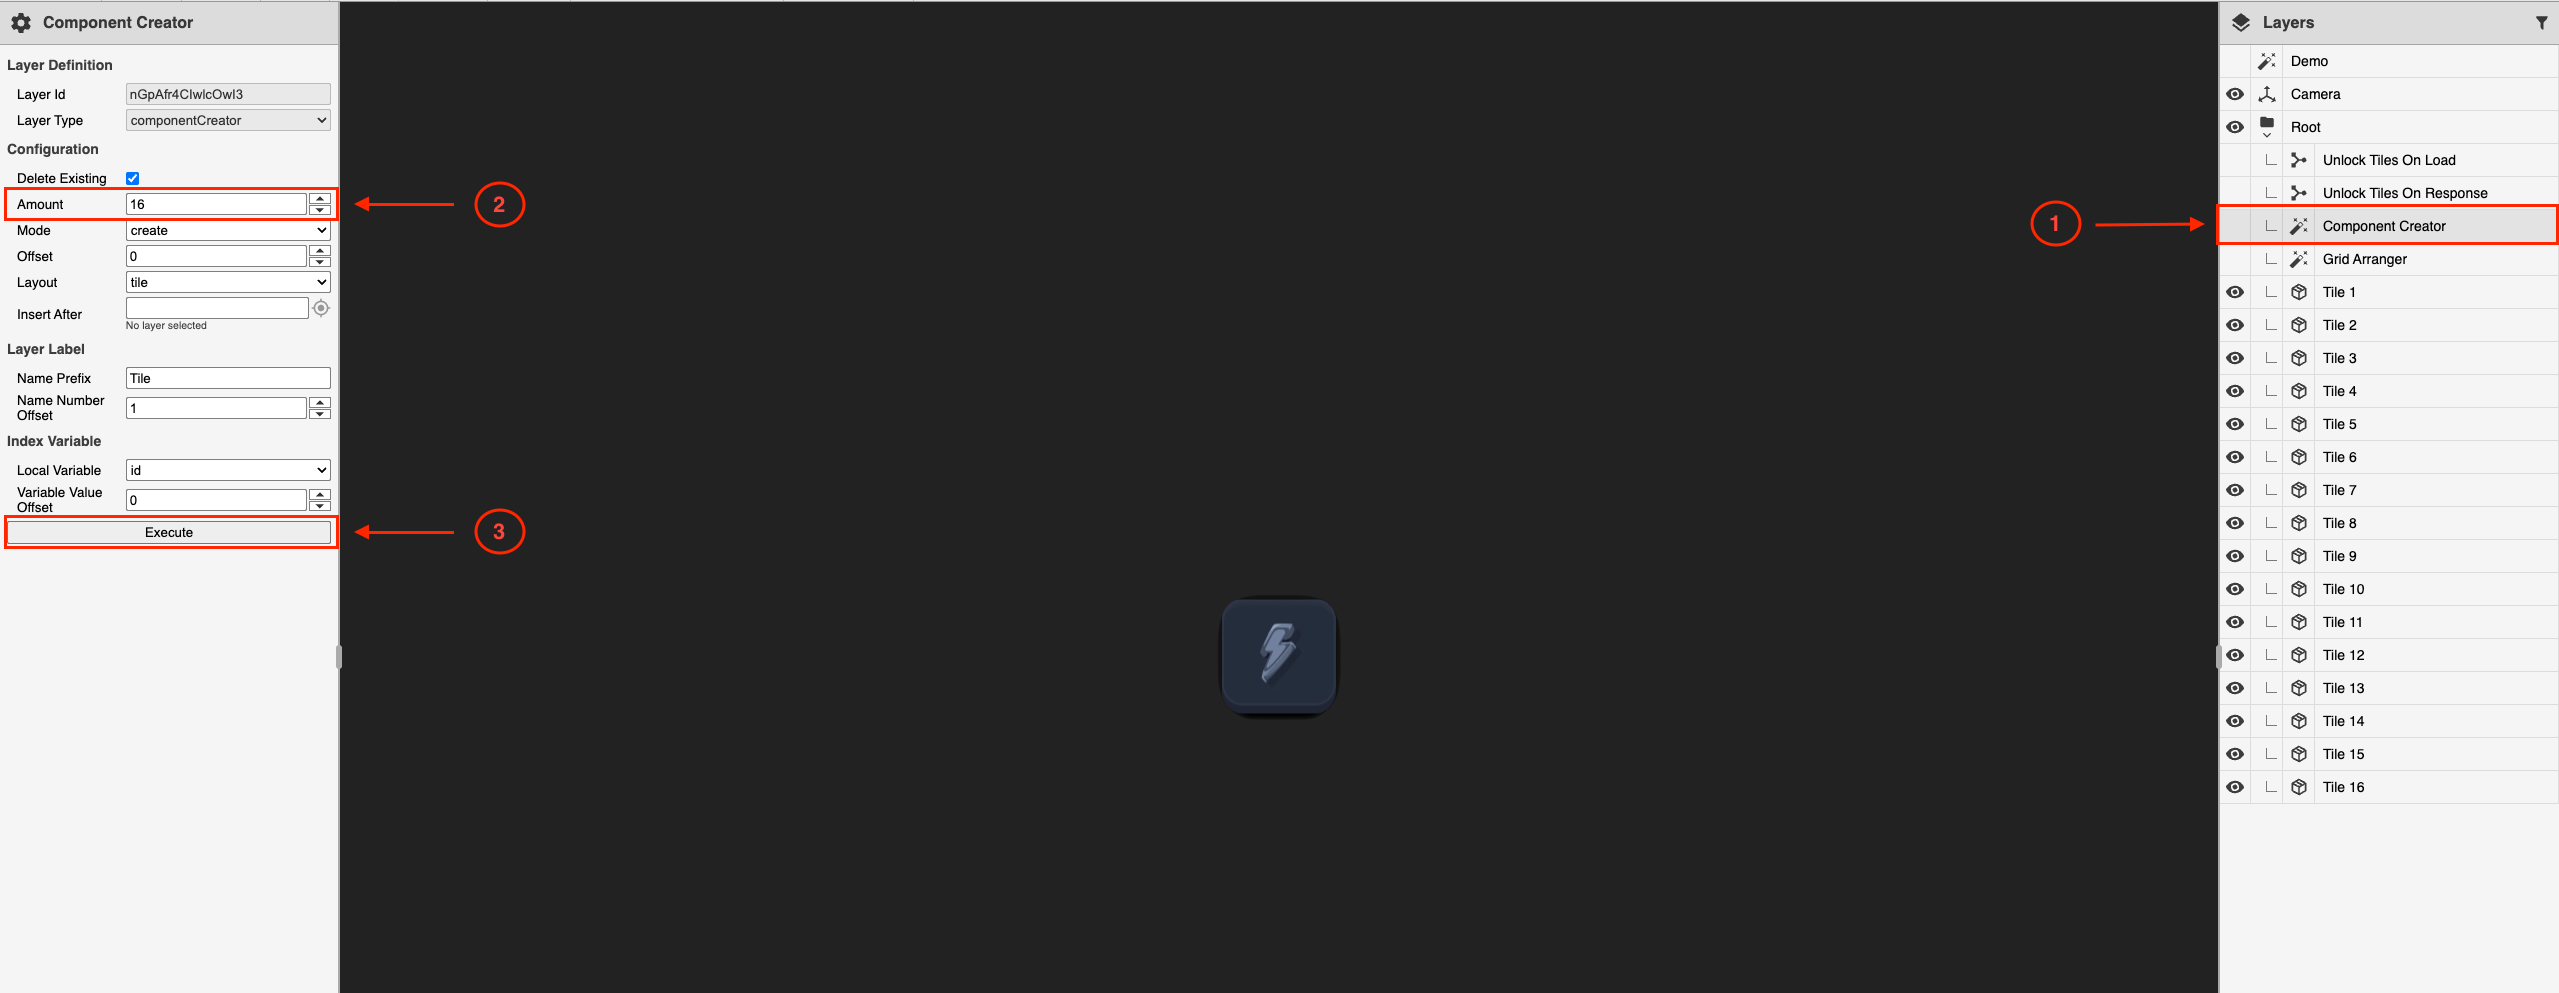
Reduce the total number of tiles in the game from 25 (5x5) to 16 (4x4) as shown in the image below:
- In the Layers tab on the right, select Component Creator.
- In the property panel on the left, find the Amount field and enter
16. - Click Execute.

Reduce the number of tiles in the game grid
-
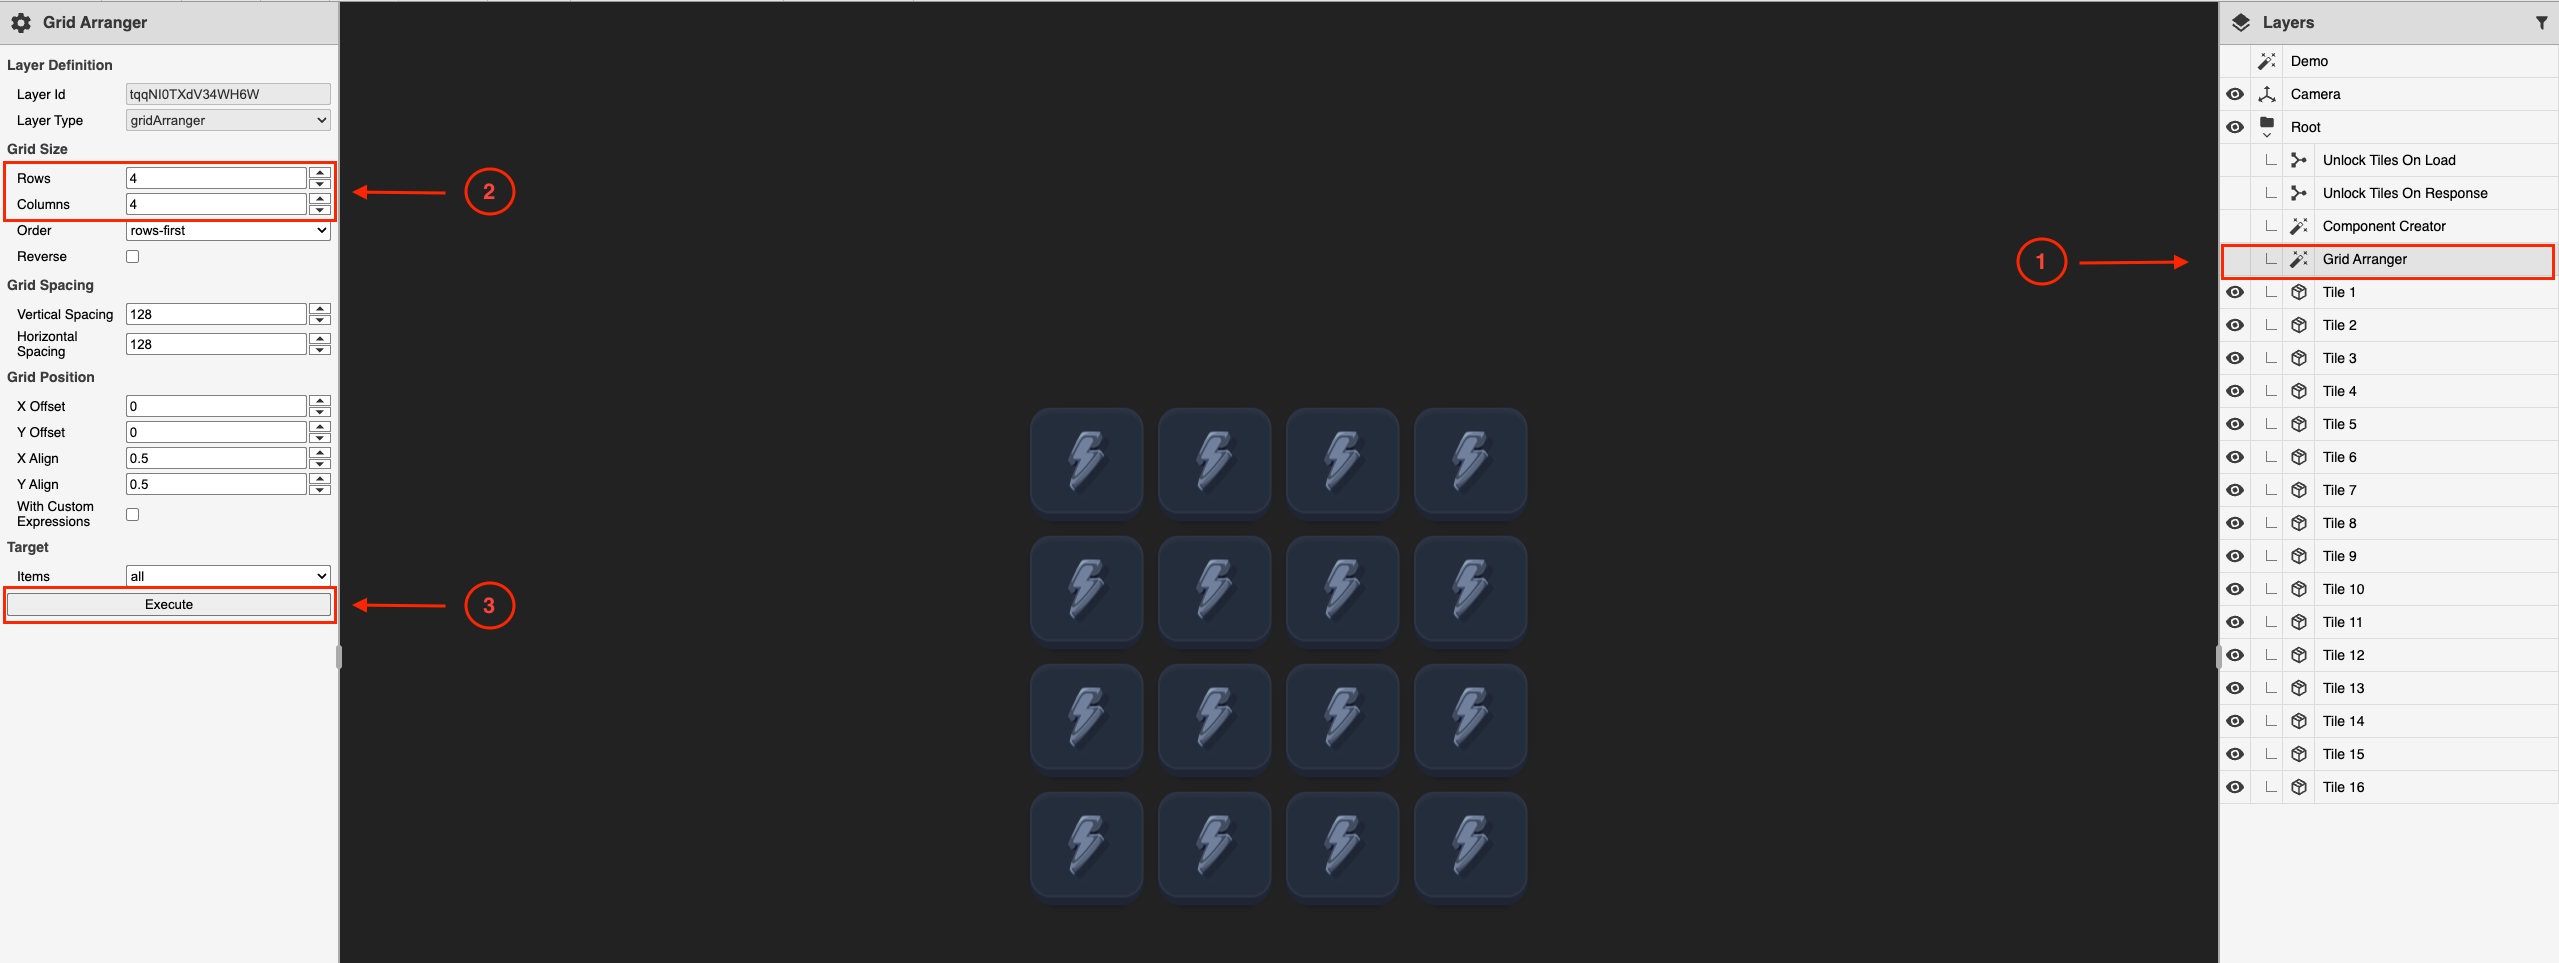
Rearrange the 16 tiles into a 4x4 grid as shown in the image below:
- In the Layers tab on the right, select Grid Arranger
- In the property pane on the left, set Rows to
4and Columns to4. - Click Execute.

Rearrange the tile into a 4x4 grid
-
Resize the grid to fit in the grid container
-
In the Layout drop-down, select the Main Screen Layout again
-
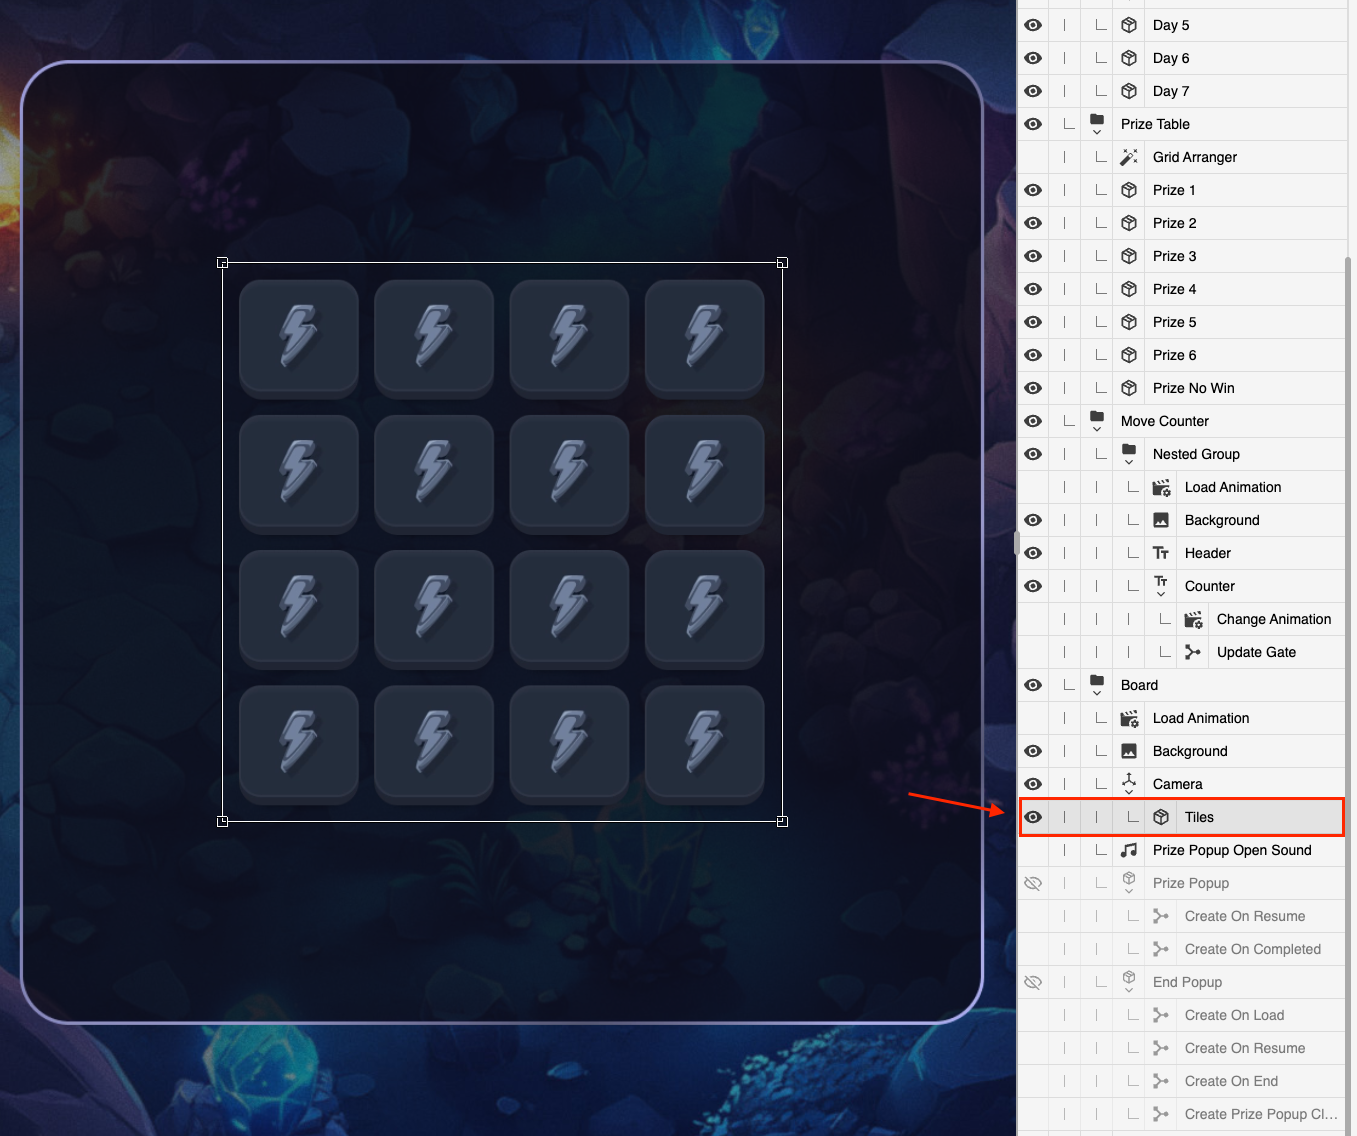
Select the Tiles layer as shown in the image below:
You may need to remove some items from the layer view to get a clear view of the updated grid.

-
Click and drag a corner of the selection box to resize the grid to your desired dimensions.
-
-
Save your changes in the Editor.
Updated 3 months ago