Add or Remove Sections in a Wheel
Add of remove slices from your Wheel in a Wheels game using the game Editor.
This use case describes how to change the number of slices on a wheel. The specific example shown is how to replace a 6-slice wheel with a 8-slice wheel.
Before you Begin: Asset RequirementsBefore you begin, ensure you have the new wheel image file prepared.
- The image file must be in PNG format.
- All sections on the wheel image must be of equal size.
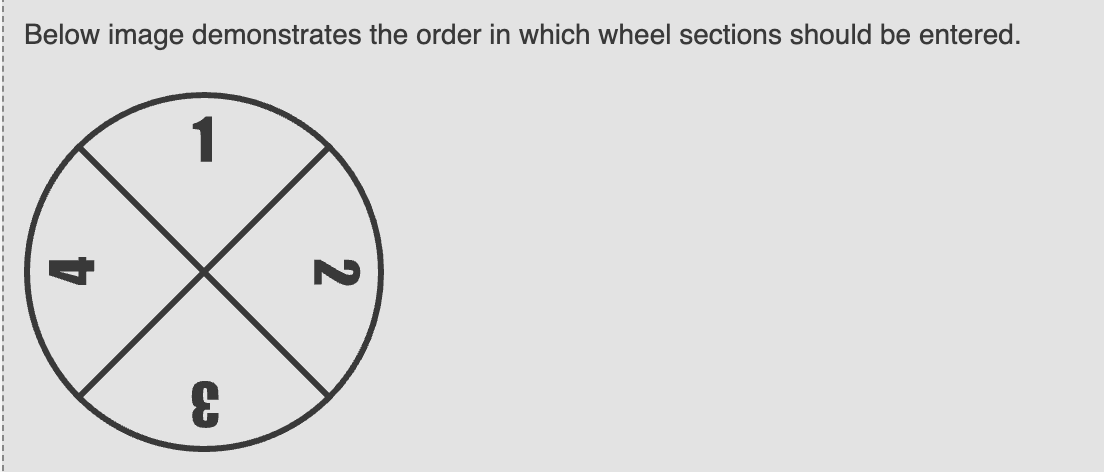
- The wheel must be oriented so that the first section starts at the 12 o'clock position, as shown in the image below.
The process of changing the number of wheel slices includes the following steps:
Replace the Wheel Asset
First, replace the default 6-section wheel image in the campaign's assets with your new image of the 8-slice wheel.
- Go to the Assets tab of your campaign.
- Under Asset Upload, click Browse and select your new 8-slice wheel image.
The file name of your new image must be exactly the same as the default wheel asset you are replacing. This ensures it automatically overwrites the old file. - Click Save.
Configure the New Wheel in the Editor
After uploading your asset, all remaining changes happen in the Editor. You'll update the wheel's settings to recognize the new sections and then adjust its position to fit the layout.
- Open the Editor. Your new 8-section wheel image will be visible.
- Go to Settings > Wheels.
- Locate the wheel you replaced and increase the Sections value from
6to8. - Name the two new sections. These are the internal names for the sections, which are then referenced in the Prizes tab.
- Click Apply to save the new section settings.
- Next, select the layer for your wheel image in the Layers pane and edit its position and size according to your requirement.
In the Properties pane, you can change the Positioning Mode to Complex for greater control. Changing the positioning mode to complex allows you to rotate the wheel using the Rotation field in the properties pane.
You may also need to adjust the Sector assets to match the new wheel slice size. Simply replace the assets in the Assets tab as you did with the wheel.
Test the New Wheel Sections
Finally, test the wheel in the Editor to confirm that all 8 sections have been correctly added to your game.
- In the Layers pane, select the Wheel Animation layer for your wheel.
- In the Properties pane, scroll to the Section Mapping Test area.
- Click each section name in the list to confirm that the wheel on the canvas spins to the correct corresponding slice.
Updated 4 months ago
